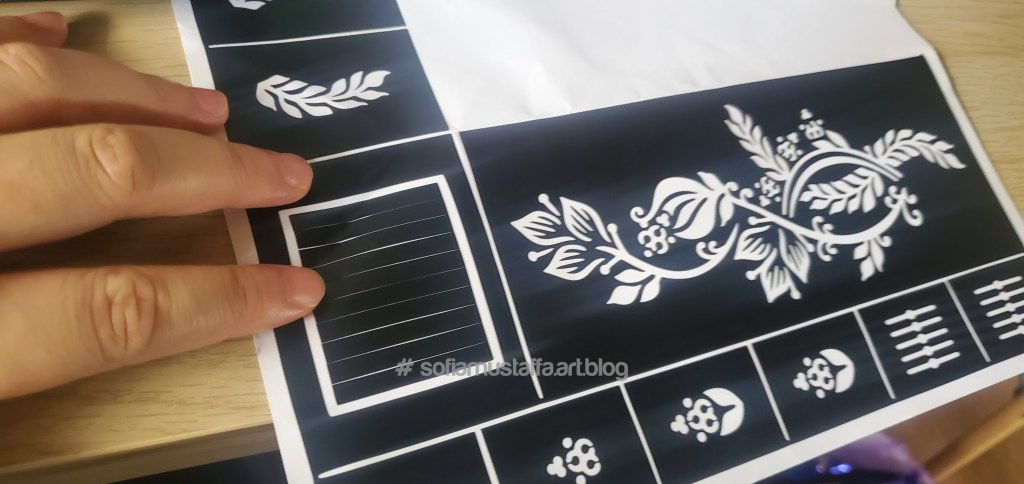
Raya Aidilfitri is just around the corner. I bought these DIY mahendi online and thought wanna give it a try 😃
Do you know how much it will cost for 1 hand mahendi in 2015? RM 15 (3.44 USD) per hand. Yes, that price was in 2015, I believe it will be more now, in 2022. Do you know how much I bought all of these kit? RM 31.50 (7.23USD) and you can use the sticker template over and over again, and wherever you want 😄
I bought 3 varieties of the finger design, 1 overall hand design and of course the henna (chose natural henna). You can choose your own fav design, coz sometimes when I did mahendi outside, they make a different design from what I chose. Myb they simply don’t know how to draw it. Idk😶
So…..here we gOoOoooo…let’s start….😃🥰
How to DIY your own mahendi 😍
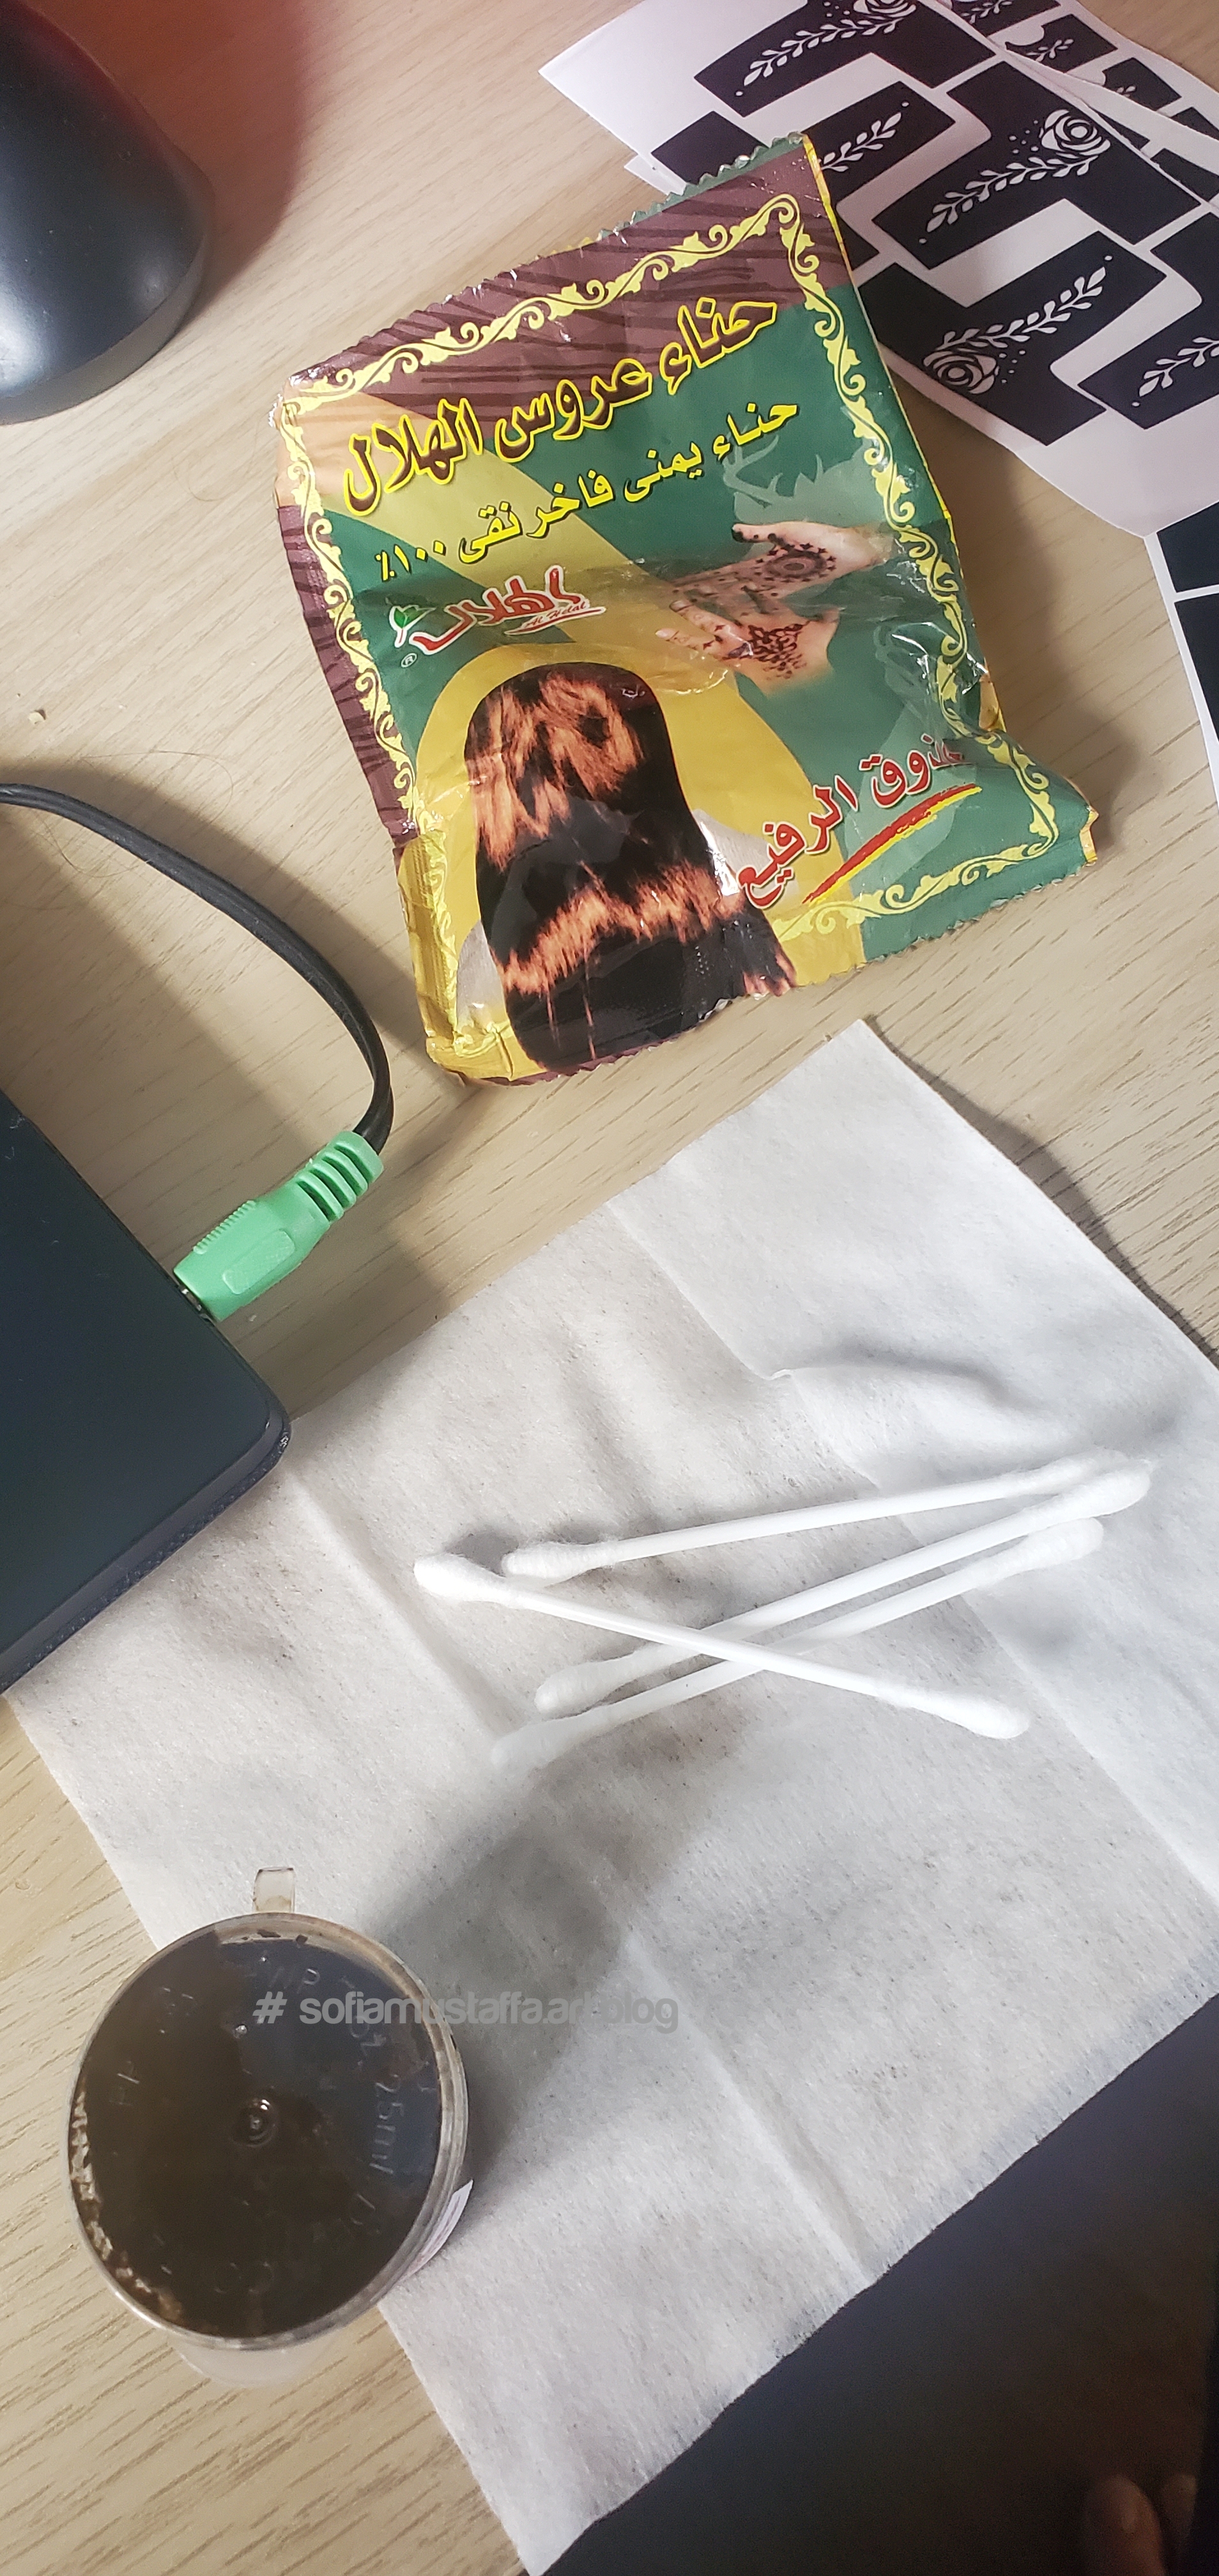
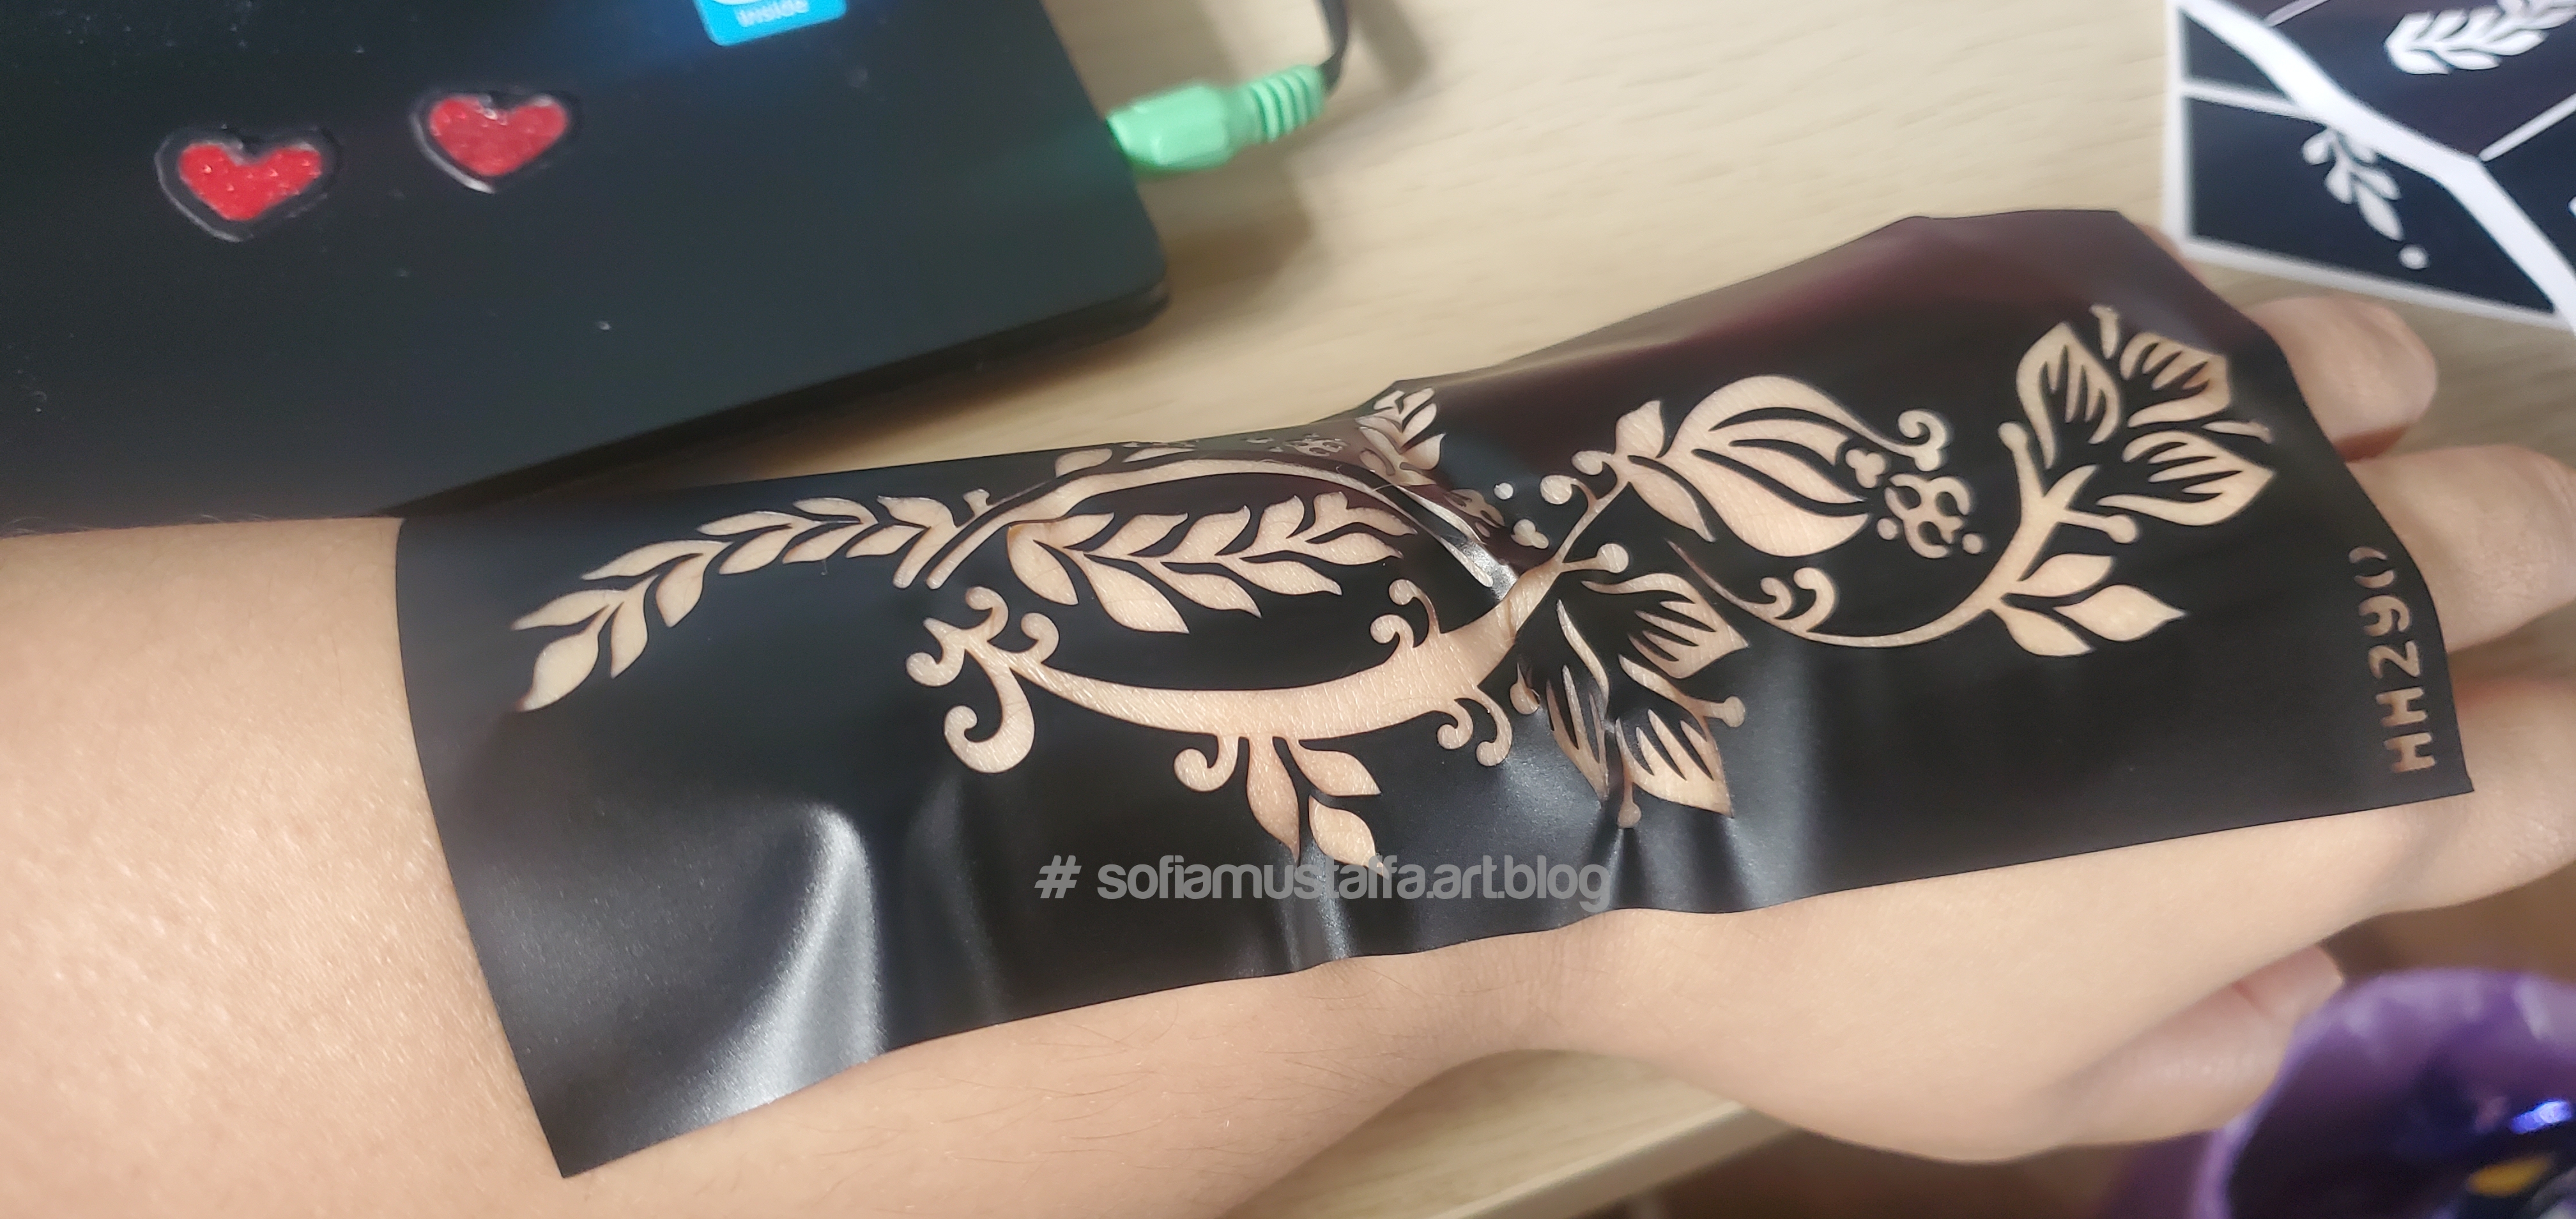
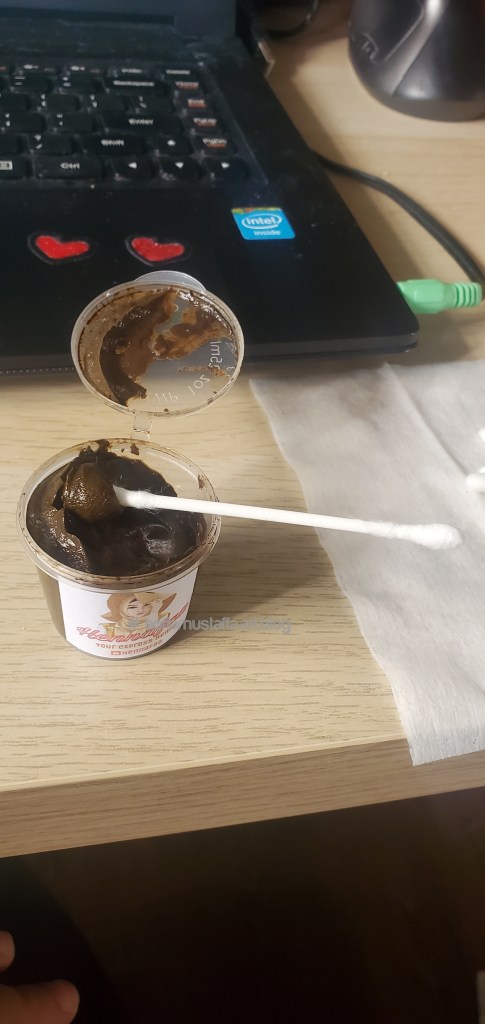
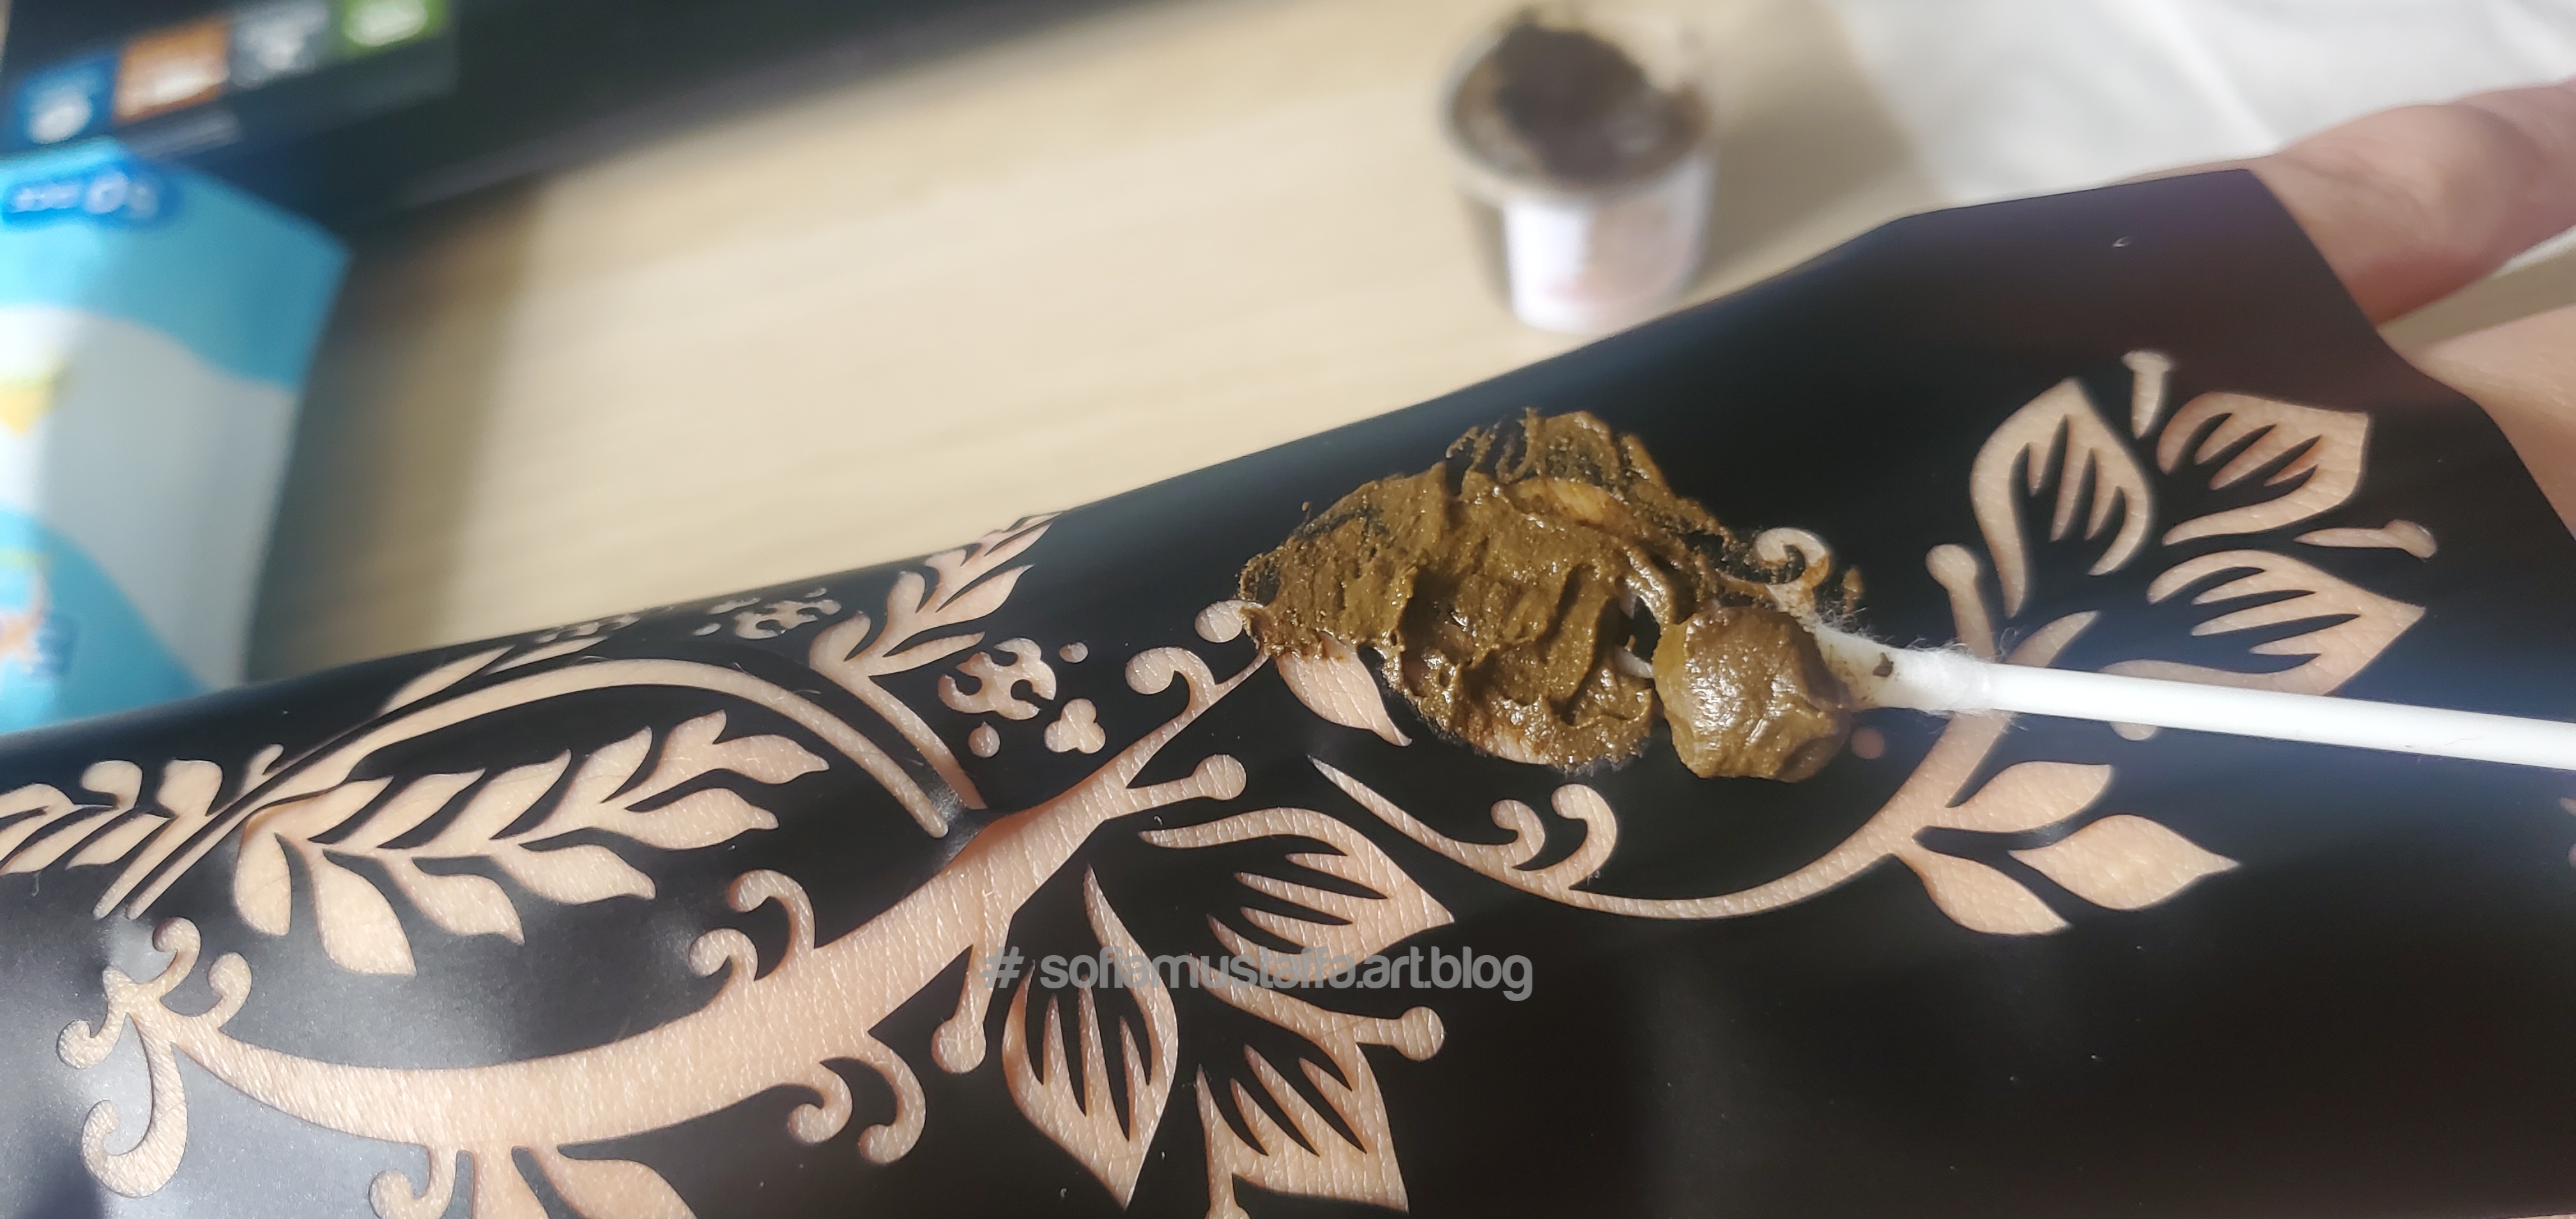
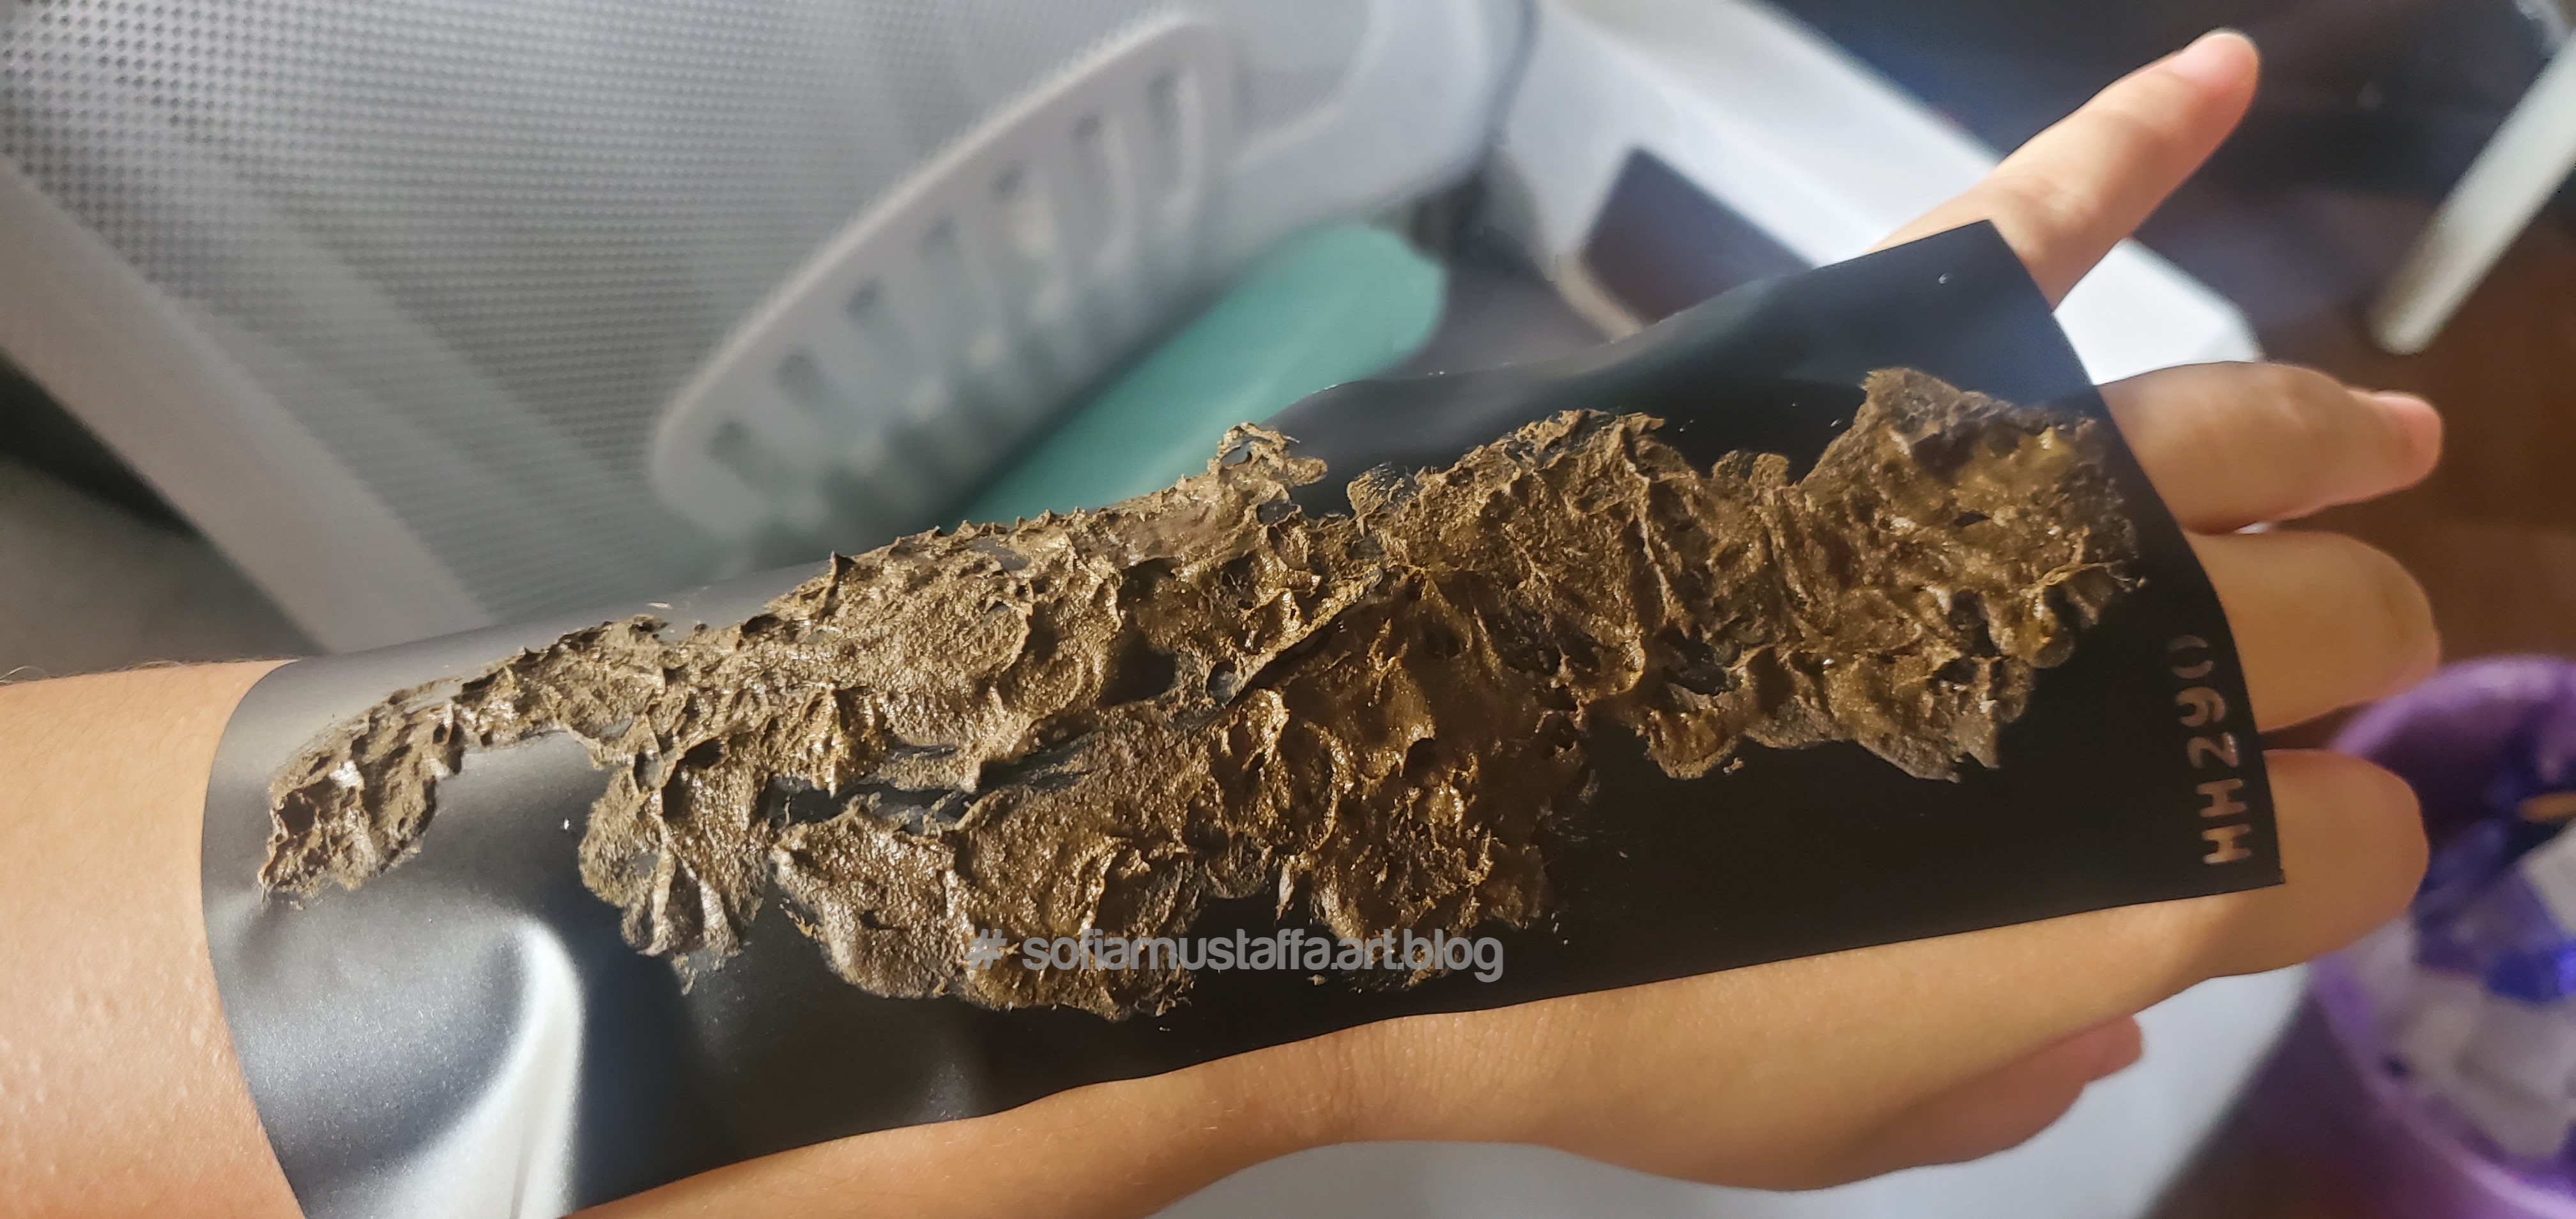
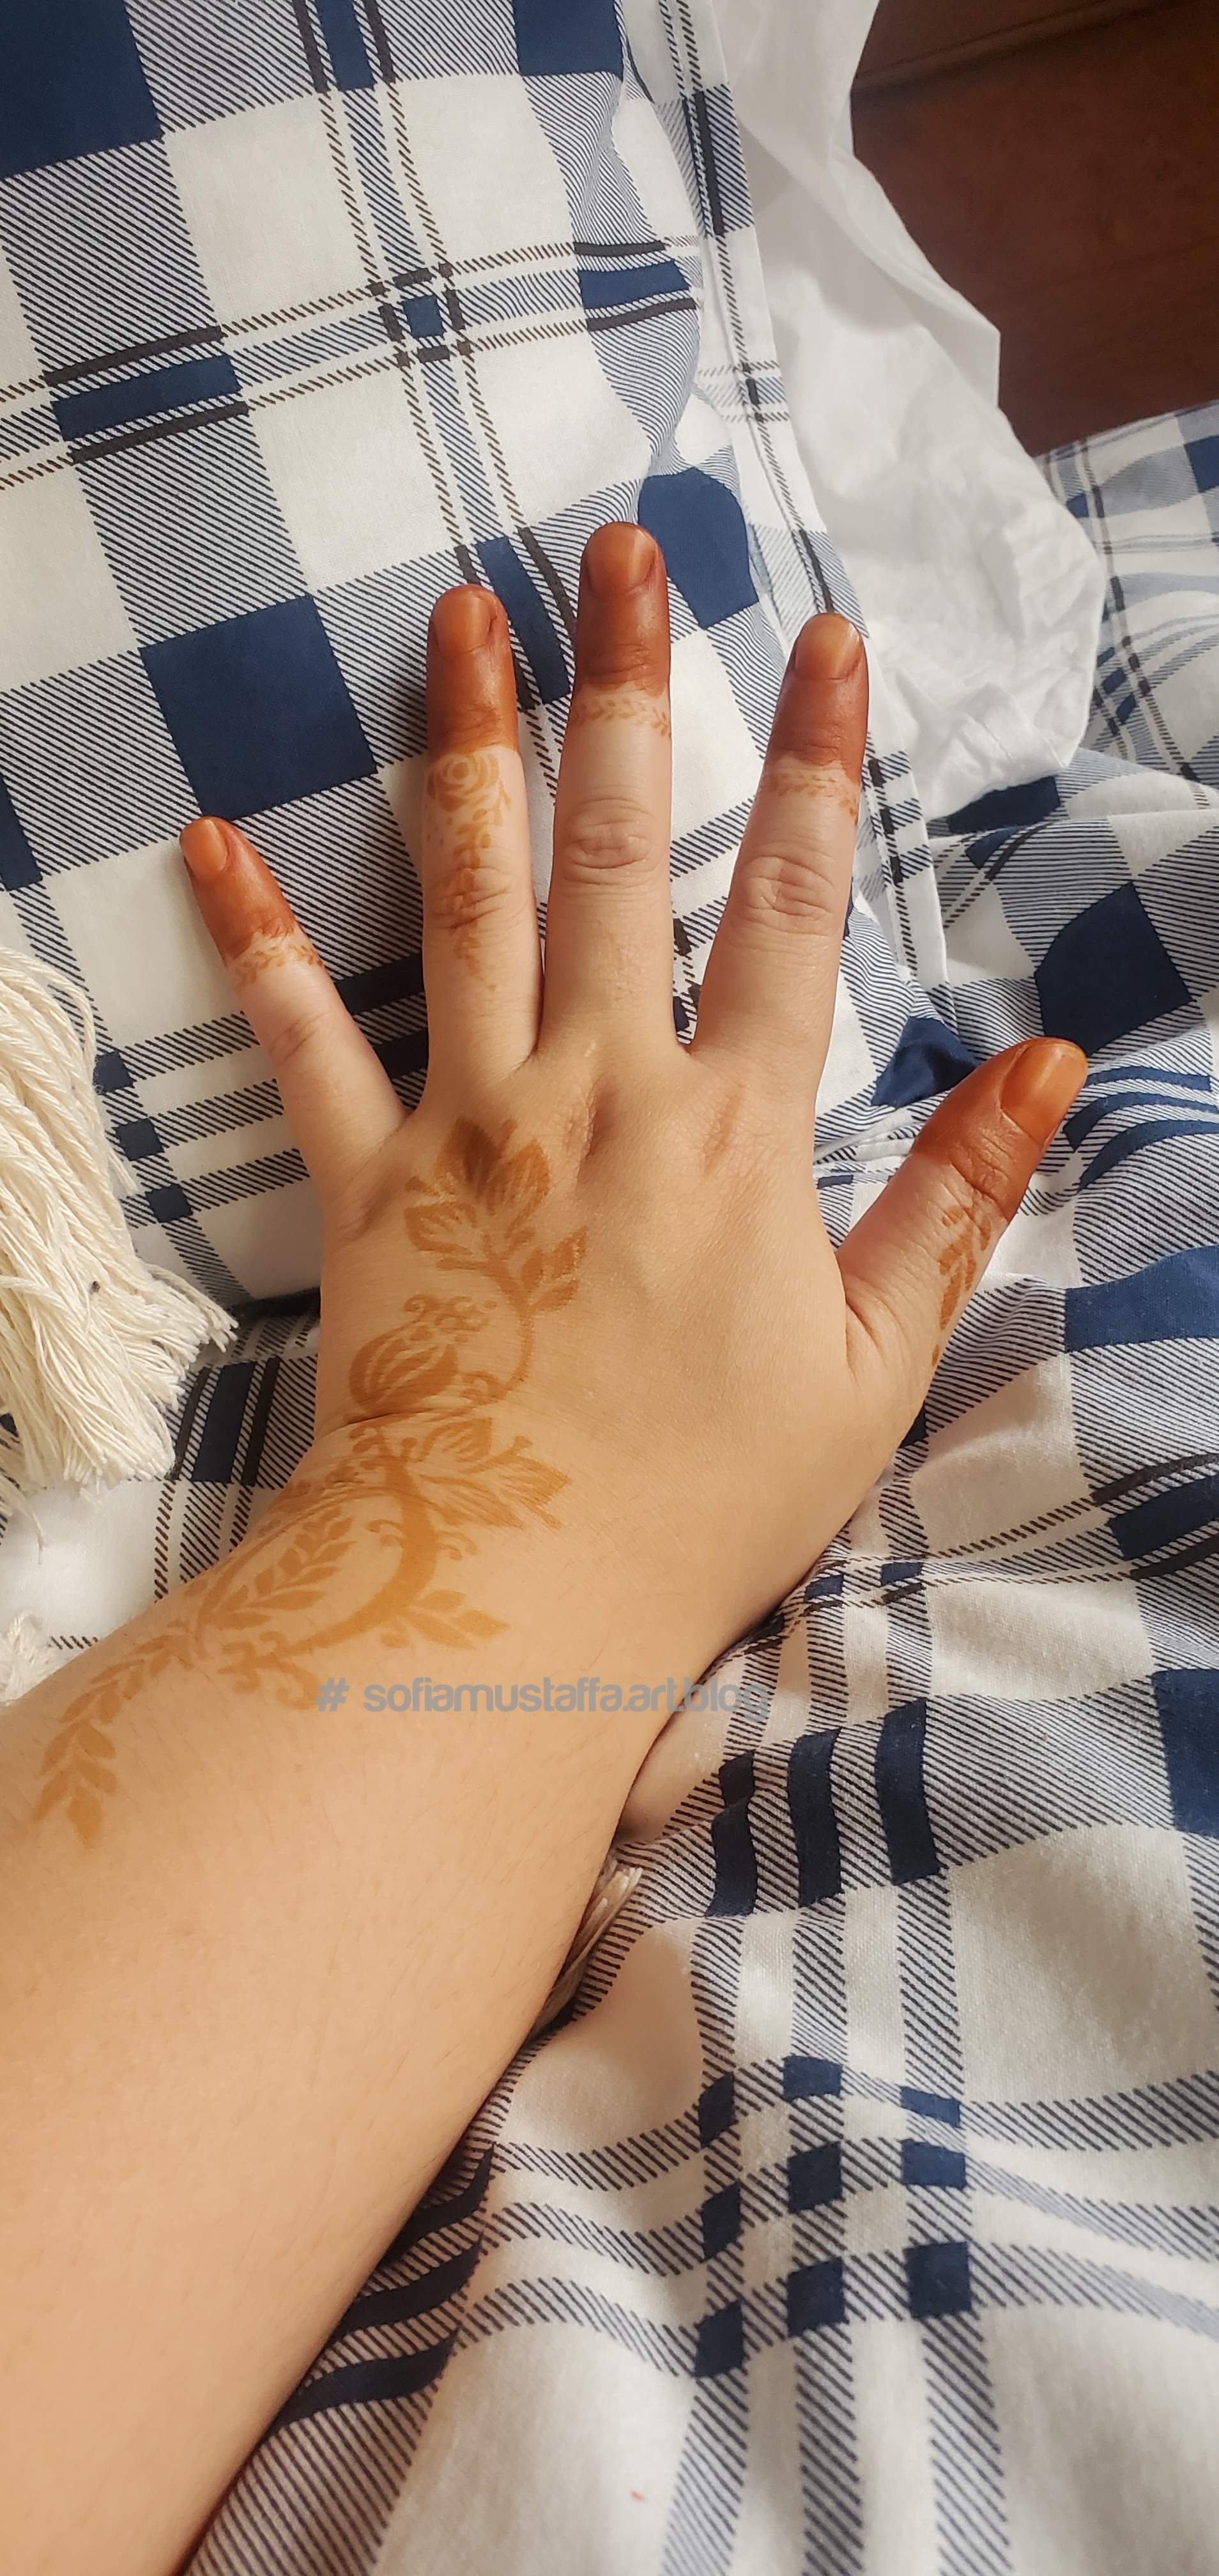
First thing first, you gotta choose which template you wanna try and where to put on your body 😅I prepare some tissue, and cotton bud to apply henna on it. As you can see here, the packet is the original henna, where you need to mix it with water. But I want things easier 😃, so I just bought readymade henna in the small cup. Of course it will be cheaper if you mix it yourself, i think the cup and packet, cup double price then the packet and a lot of quantity 😀Okay, then you put on the sticker template on your hand like this. Don’t put henna on those..HH290..its the sticker code ya 😁😅Alright, now we use the cotton bud to apply henna on top of the sticker…🥰Tadaa…make sure all template is well stick and apply on all sticker holes………..something like this….see..i dont put the HH290 henna, if not u gotta see it on your hand too..please ensure you alert on those 😅😅
Okay, after you apply the henna, you gotta wait for few hours…or some people will leave it overnight. But hey, Im not gonna wait that long, I just leave it for 30min 😂. The more longer you wait, the more thick the color will be…☺
Okay, done for the hand part…let’s go to the finger part….
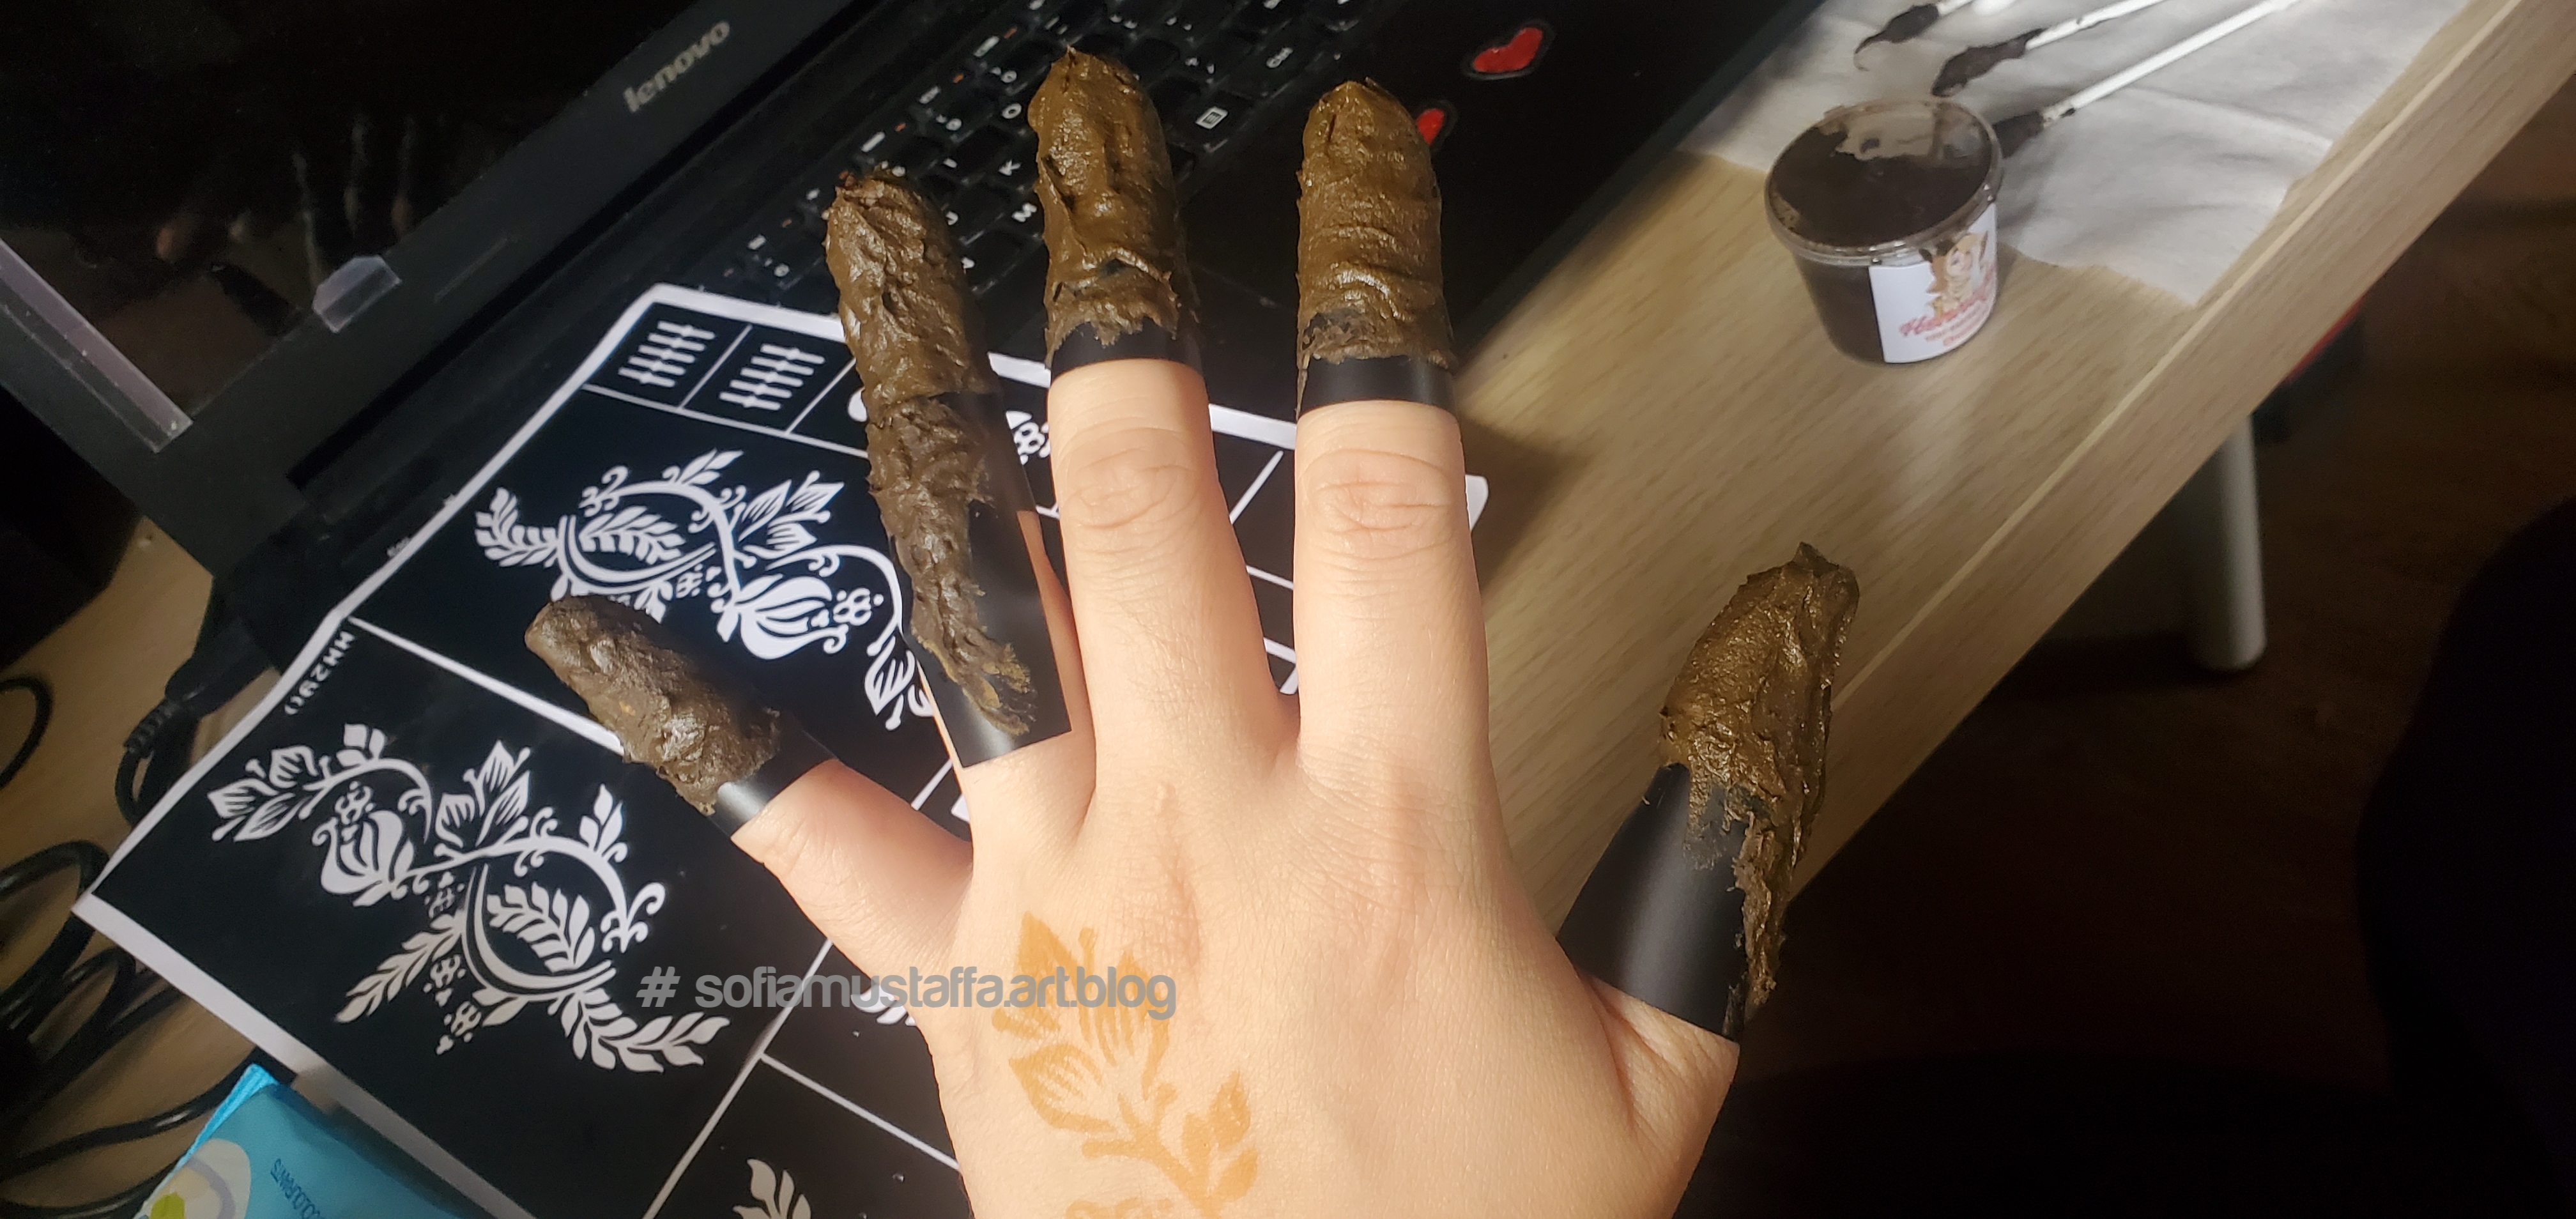
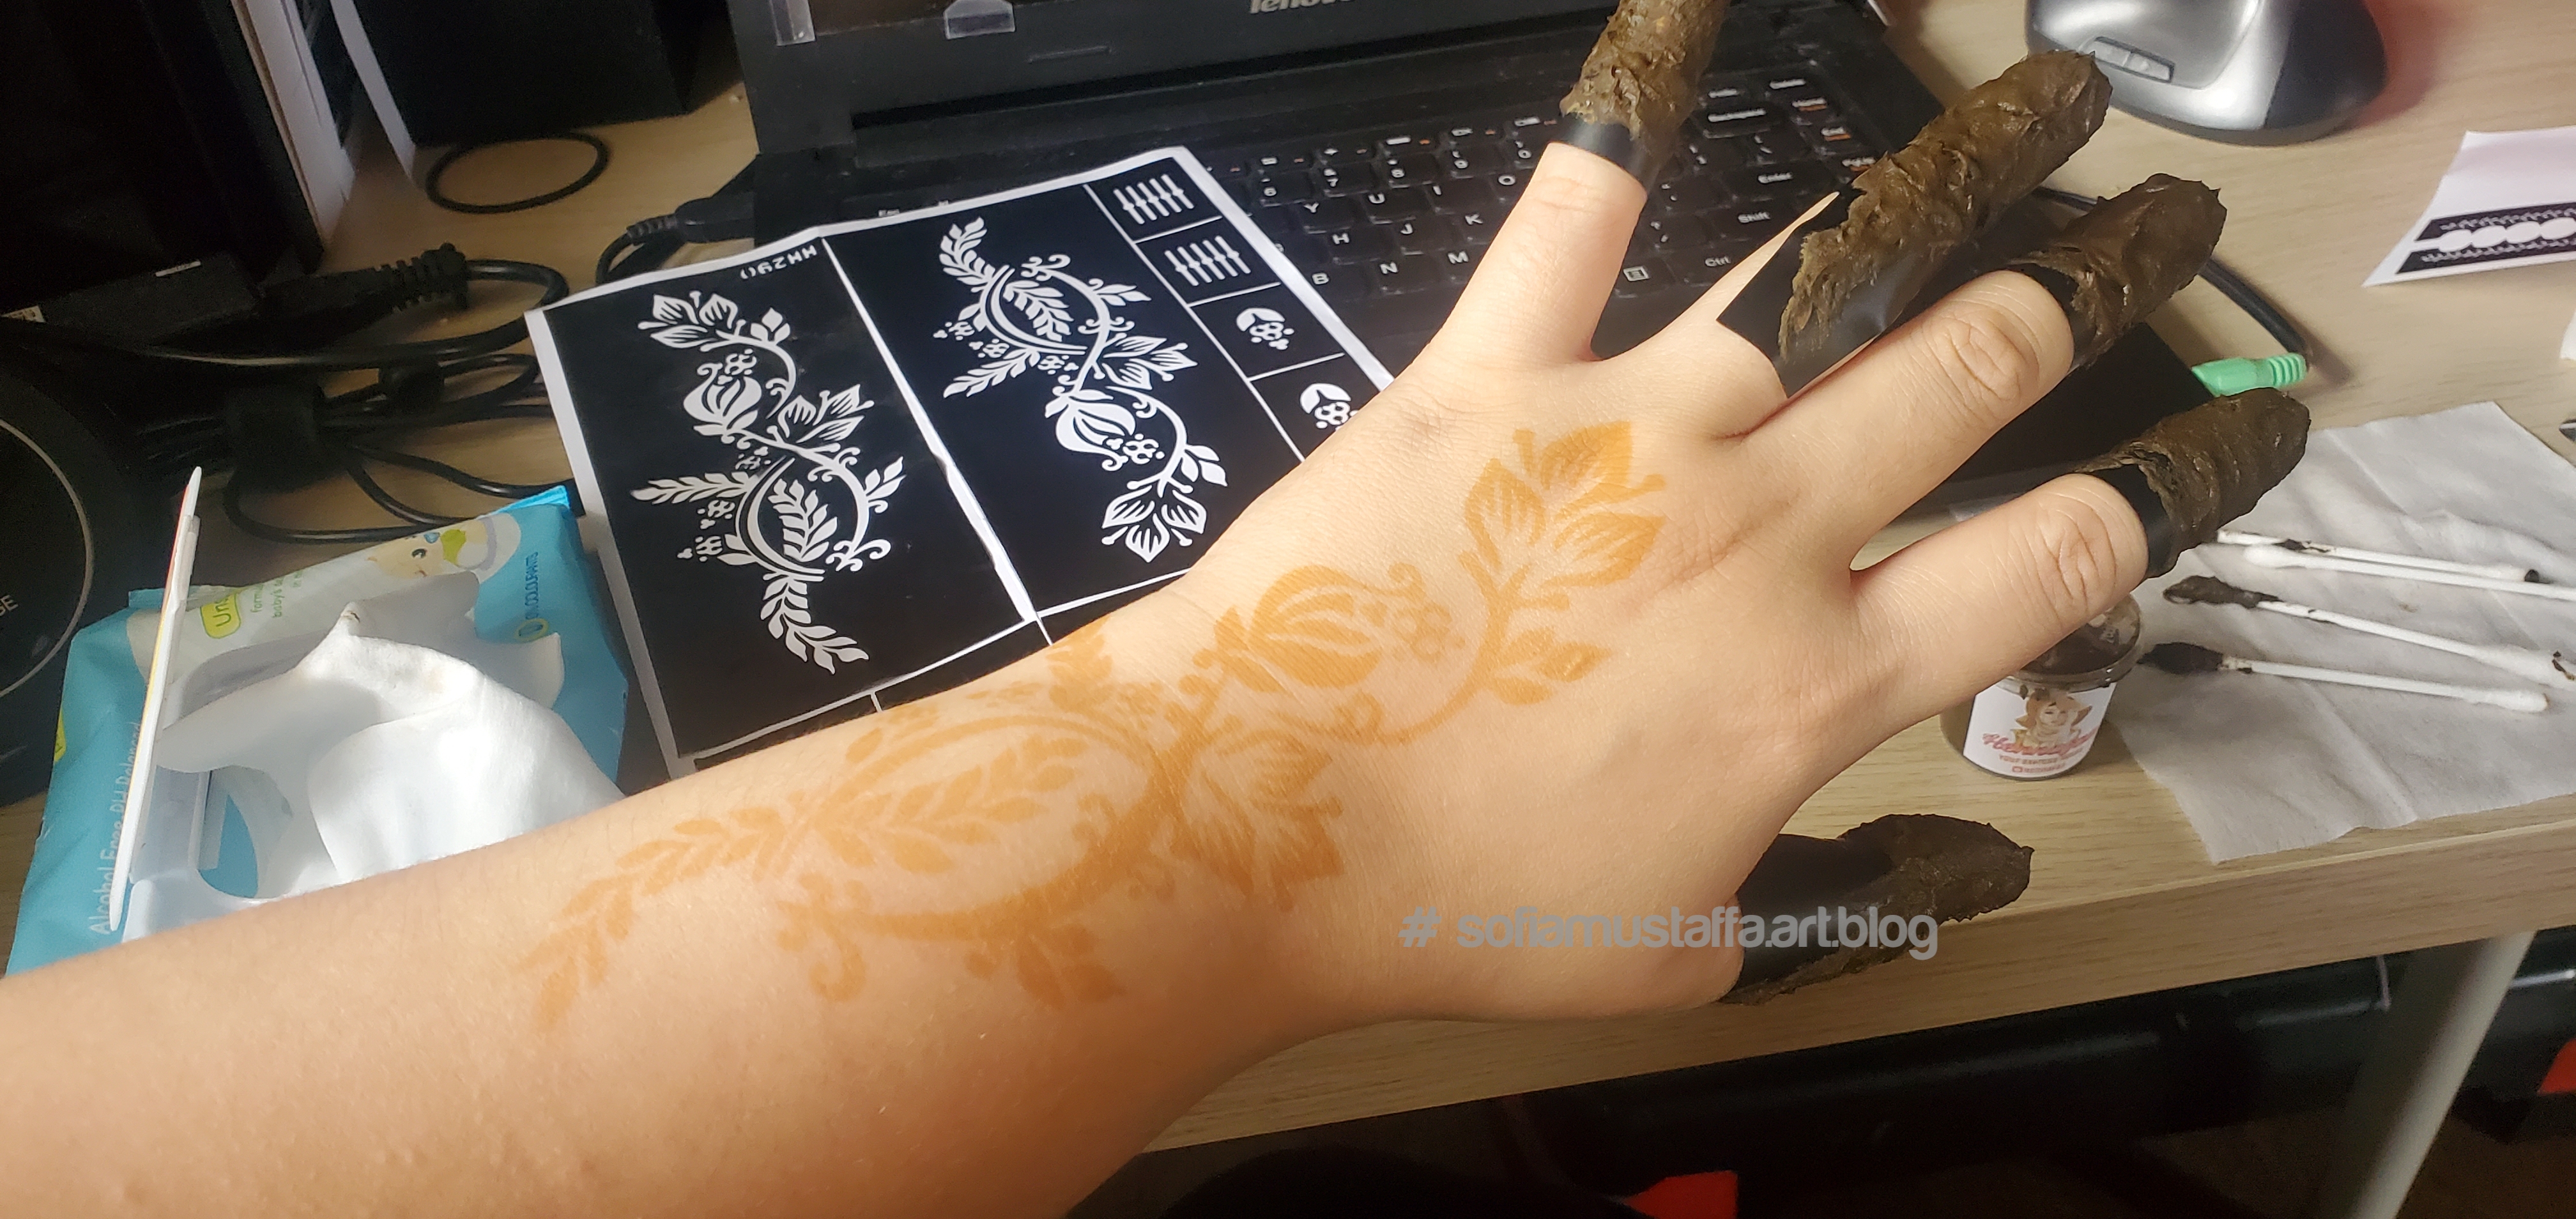
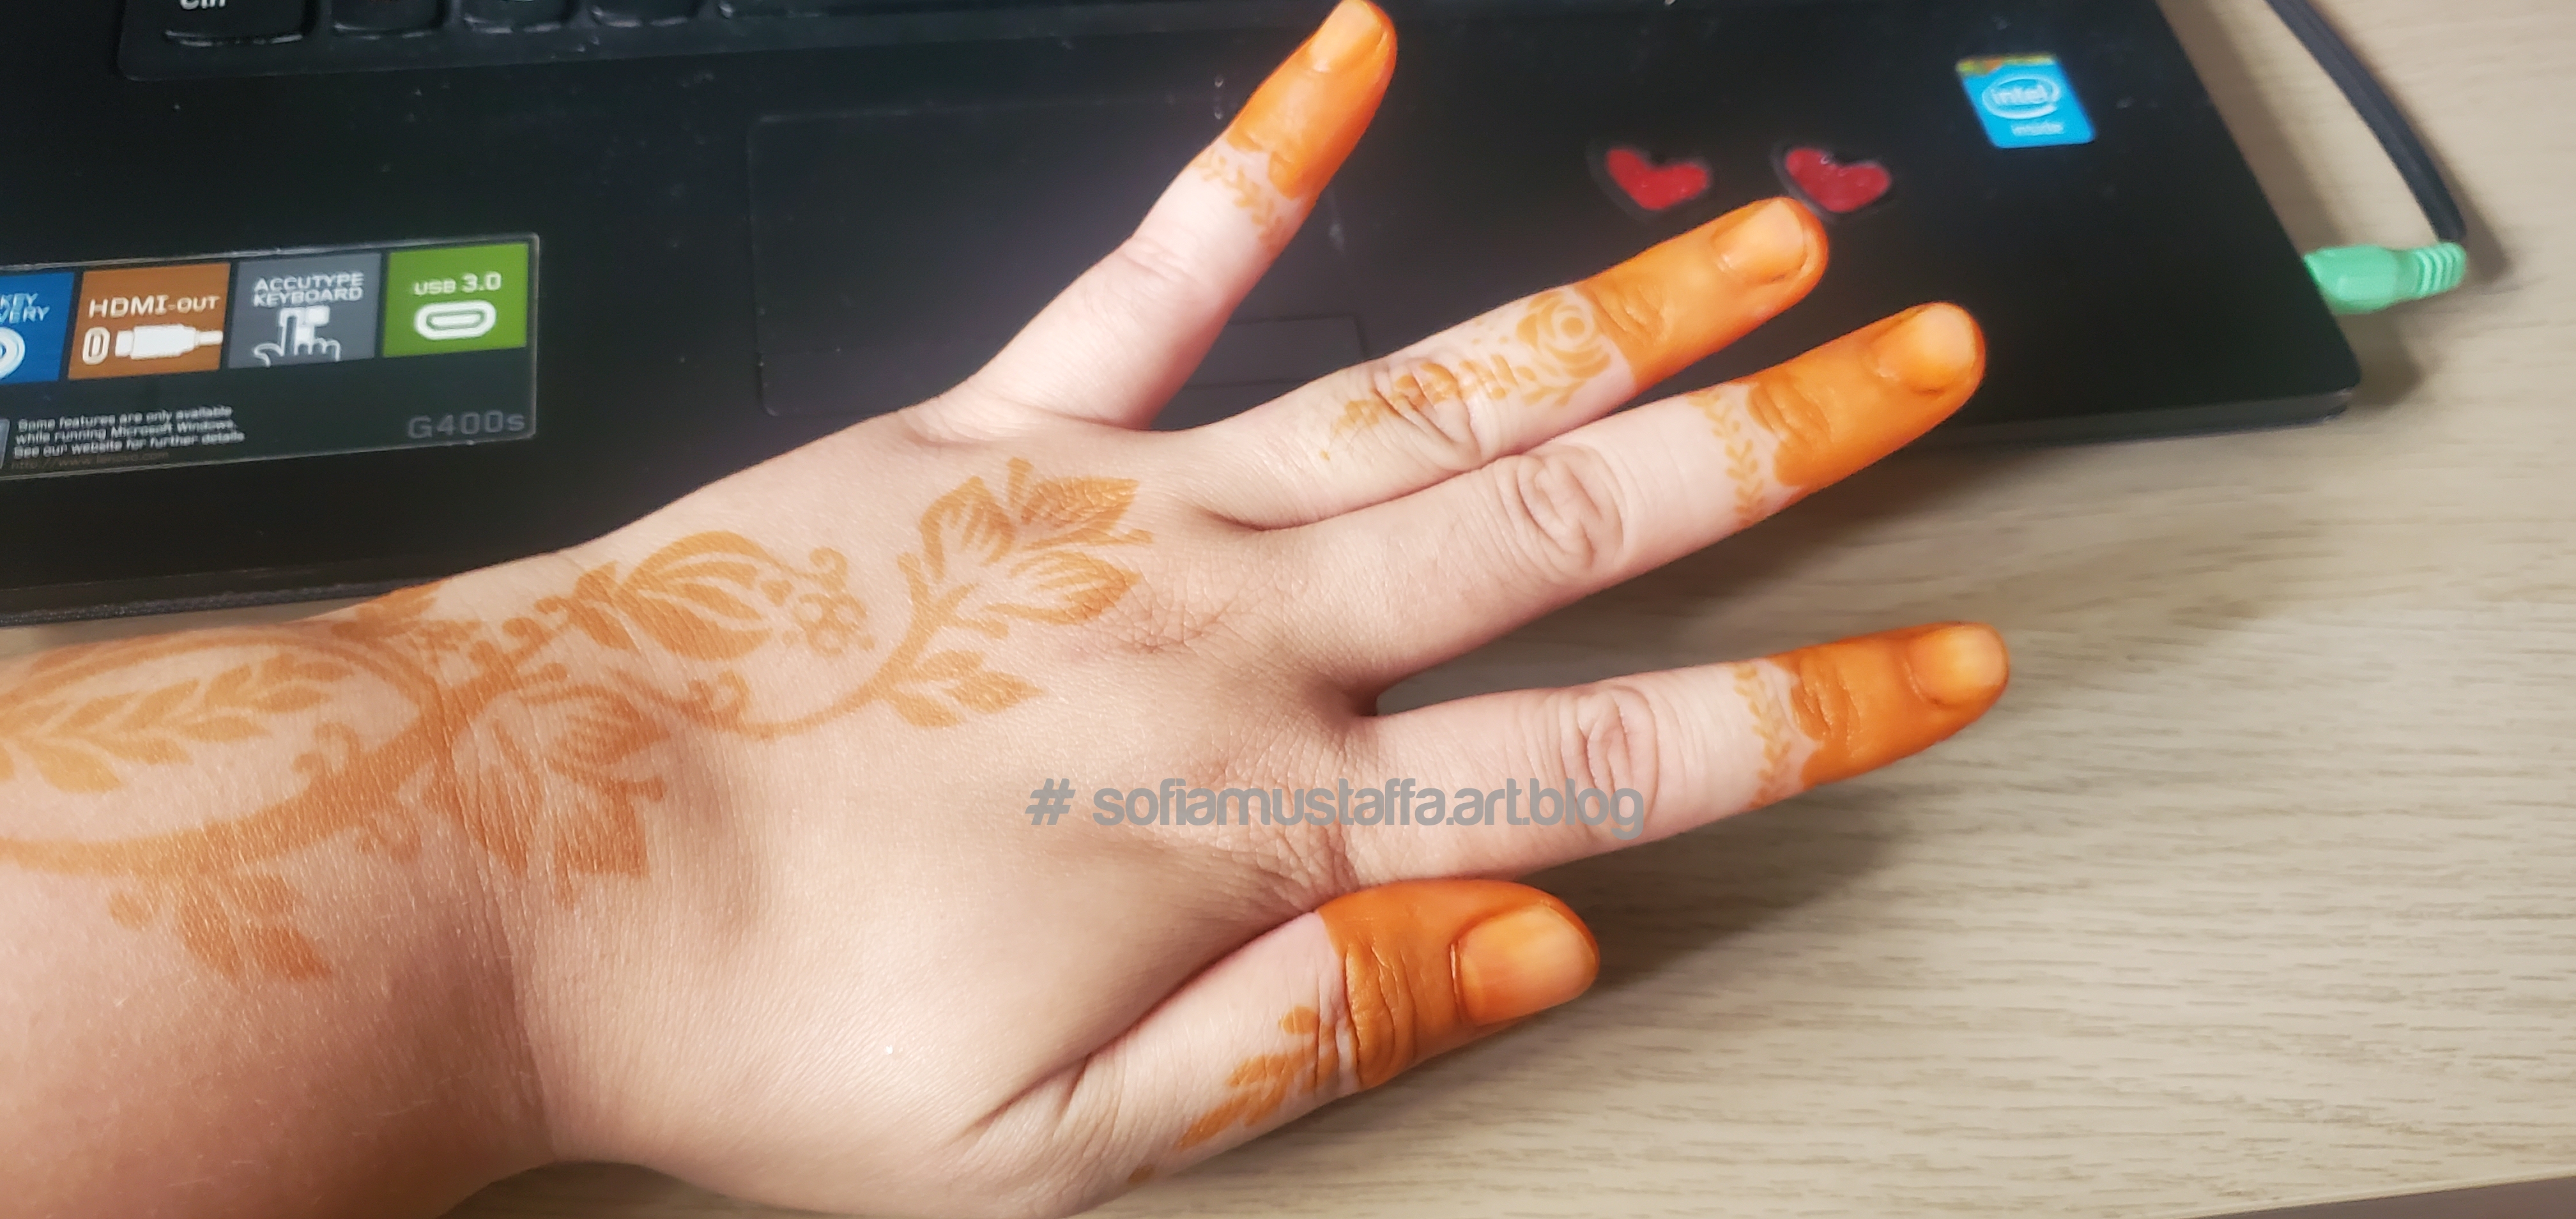
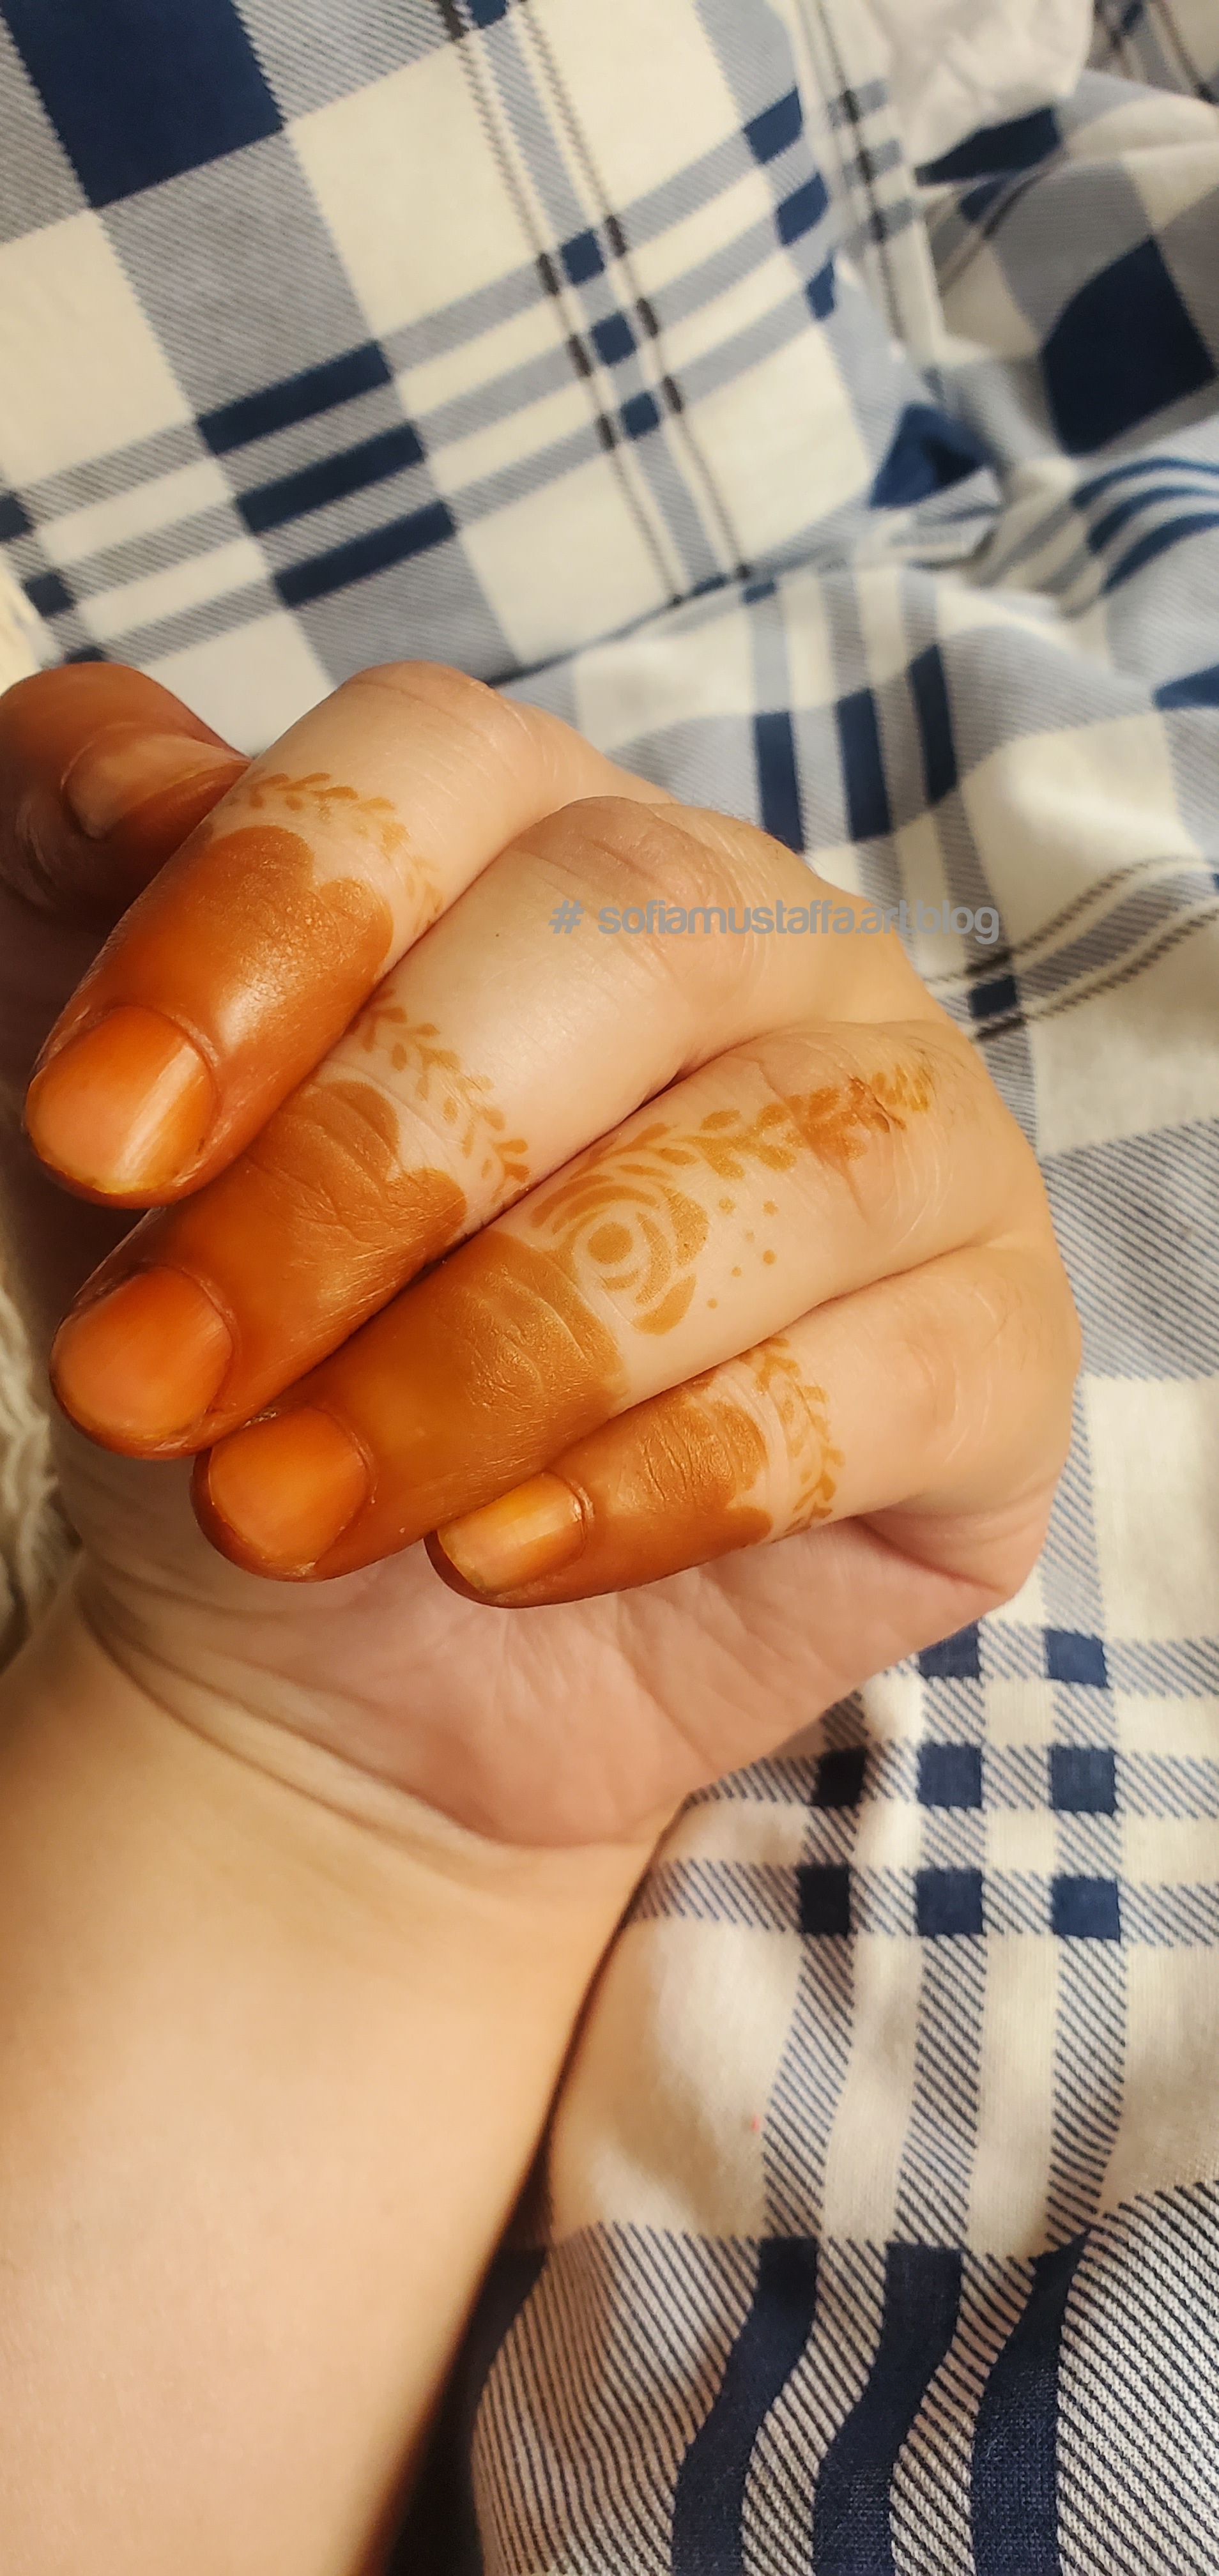
Hahaha…if you go to outside..most of them just lazy to design your hand. But me, I put on different design to my finger. You see, 3 different design on my fingers 😃. Okay, you gotta put it lower like this, so that 1/3 of your finger will cover by the henna..Apply the henna on top of the sticker template like this…Tadaaa..you see, the color is not that bright coz I just leave it for 30min 😂 okay, I waited another 30min. I don’t have much time to wait..LOLTadaaaaa….overall view..well..not bad…not bad at allIts orange color. Henna got available in white, dark green, black, red…but I love orange color the most. Suit with my skin 🥰Jeng jeng….i just love it…different kind of design….🥰🥰🥰
Okay guys, thats all Im sharing on how to make your own mahendi. Your own design, your own satisfaction. Till then guys…to be continue….
Hey everyone….its the last week of Ramadhan that people gone crazy for shopping. But, Im done all shopping in the 1st Ramadhan itself 😂😅
So, I went to energize myself by staying at a 5 star hotel for a night 🥰
I chose Pullman Hotel, located at the Golden Triangle KL. I planned to have iftar at the hotel’s restaurant too, unfortunately it was fully booked. I called earlier before, and they took my phone number, but no one is calling me back. So, I decided to call again for booking, unfortunately is fully booked now. Well, everything is good, except for the receptionist for the restaurant who pick up calls. I even wants to order for in-room service, but after couple of trials, no one is pickup up the call. Pretty lousy for the restaurant ordering. So, I just order grabfood. The grabfood services always the best for me, everywhere I go. Too bad. After check out and review the hotel, then only the receptionist of the restaurant called me. Too late for you 😒
Okay for Pullman Hotel, what you need to do, first thing first you can park your vehicle at the entrance for check-in. After check-in you will be given 2 key cards, which you can enter the parking using same key cards. I love the concept, so you will be holding only 1 card, to enter hotel and also to enter parking. The wifi is very strong and you will be given your own ID and password to sign in the hotel wifi. I think its brilliant concept.
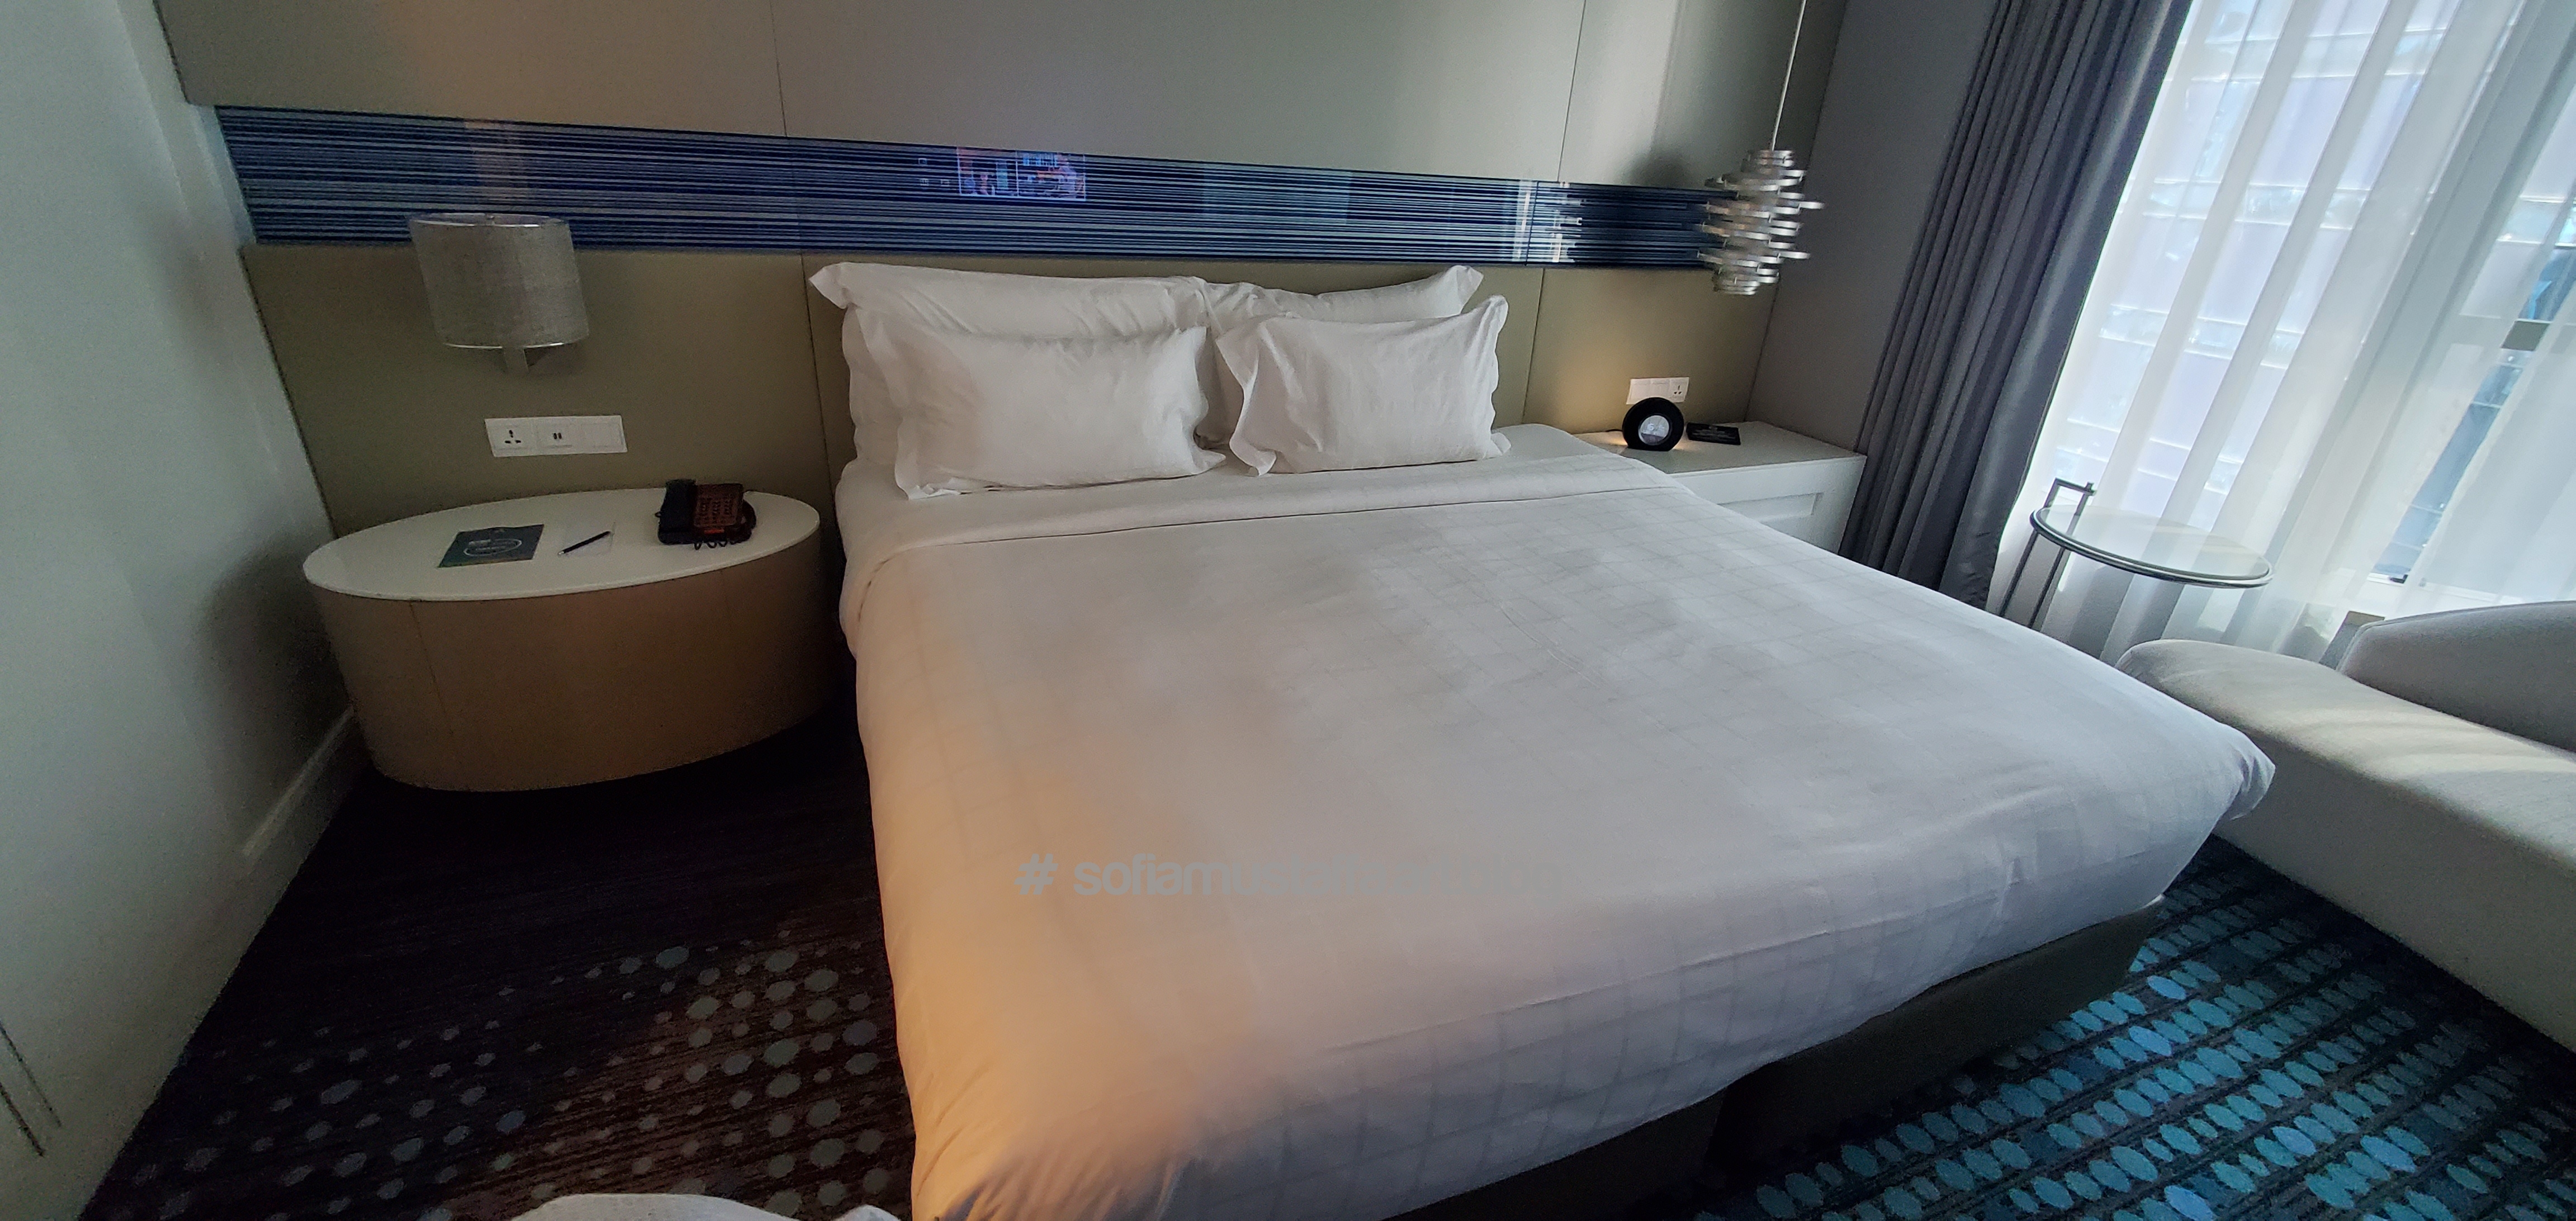
Okay, after you park your car, you will need to go to the lobby first by elevator. Then, there are separate elevator to the hotel floors. My room was at level 20. You will need to access the floor by touching your card key room, then press your room floor. So, mine should be Queen room, but they upgraded it to King room, good service by this 5 star hotel ❤
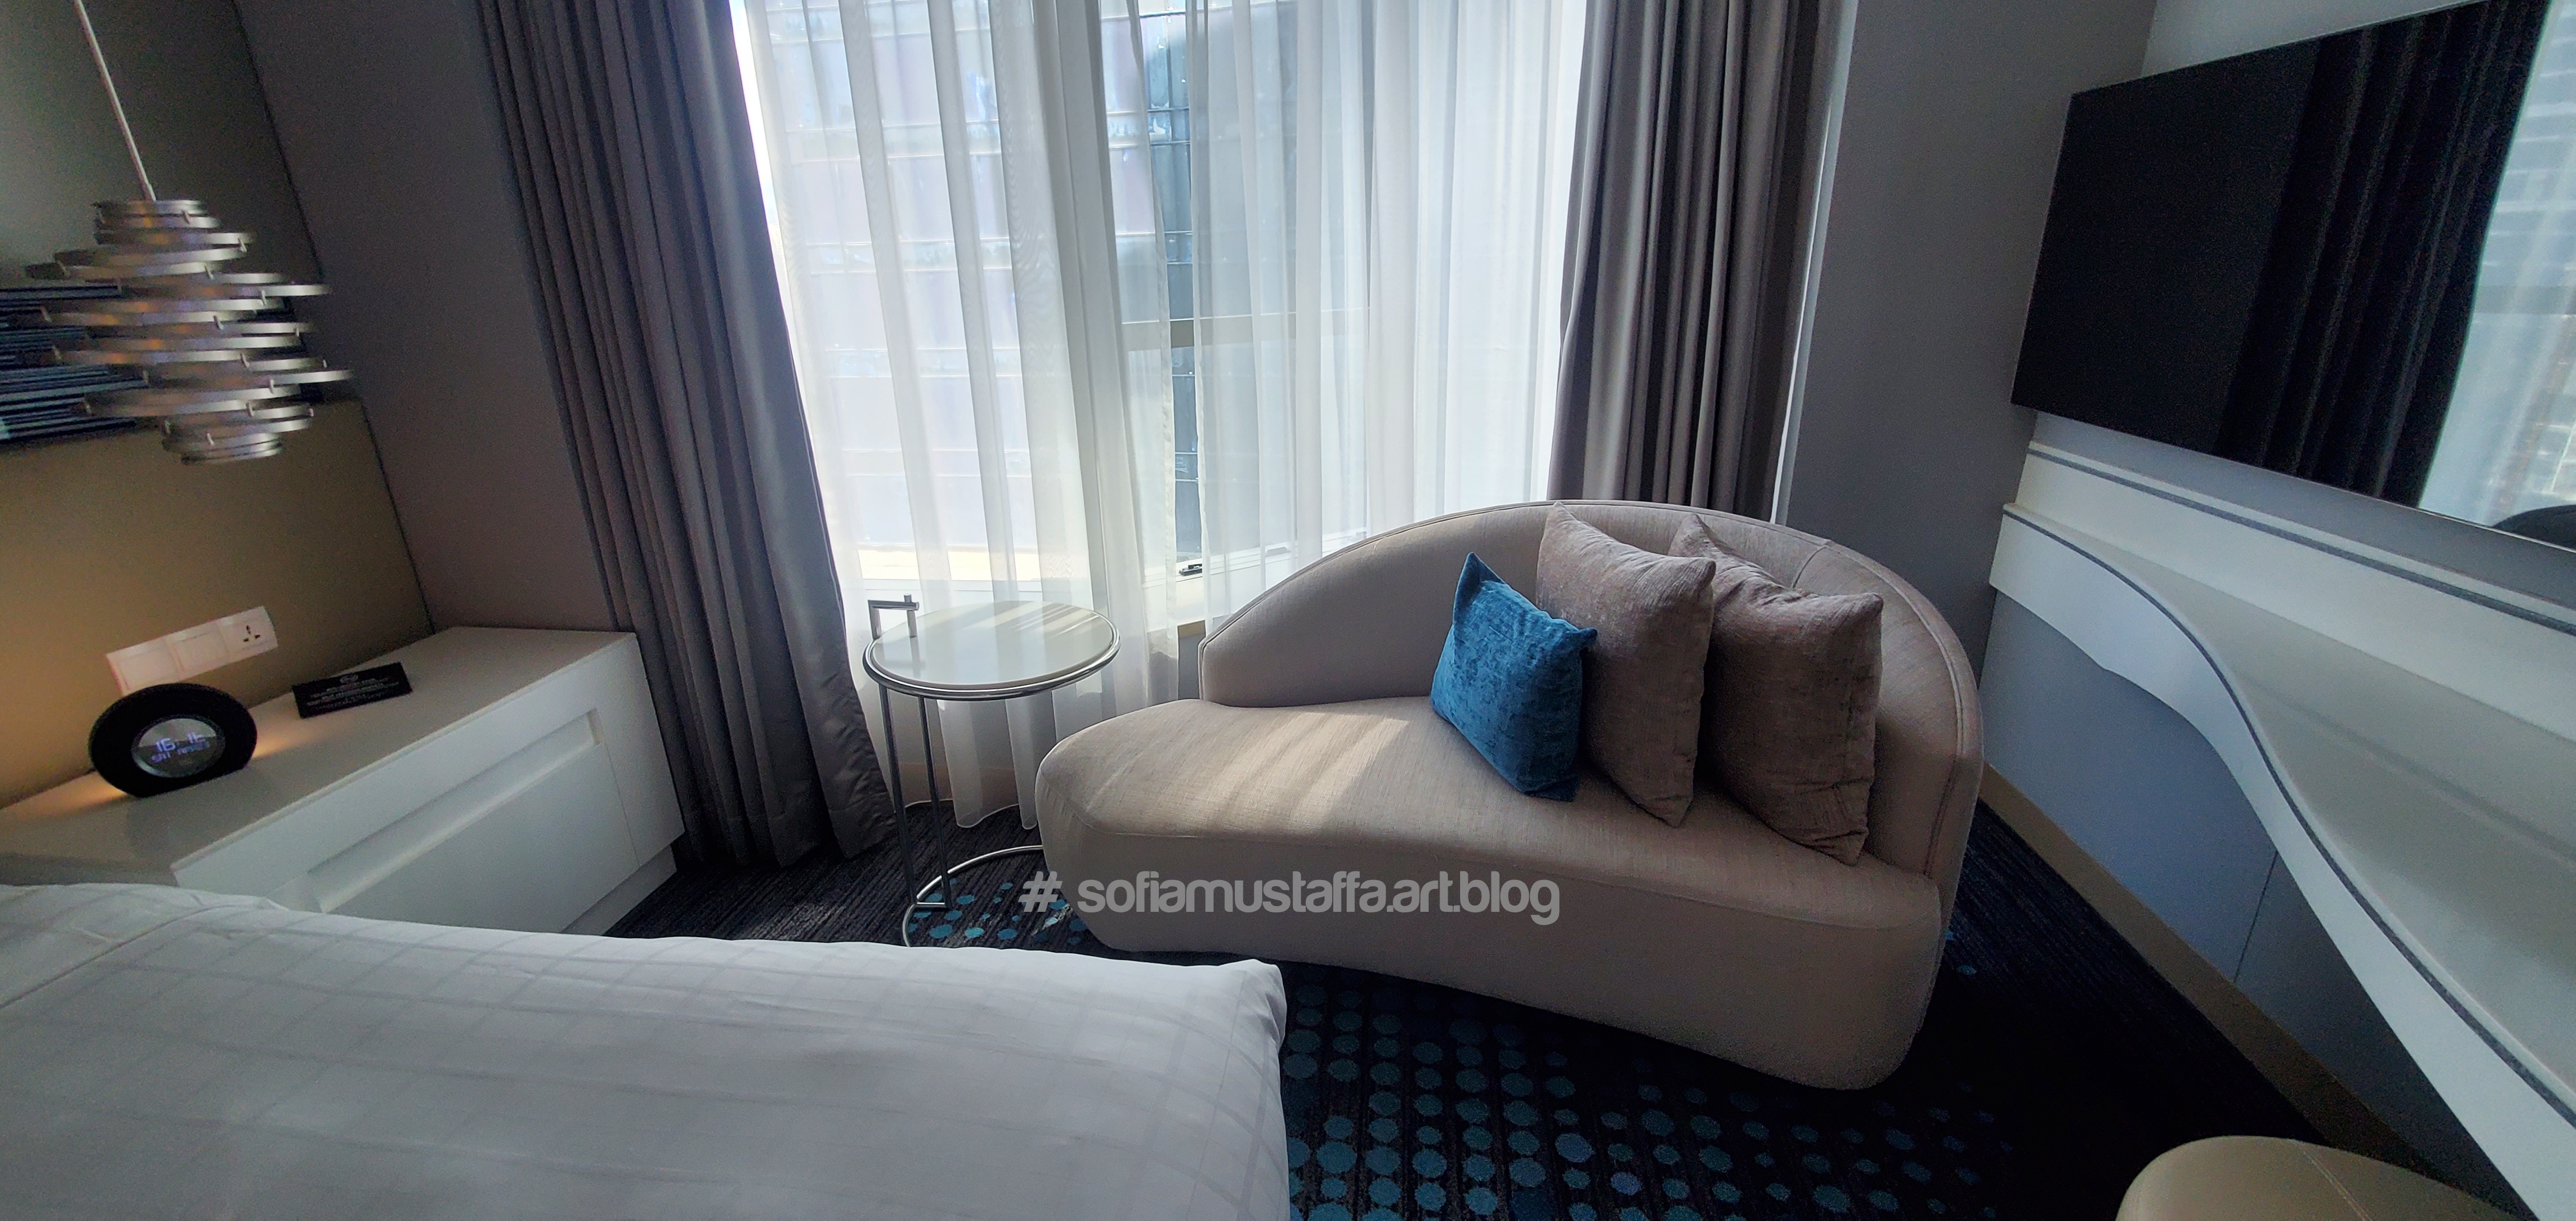
Okay…when I entered the room, it will look something like this….
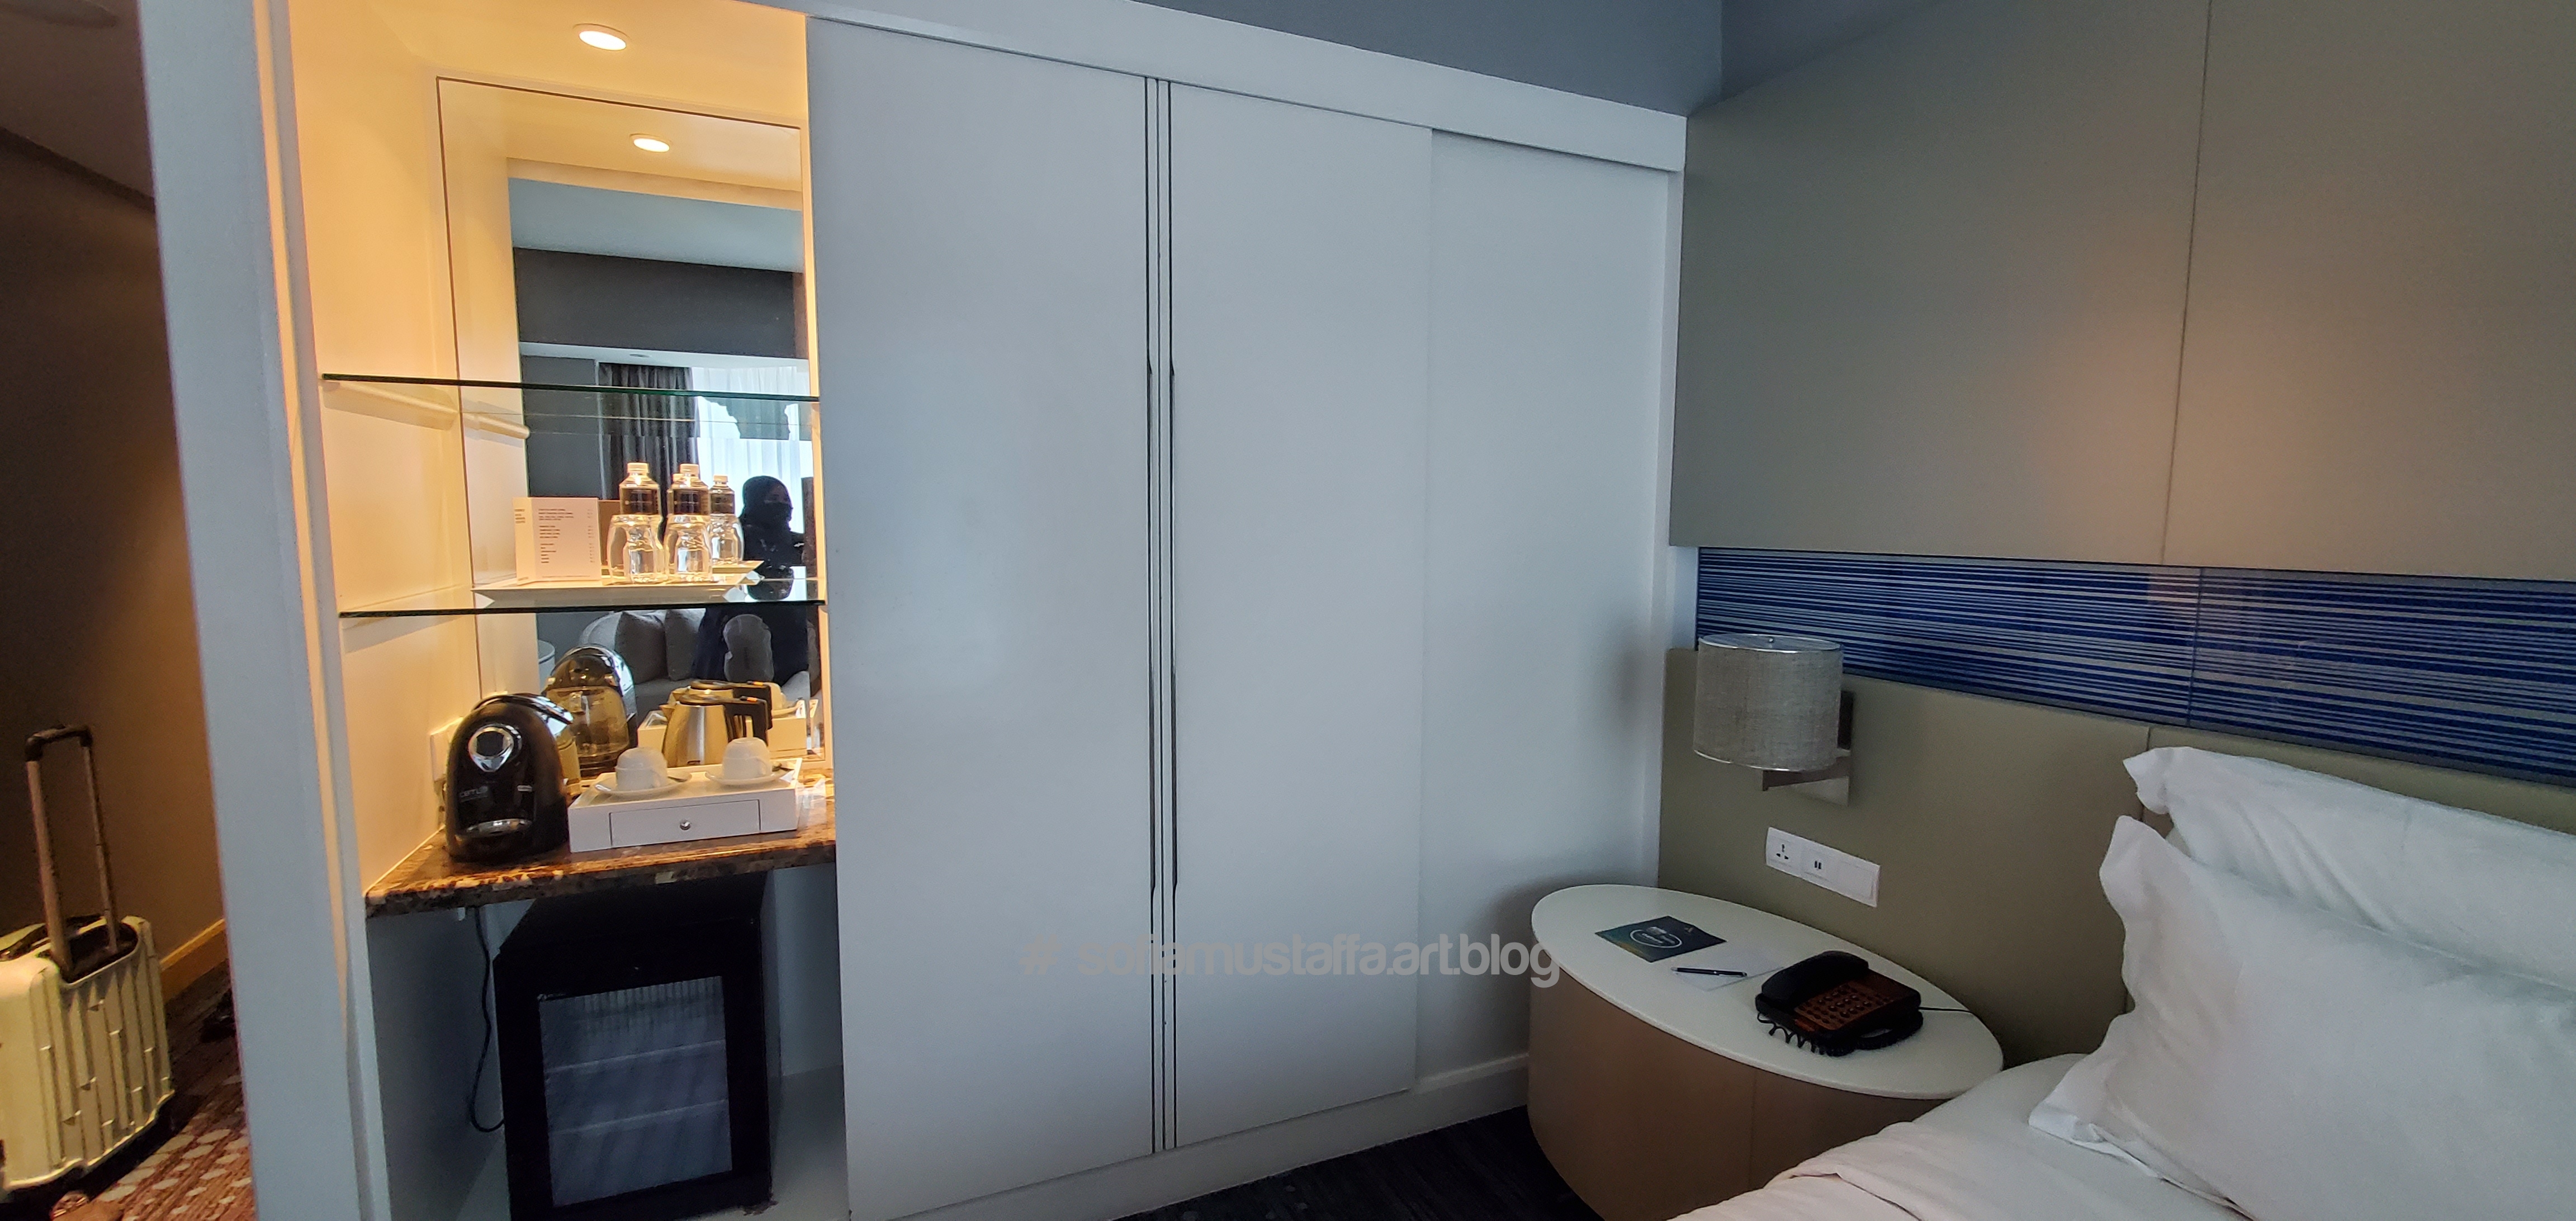
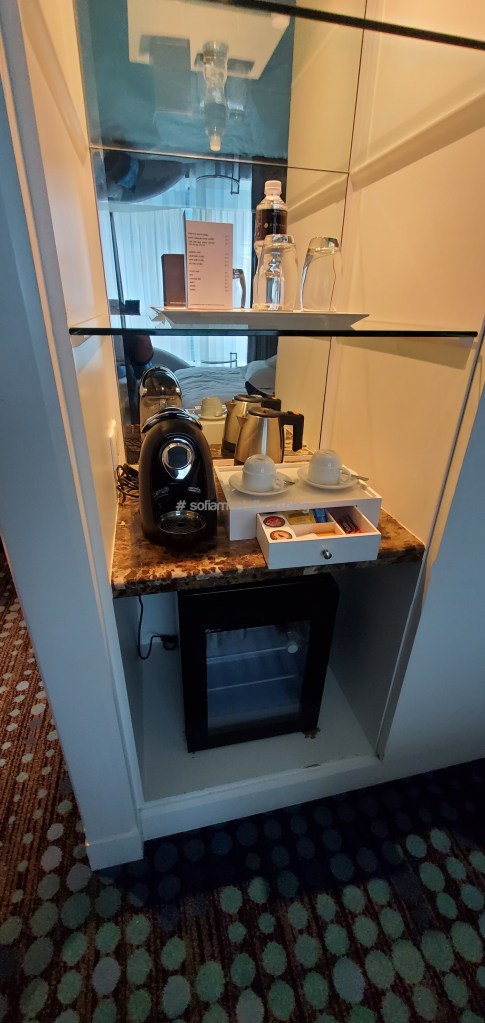
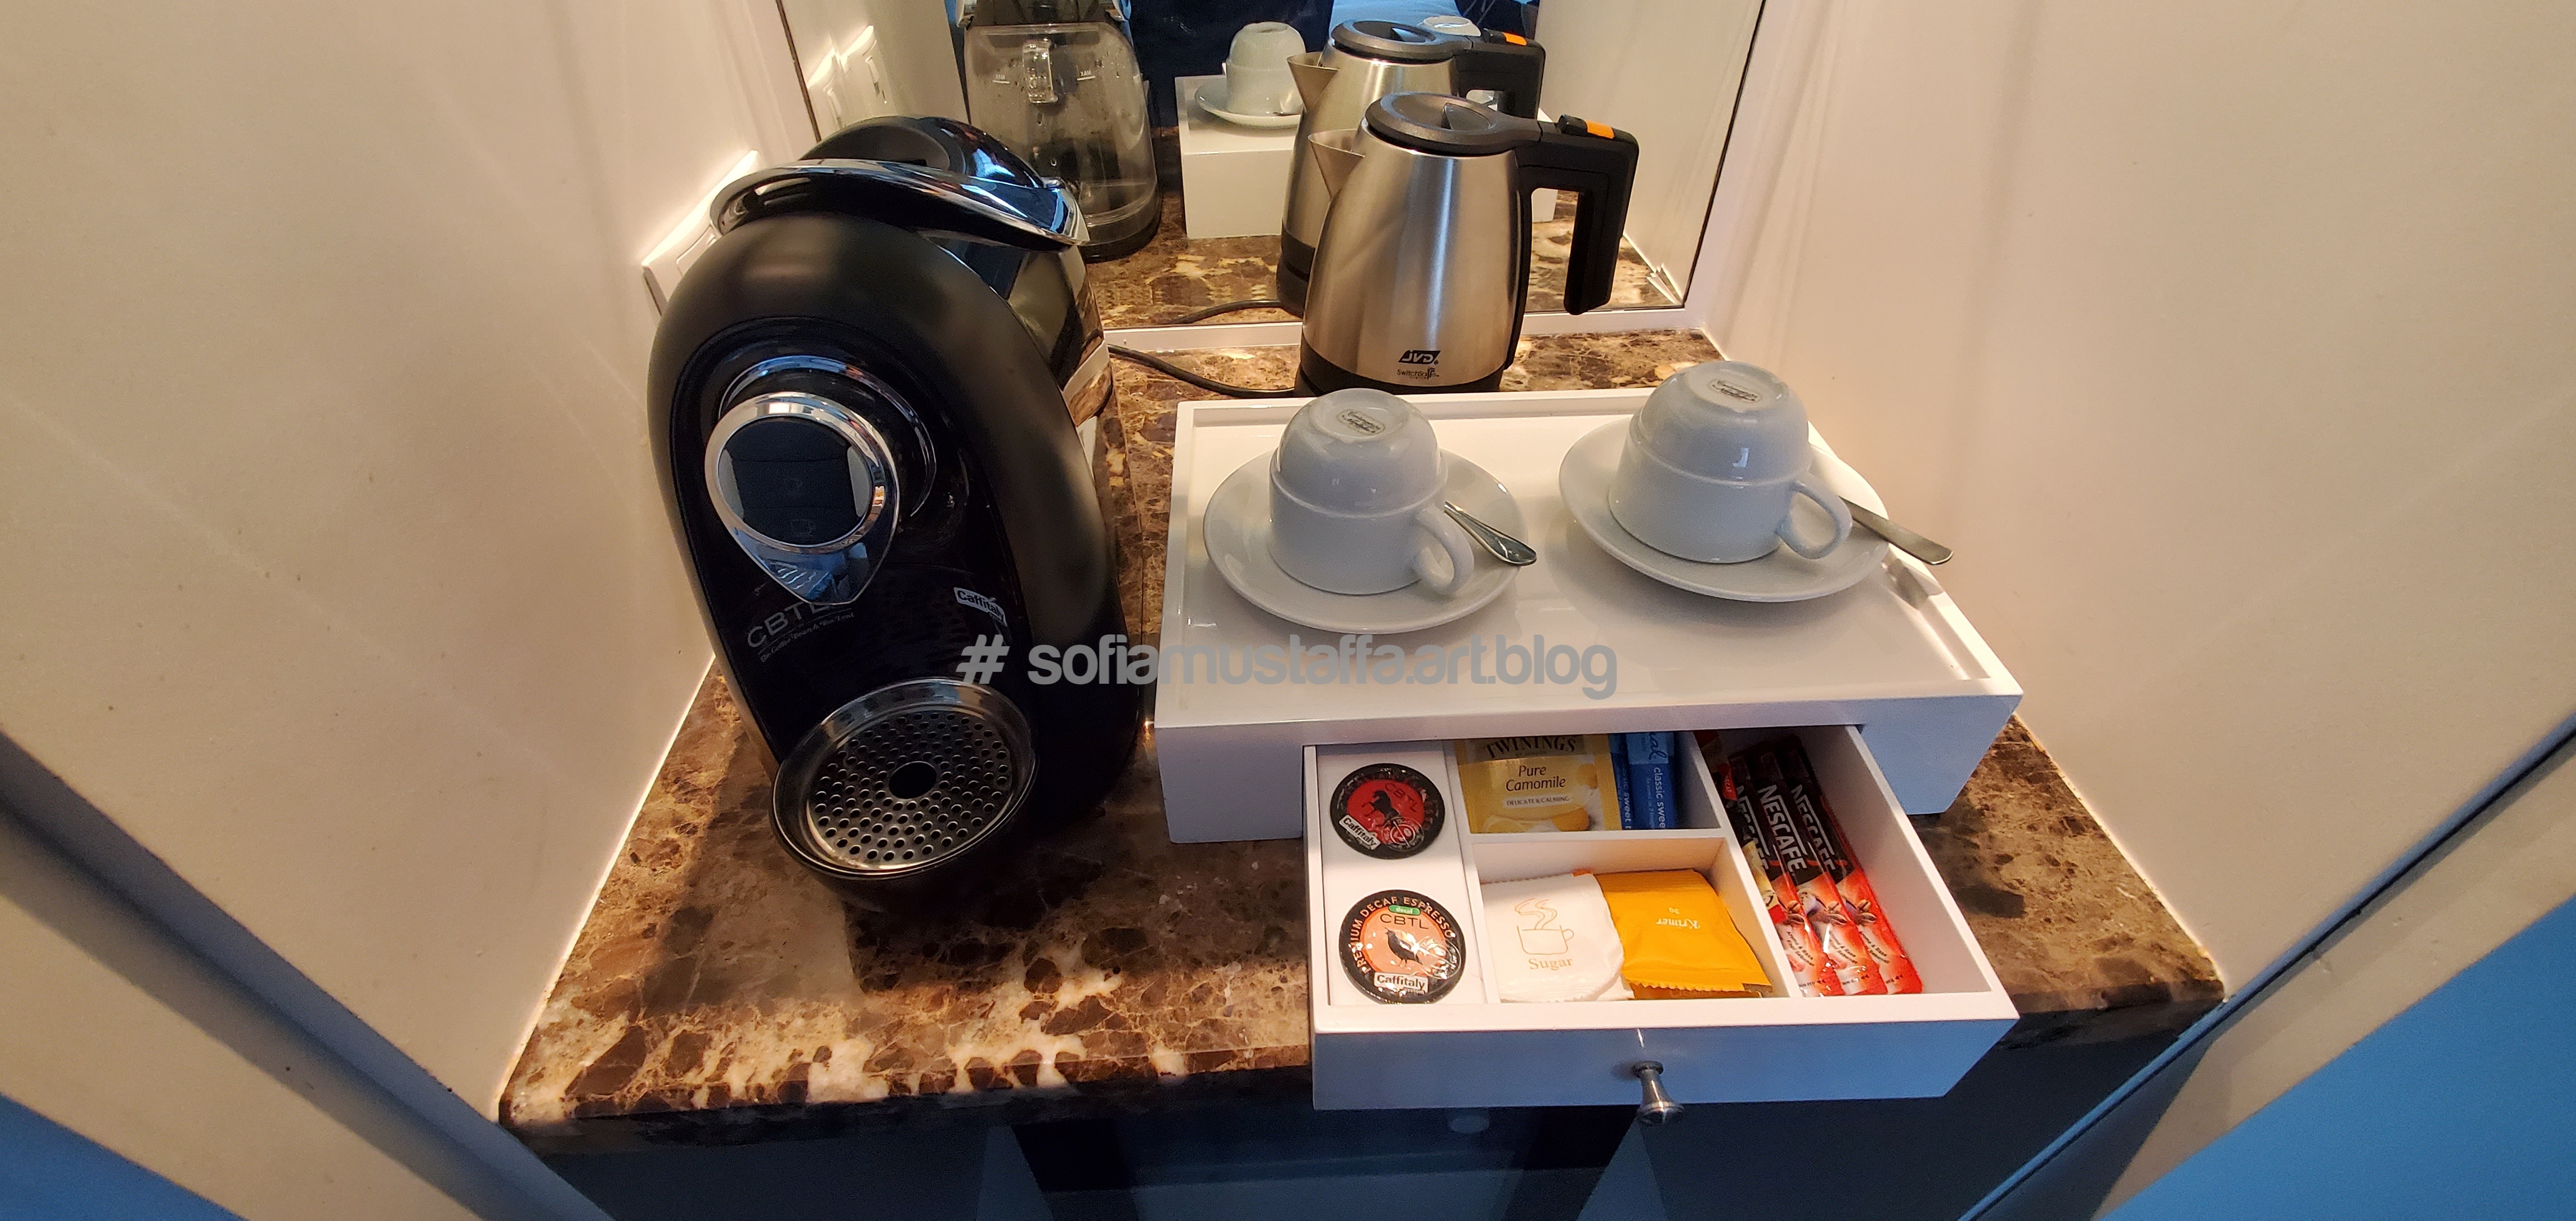
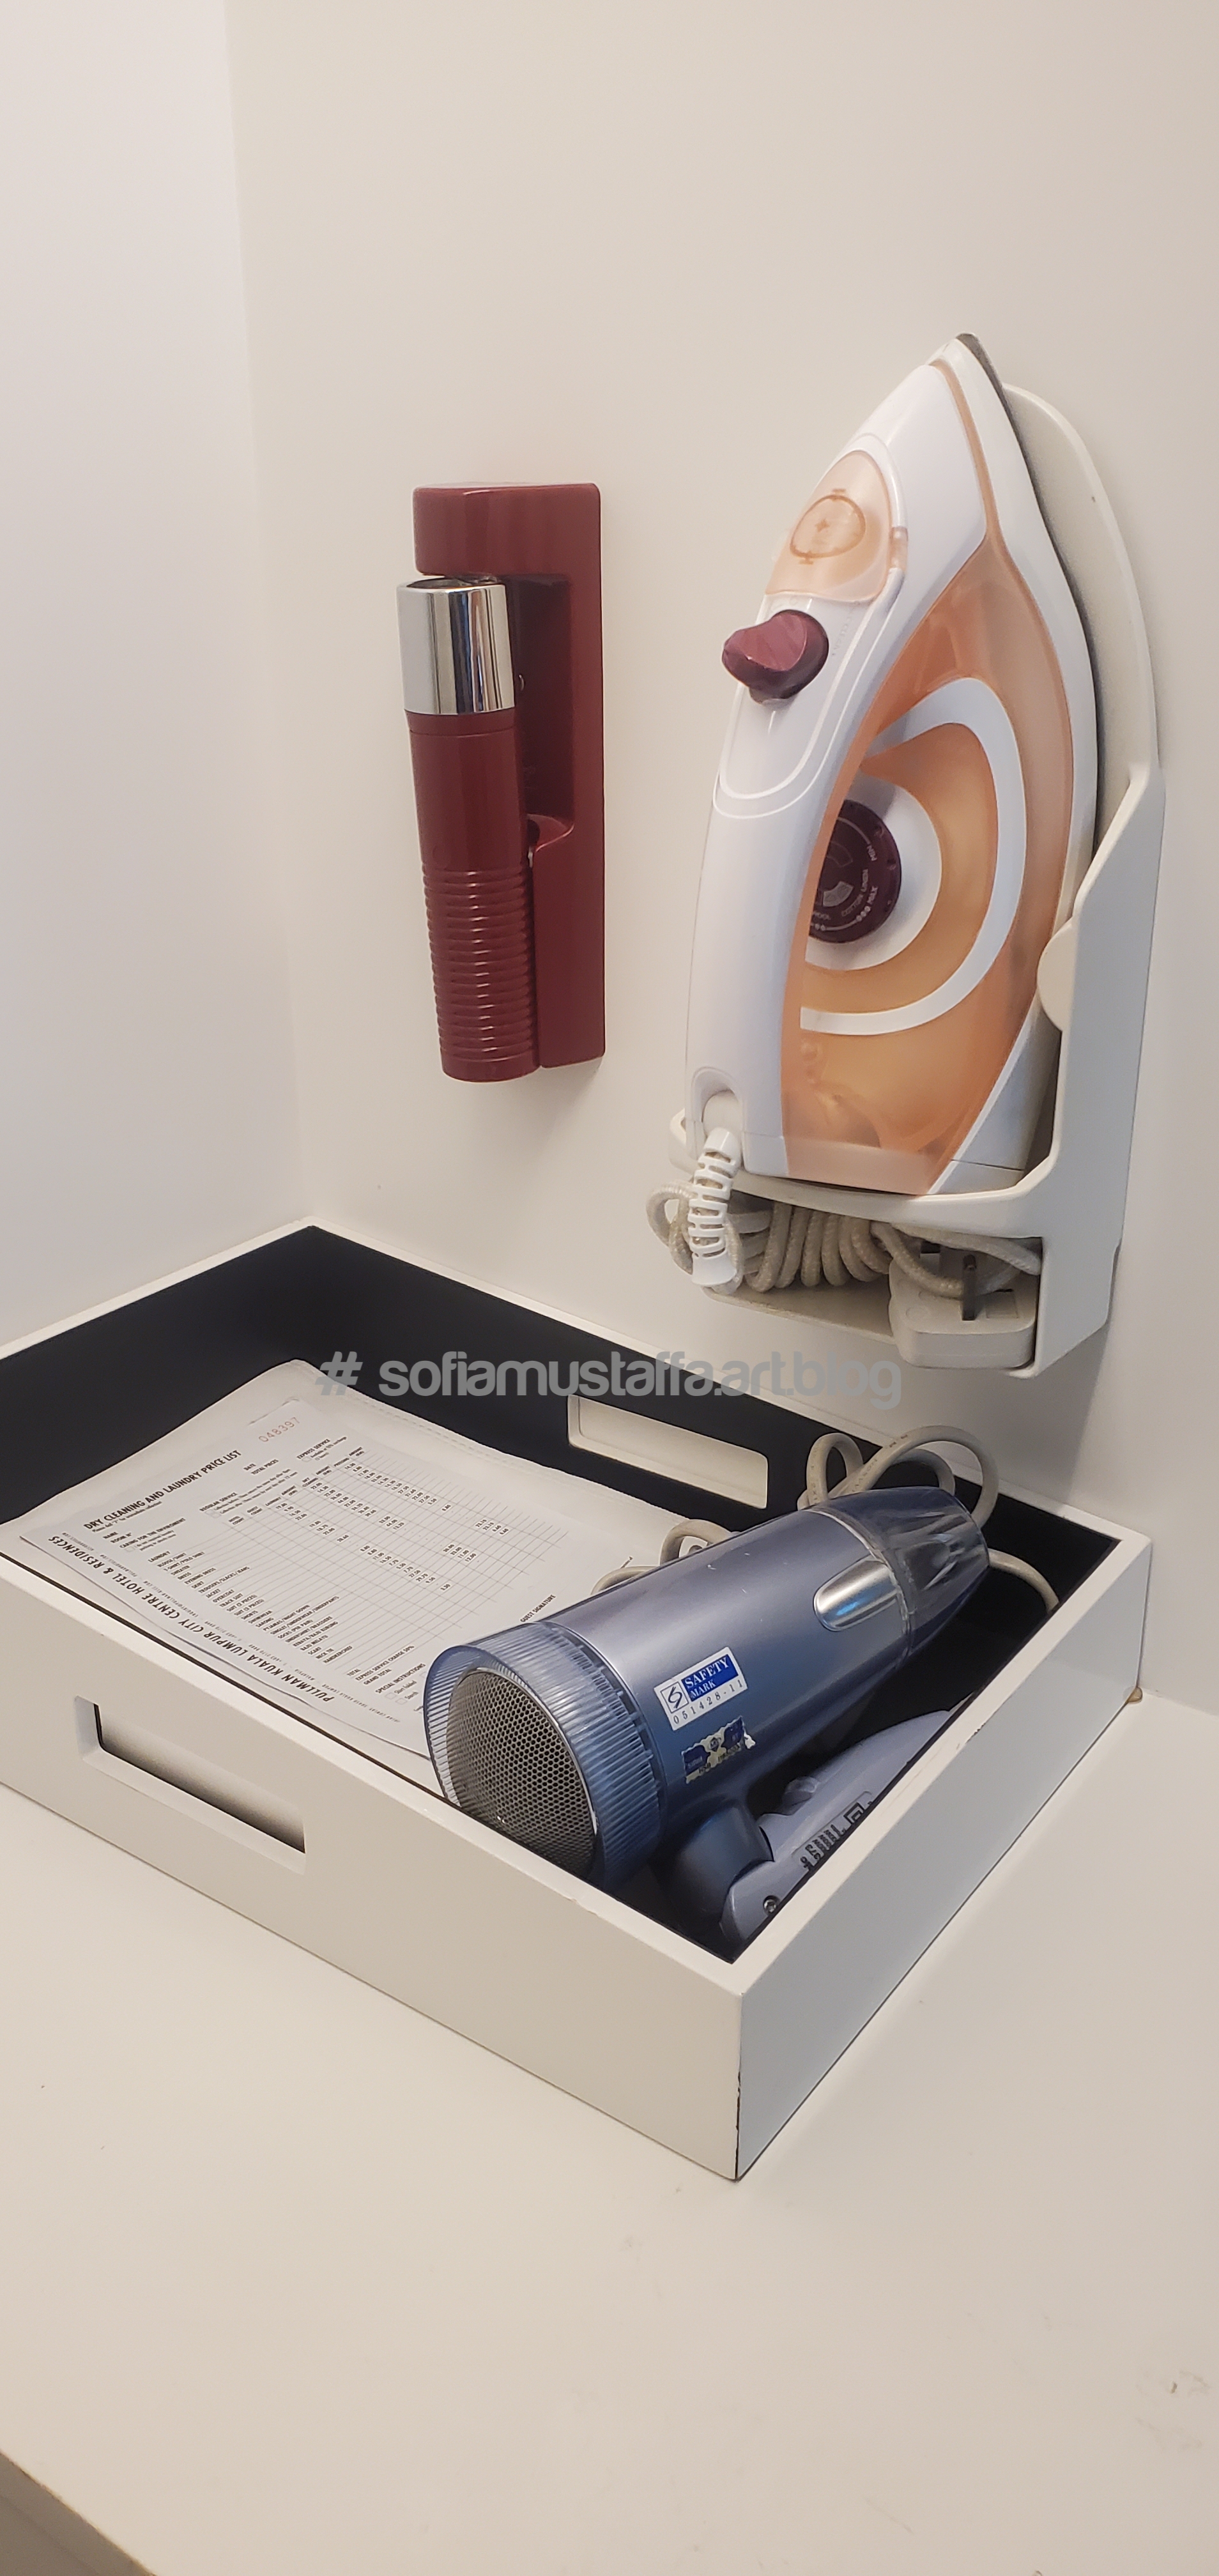
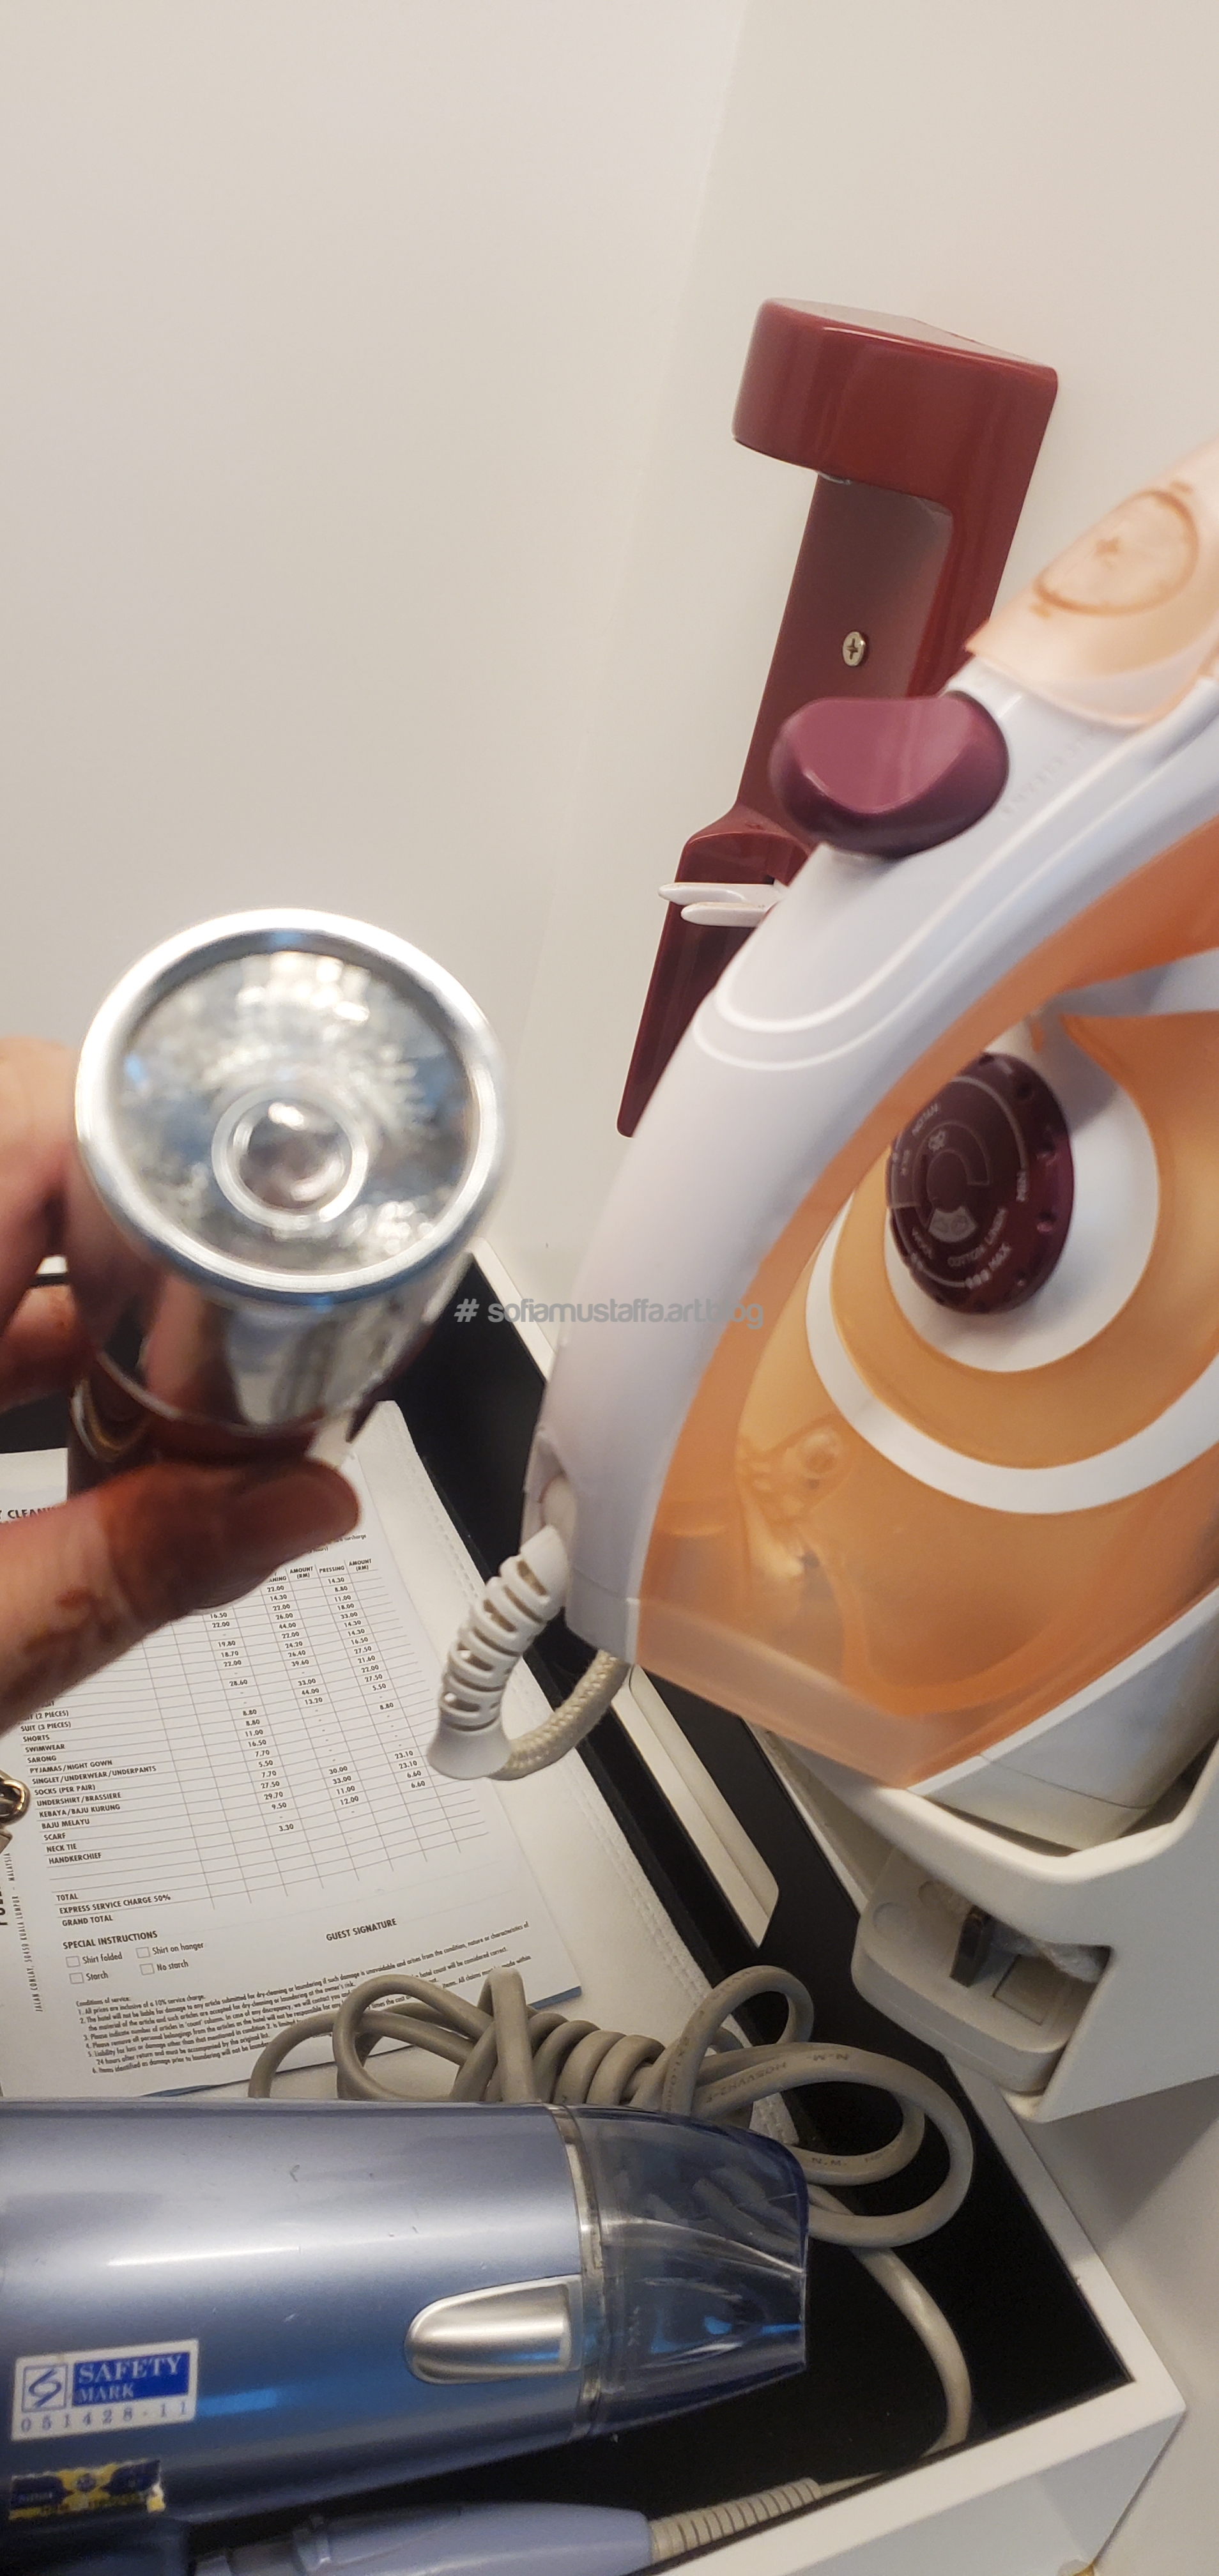
The entire roomThe couch…love the design. Very comfortable at right level of height. 🥰The bed is very thick. Not soo fluffy, but still okay. Its feather fill pillow. They put on bed topper, but I think I will love the original mattress more coz the texture was like a bit latex feelings. The bed topper was like a normal foam to me. But still okay, not bad.It got side table, plenty of switch and lights, service phone, minibar fridge, coffee machine, mineral etcHere got only coffee and tea, if you need chocolate, u need to order in-room service..or simply bring your own..or..you can order Grabfood 😃Coffee and tea available..with creamer and sugarAvailable, hair dryer, rechargable torch light, iron and board. Its very thoughtful to have the torch light, in case if there is an emergency blackout happen.Nice..
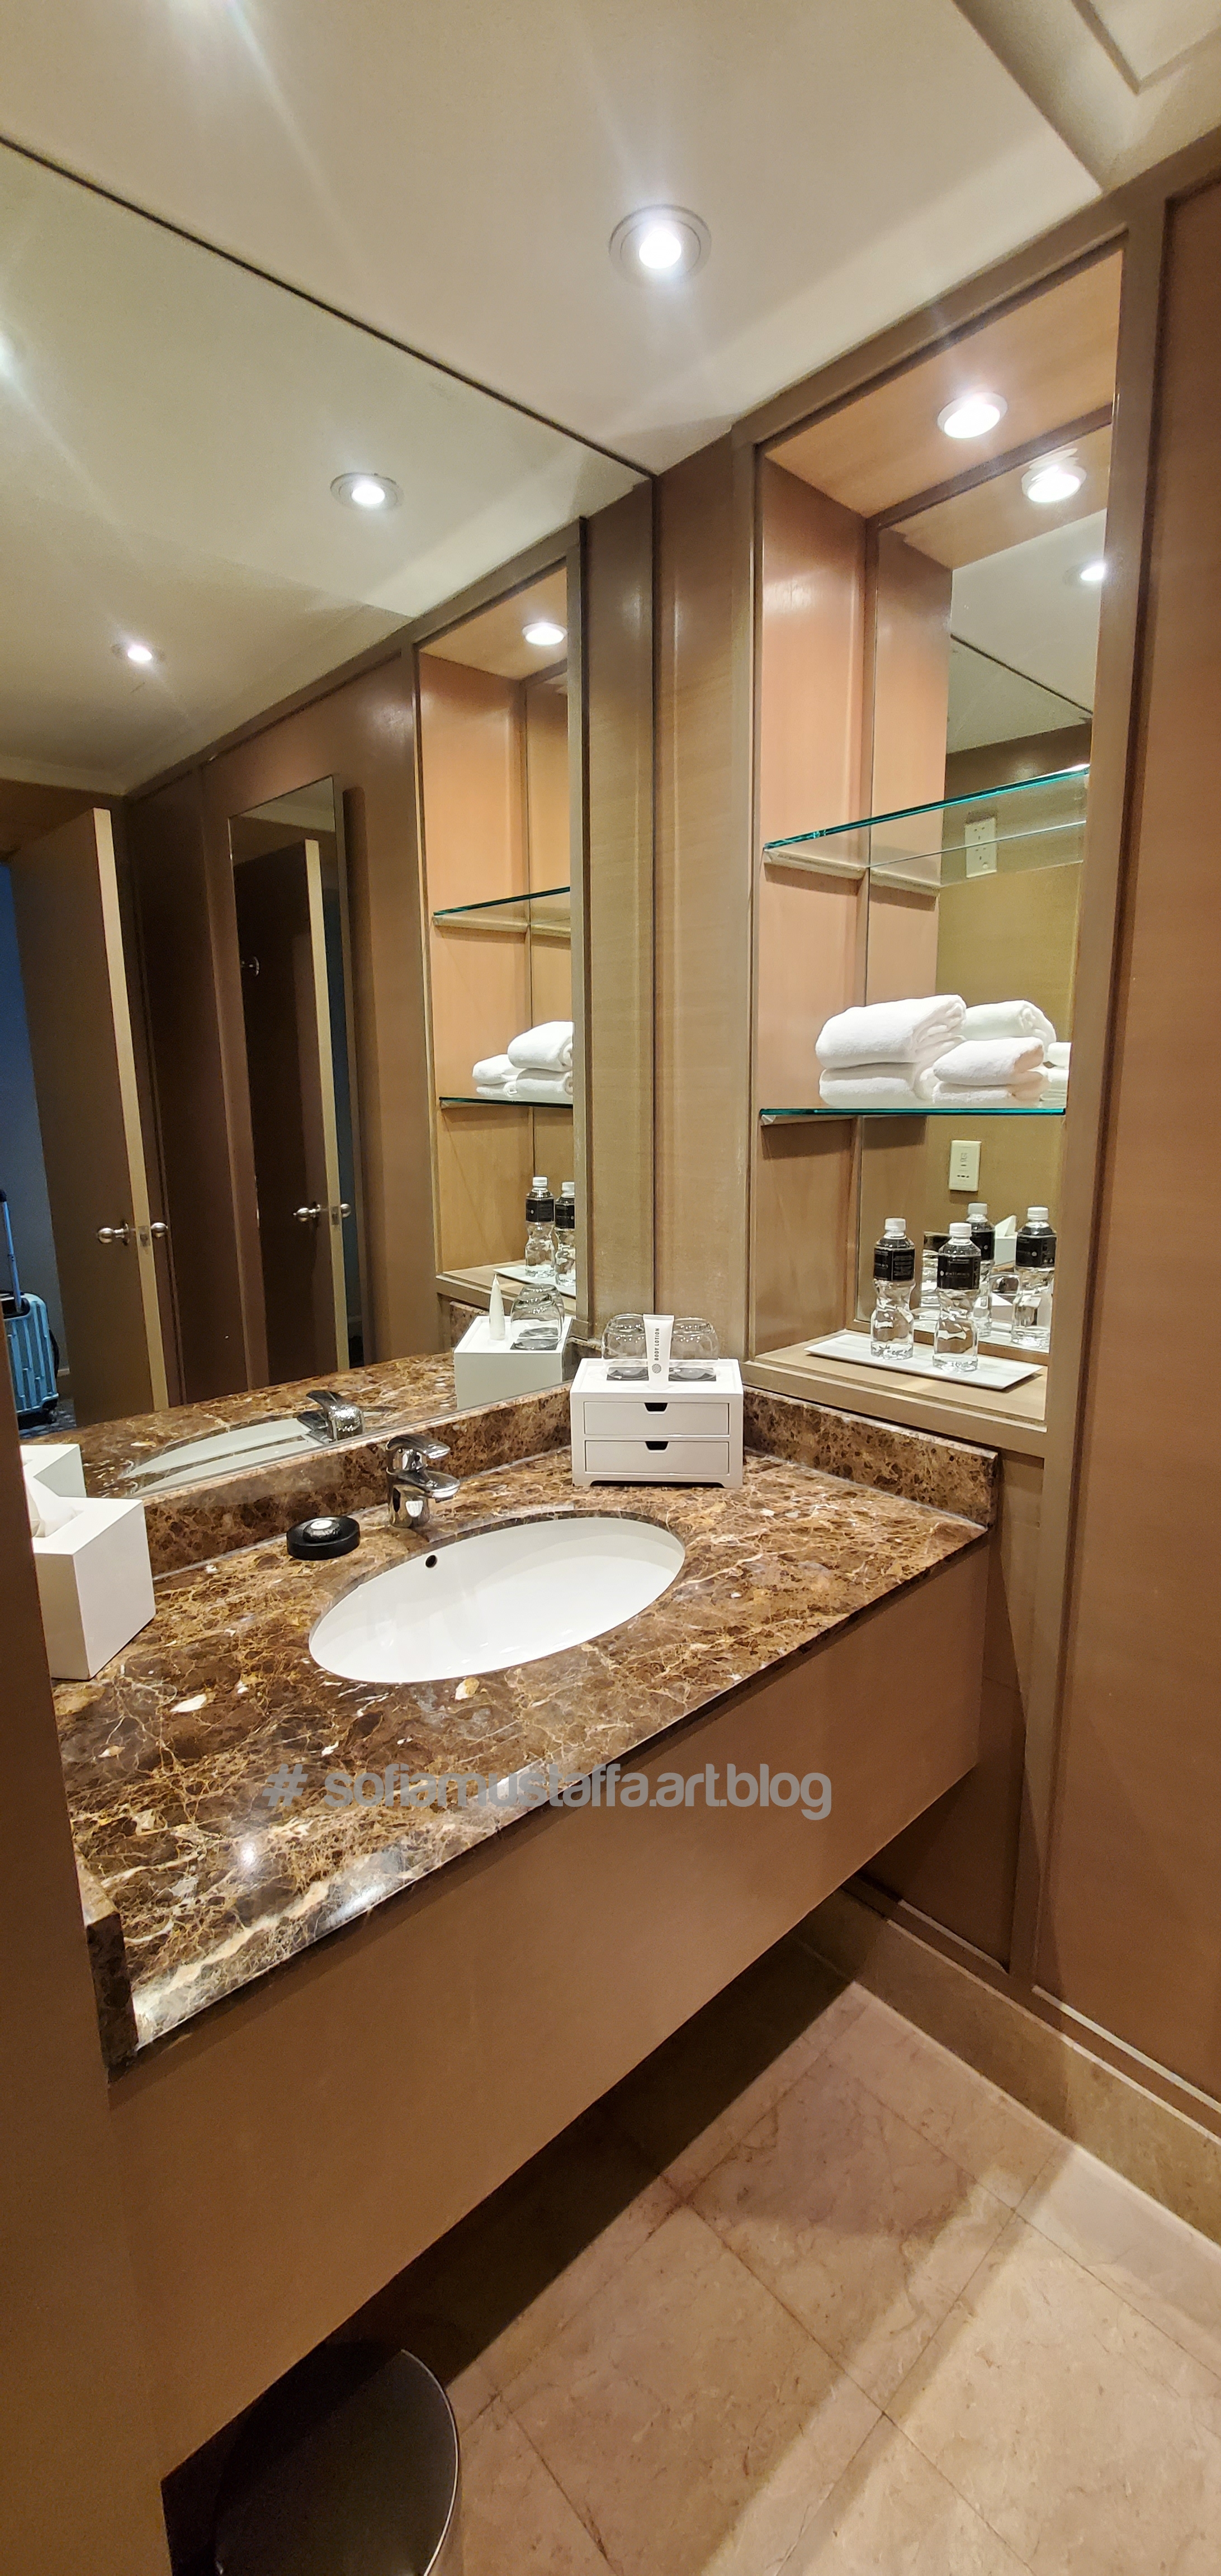
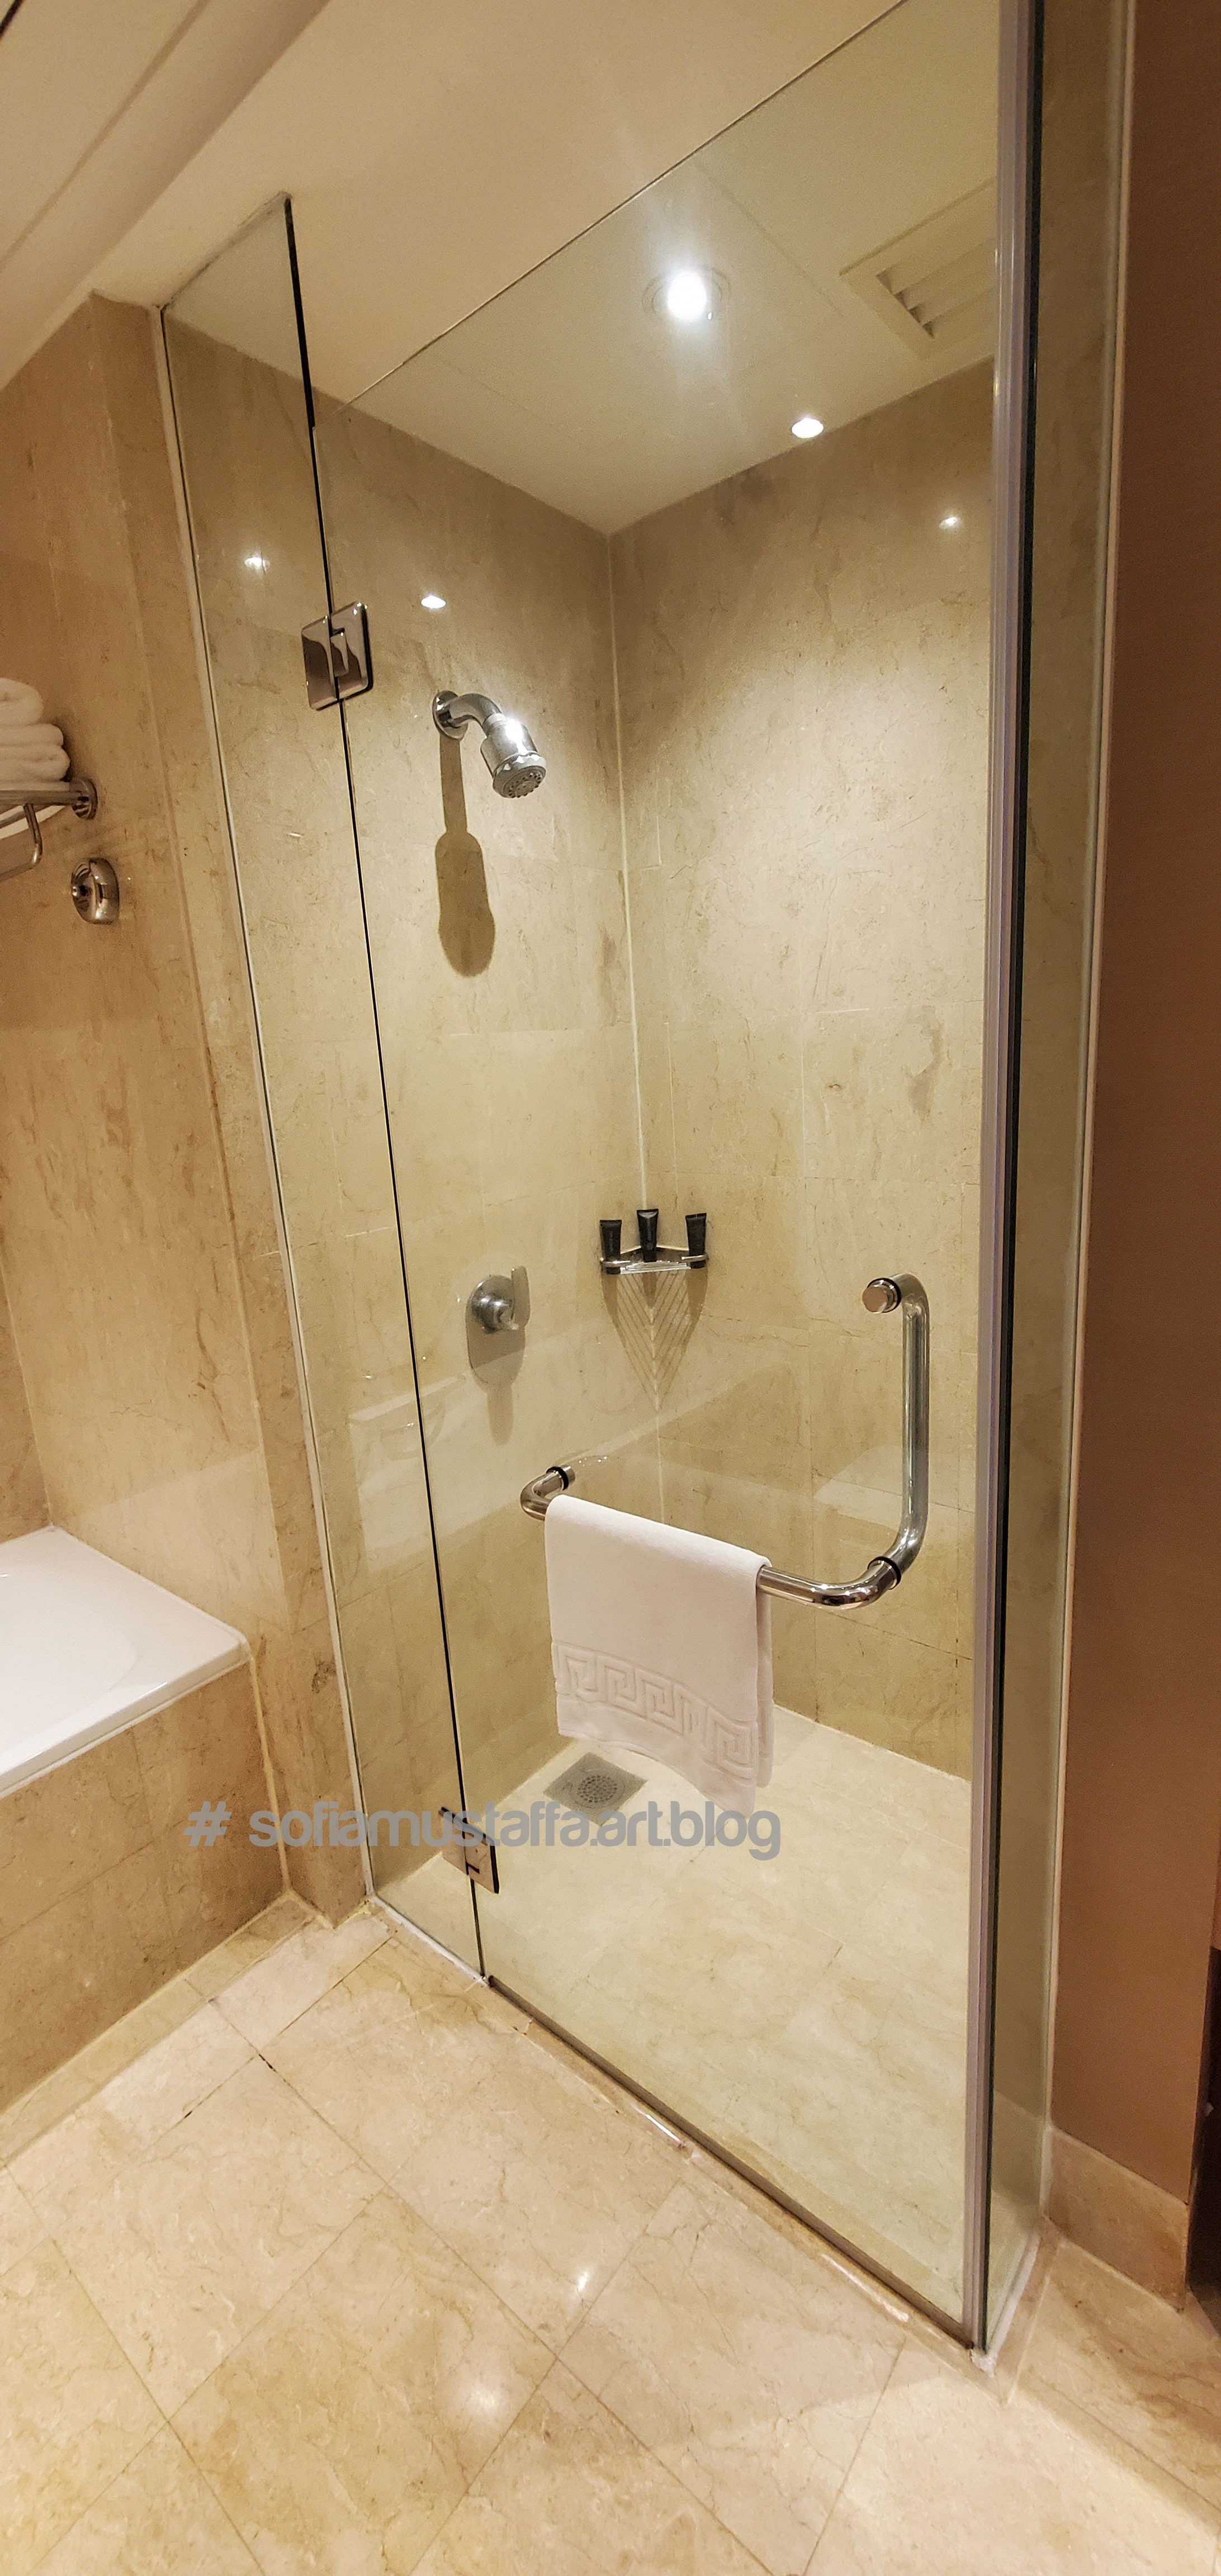
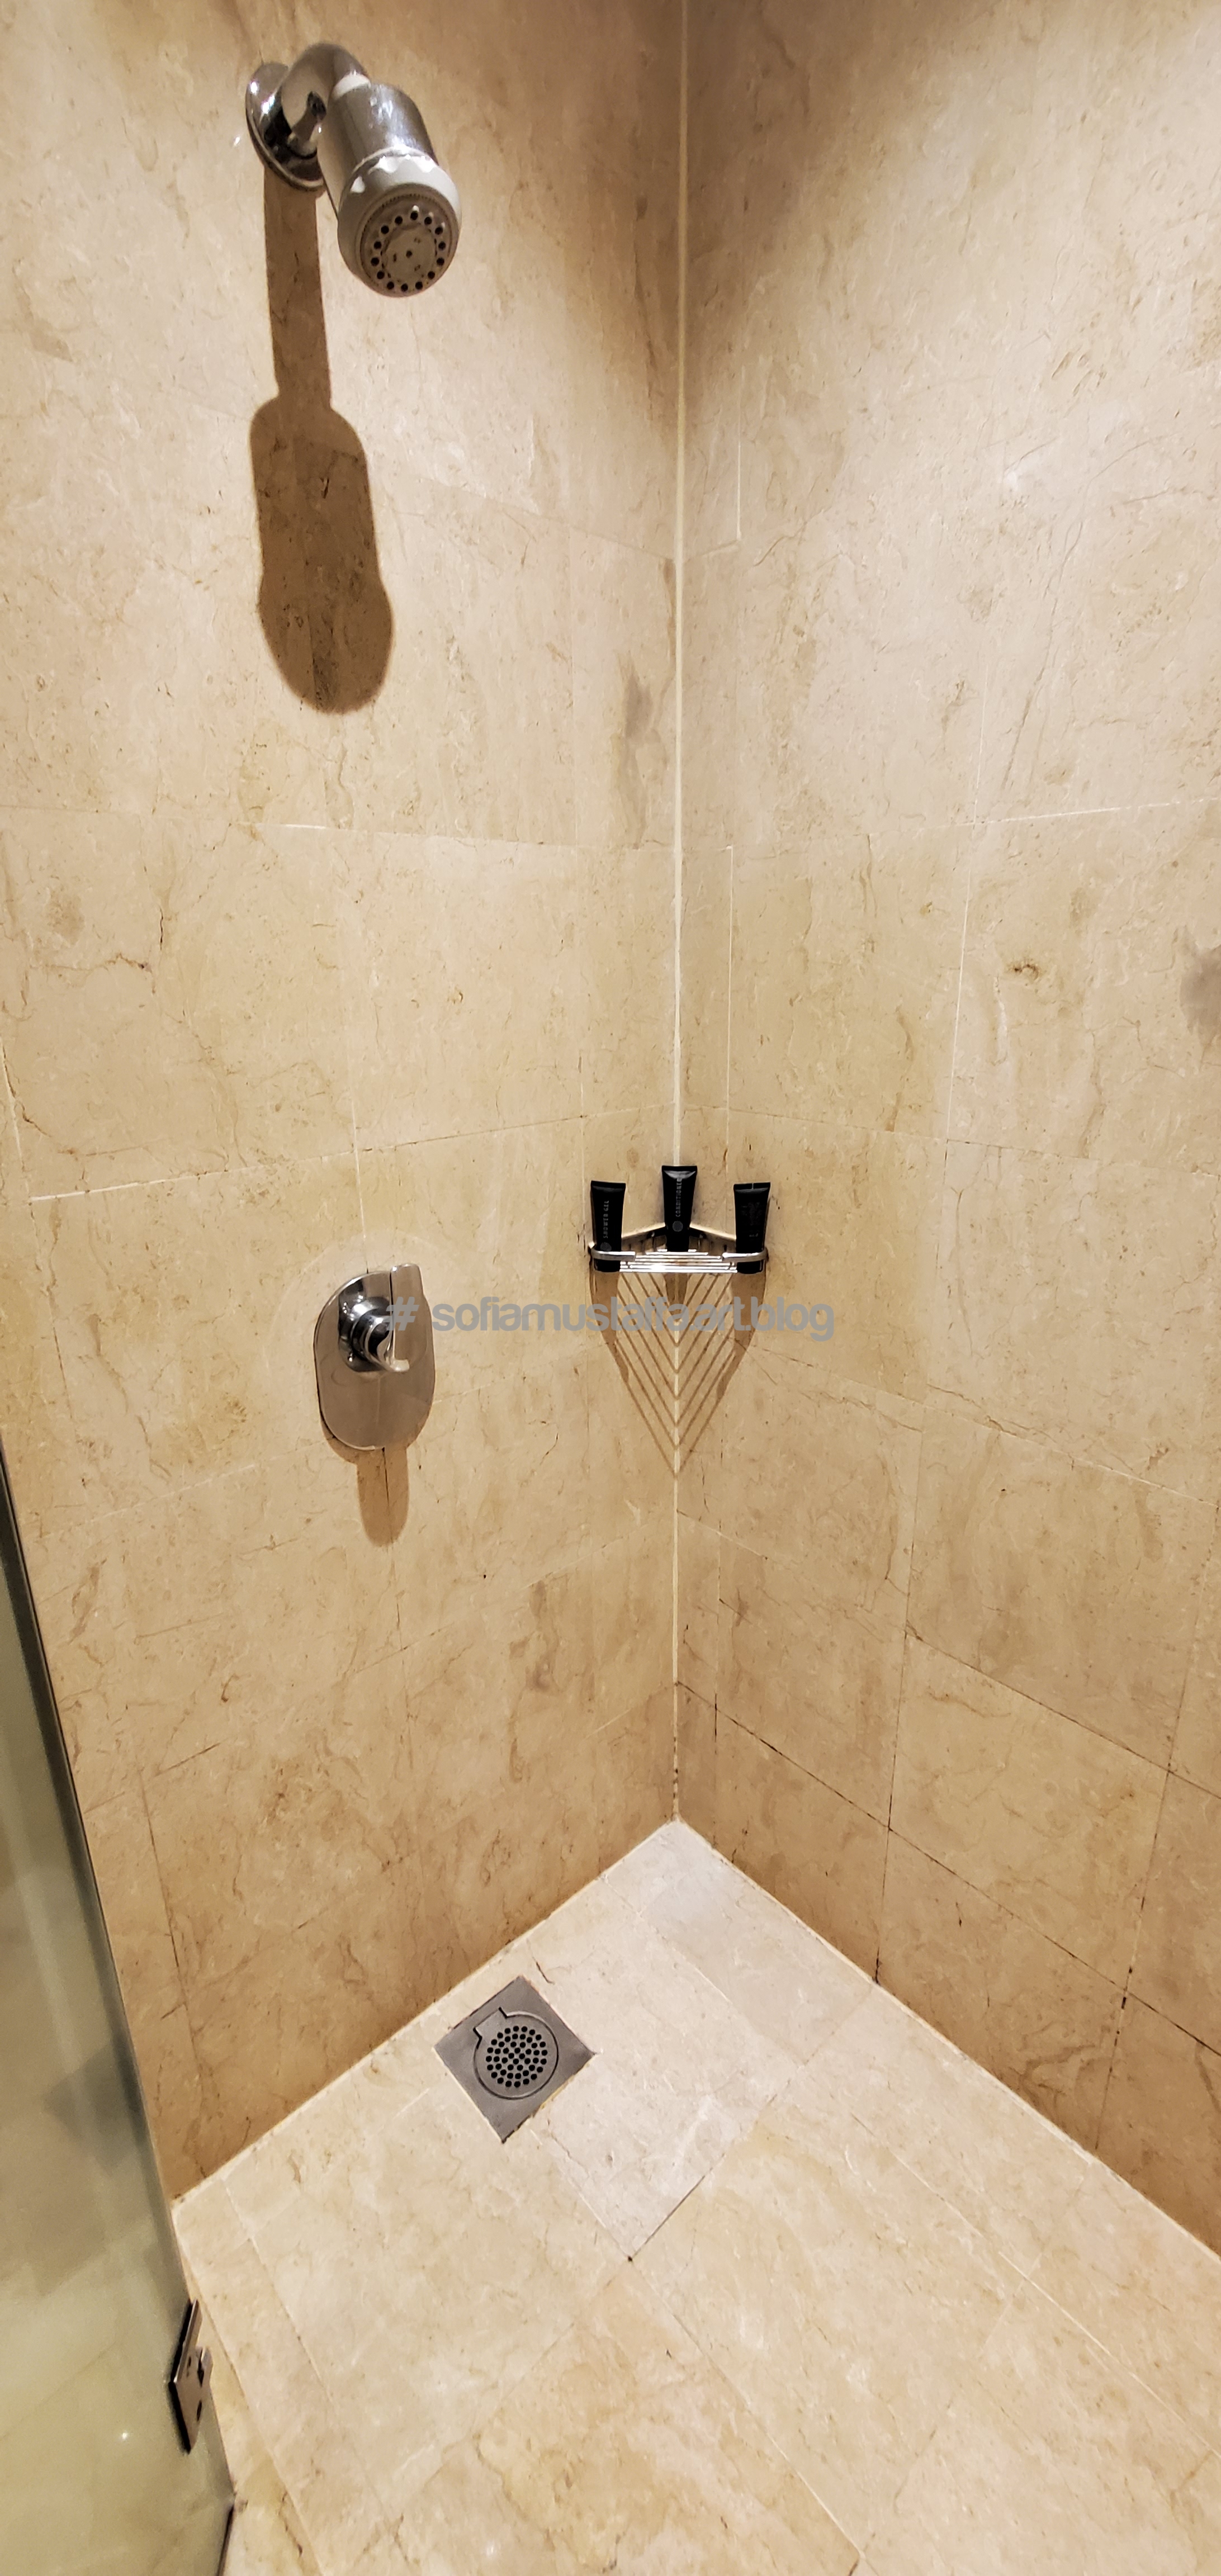
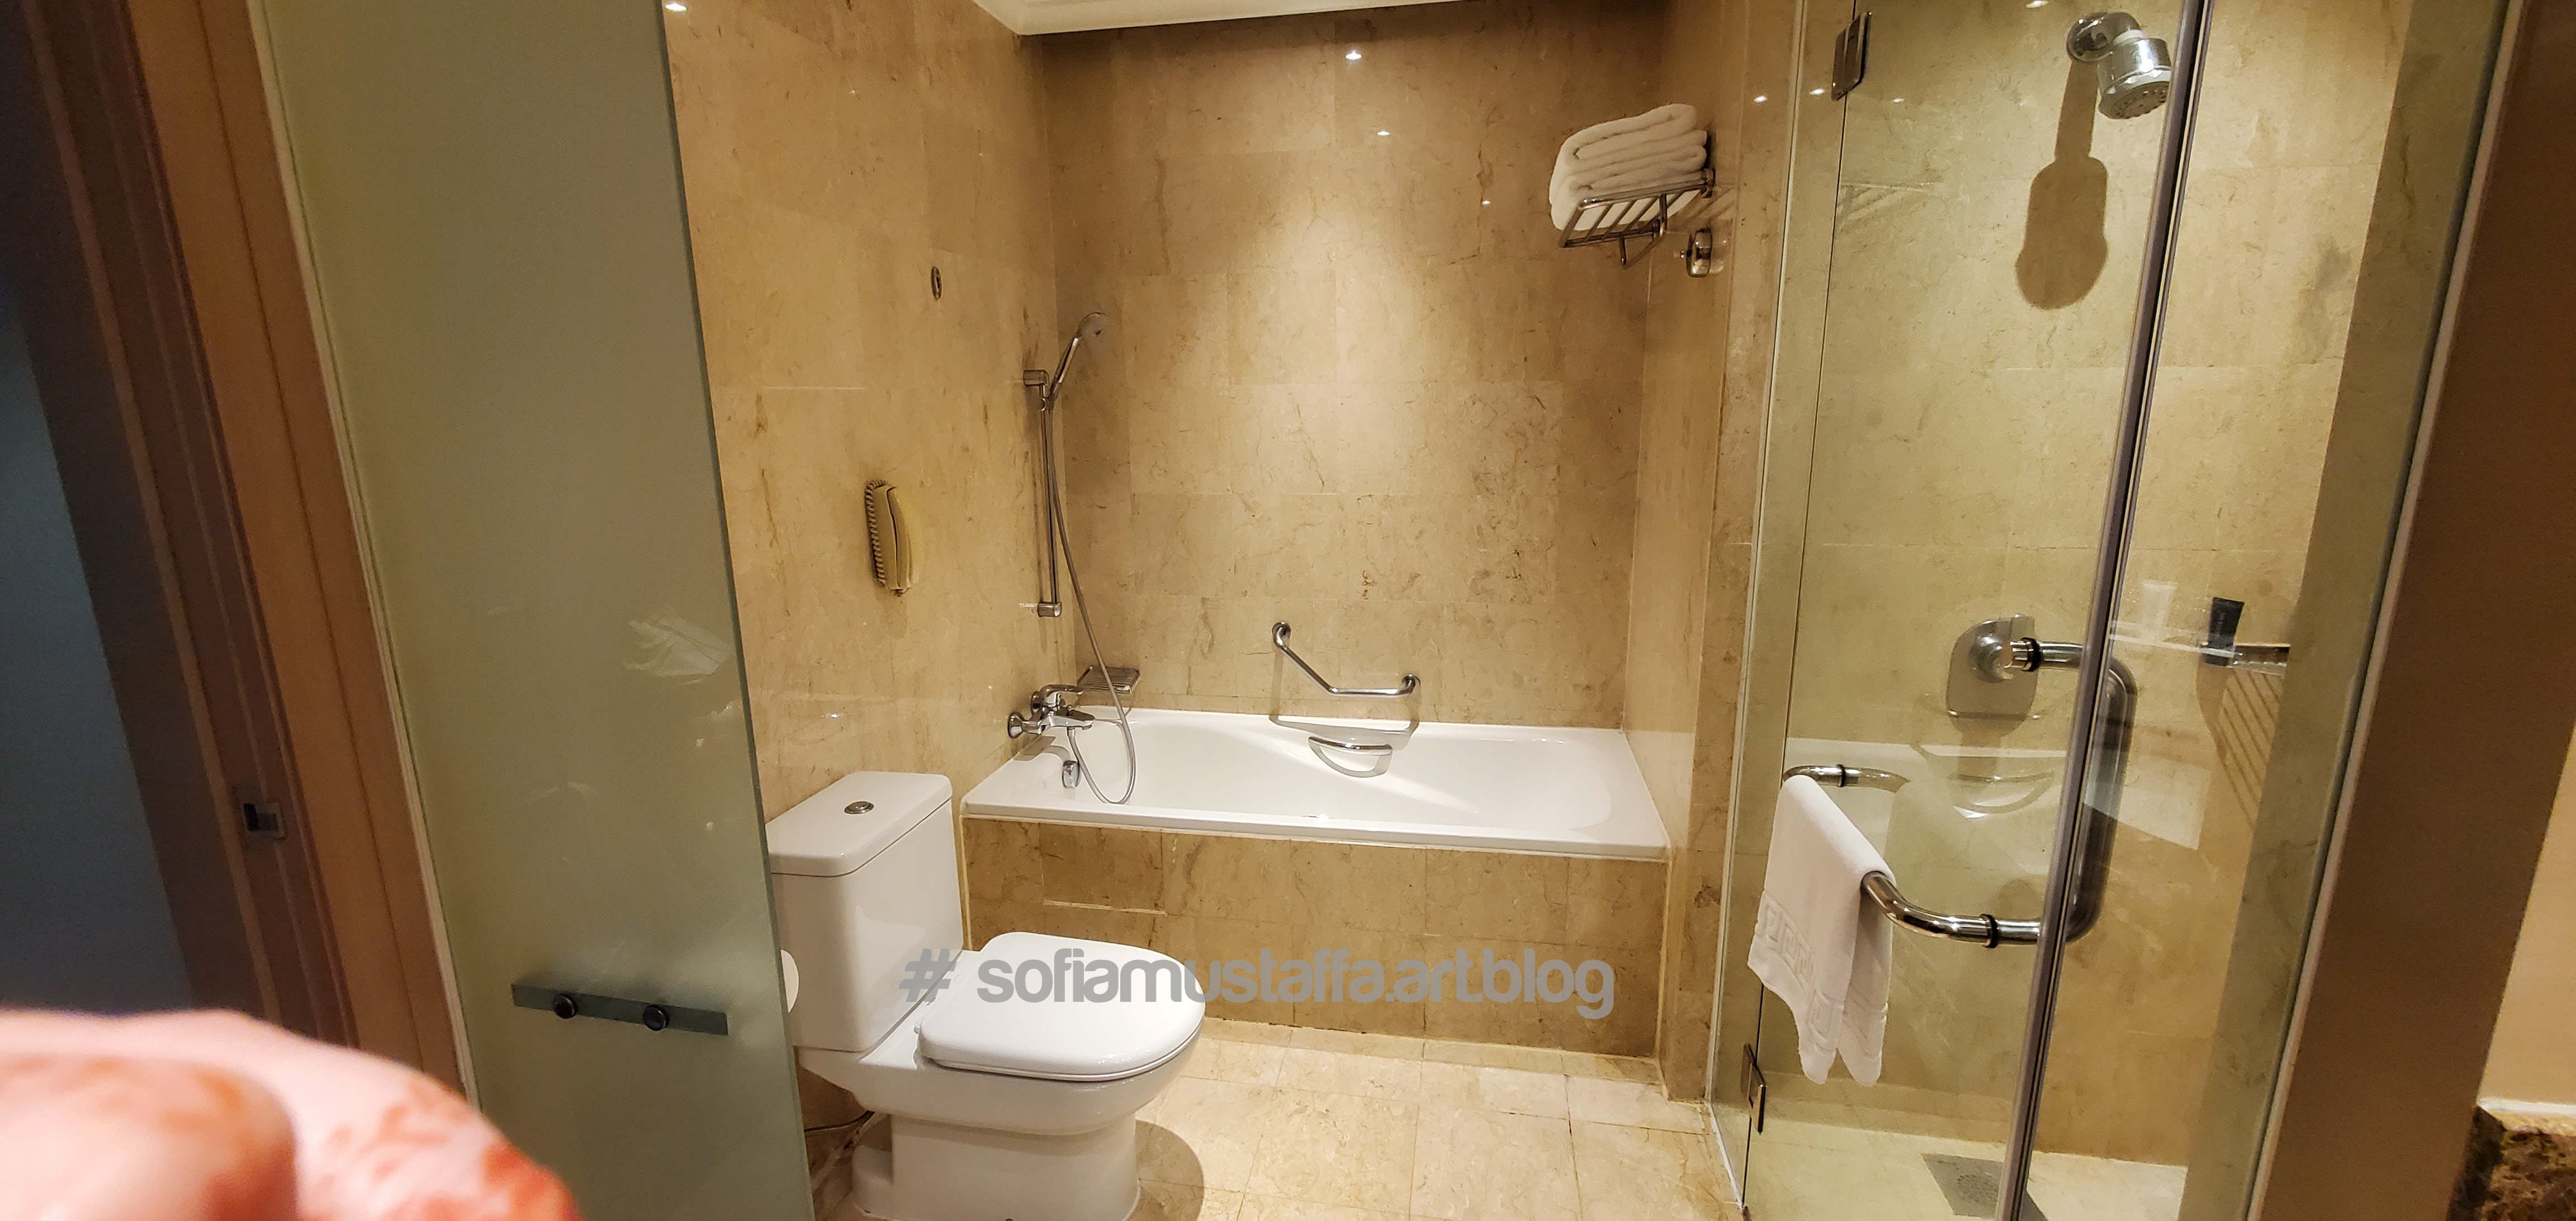
I love the bathroom. Its very huge and well organized. It got both shower and bathtub. Got 3 sizes of towels-body, hand and face. Got comprehensive toiletries as well🥰
Well organize, the tissue is very soft as well..very detailShower-shampoo, body gel and hair conditioner available
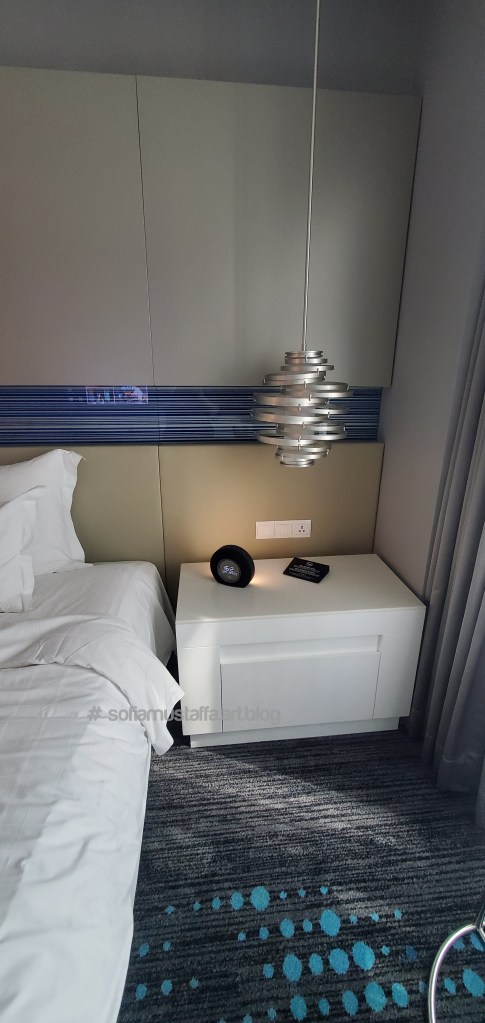
My fav part is the side table and smart alarm clock beside my bed side. 🥰 I survey, the alarm was around RM 600 😅
My fav part…The most fav part 😁🤩
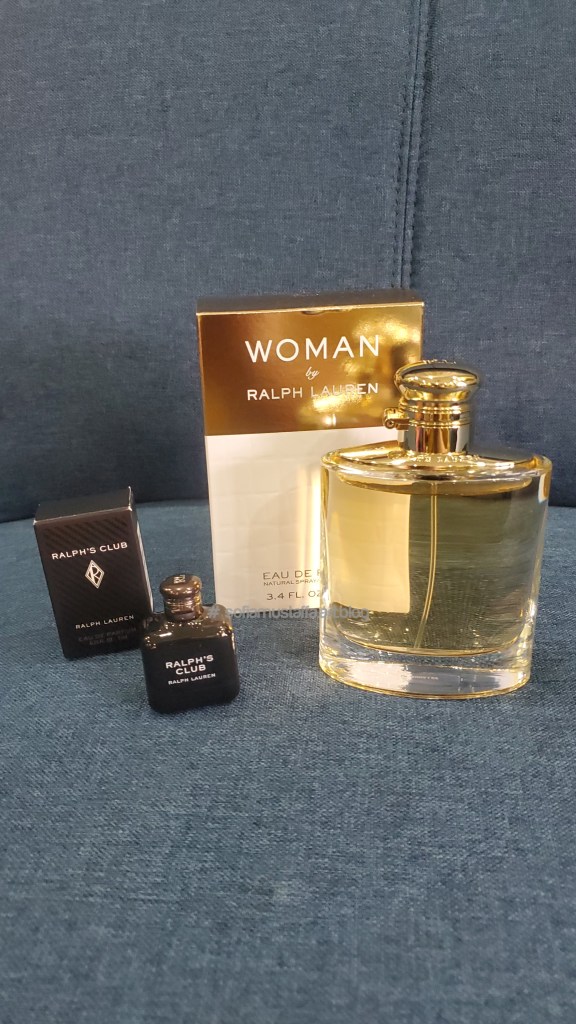
Okay, after check out the hotel, I went to the opposite Pavillion mall. Actually, you can just simply walk. Its 4 minutes walk, but well..I just stay for a night and don’t wanna waste any minutes, enjoying the hotel. So, after checkout, I went to the mall and bought a parfum. 🥰
Not bad…testing a new parfum. Most of my fav have discontinued 🥲
Okay guys, thats all my minitour about my short stay in a 5star hotel, located at the center of KL’s heart 🥰
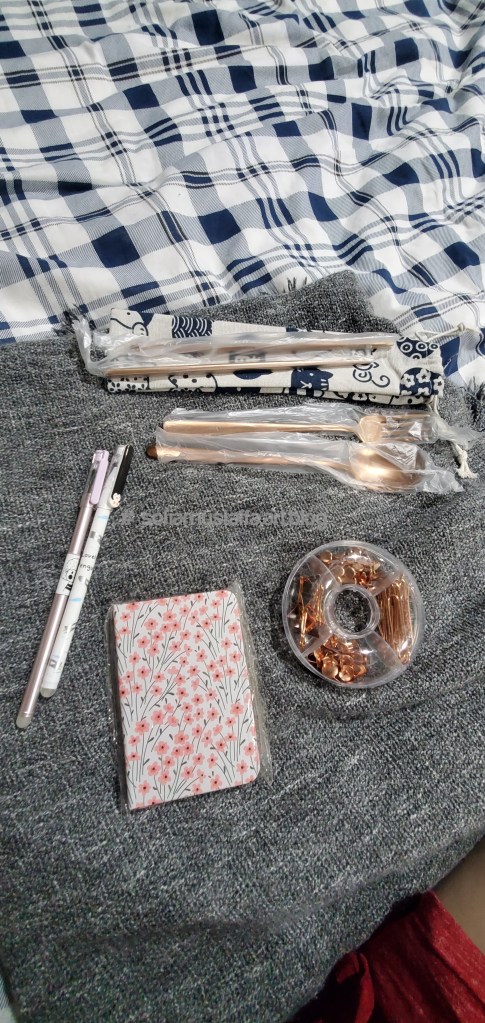
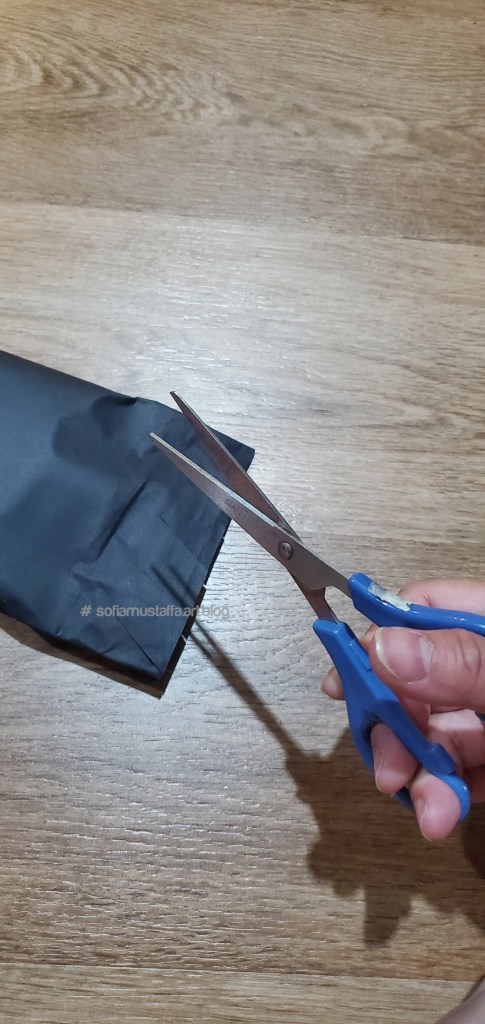
Hi everyone! Its midnight now and its public holiday in our country. I just finished wrapping my farewell gift to my supervisor. Its a habit for me to give away farewell gift to my supervisor or my colleagues as an appreciation for their leadership and sharing knowledges with me.
Okay, so what I bought is….a flatware set, small notebook, pen, and stationery pin set..
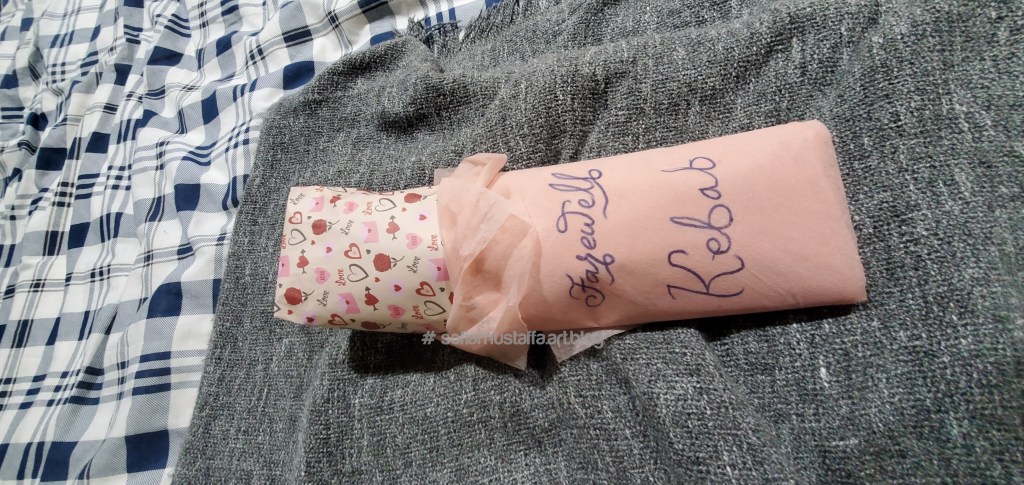
Well, i don’t have box to put all things together. So I decided to just wrap it. It turn out..holding it, felt like holding a kebab. So I wrap the gift to be look like a kebab 😂
Tada!!! A farewell kebab from me 😅
To be honest with you, it’s really tiring to wrap uneven present shape. I just follow my heart and it turn out it looks like a kebab. Haha..till then guys…to be continue…time to sleep…😴😴😴
Hey!! You guys!!! I’m finally debt free with some extra 35% of my salary to save and invest on. Wow!! It’s a great achievement so far and the best thing happened to me. Alhamdulillah. 🥰
Minimalism somehow helping me a lot in my real life, in term of financial, relationship, space, happiness, spirit etc.
Minimalist to me means, you only do, what you think the best for yourself, and leave those unnecessary stress. Think wisely, before you act. Giving example, when you want to go shopping, you need to think if it’s really needed or just something you want? What your priority is?
In term of relationship, what you can do is to think what things that can give you happiness? Is this relationship trouble you, or makes you happy? You can measure it by how much you laugh and how much you cry. If you have been cried a lot, then you should move on from the toxic relationship. If it makes you laugh a lot, then you should stay and enjoy the relationship.
Same goes for financial. You gotta audit your credit. What things are your assets and what things are your liabilities? Minimizing your liabilities by limiting your commitment. Giving example, I had settled my car loan, and at same time, I had my raised 30%? You need to look forward your priority. Does your car giving you headache by repairing all the time, or your car just fine and running well? If it’s running just fine, then you shouldn’t think on spending your raised in that unnecesary commitment. Most people will simply upgrading their car when they had some raise/increment. This is really not necessary most of the times.
In term of groceries, is the best to have groceries checklist. But, I believe most of us just too busy with our daily routine and don’t have much time to make the list. Then, you should buy things which is your priority, the one you needed and left behind what you want. At times, it is very hard to decide. Well, my kind of minimalism is my happiness is my top priority. Giving you some example of my current situation. I’m living with my parents house and we have lots…of cusion. I love boho kind of cushion, I did bought but limitted to only 3 instead of 11 cushion that I put in my cart. So those what I want, I limit it and cut it..by buying only 3 and it perfectly suit my bed 🥰
Hello!!! HellOoooooOoo…hello!! Everybody! How are you? Today, I got a lil time for myself..so I made some diy items.
My room is super duper dusty lately. I’d bought dust mite vacuum, but unfortunately the parcel was lost during shipping. I bought it again, and hoping it won’t lost again.
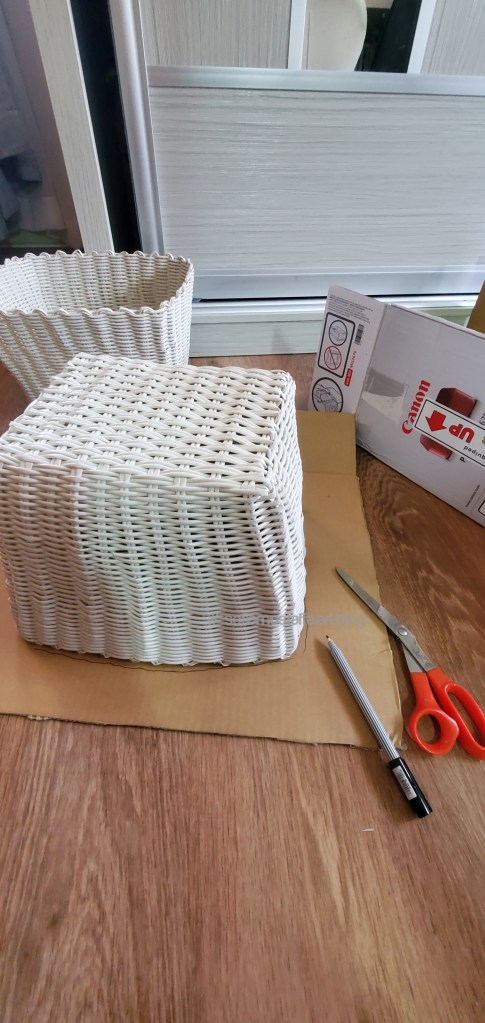
Because of my room sooo dusty, so I was thinking to cover up all my baskets. You really can’t see with your eyes the dust on fabric, but its there 🥲
So I do some research on how to diy it by using recycle things I have now – boxes.
Things you need to make this lid are:
1. Scissor or cutter
2. Glue gun
3. Marker pen.
4. Ruler.
5. Big empty box.
6. Wrapper paper.
7. 10mm jute – optional
DIY basket’s lid 😃🥰
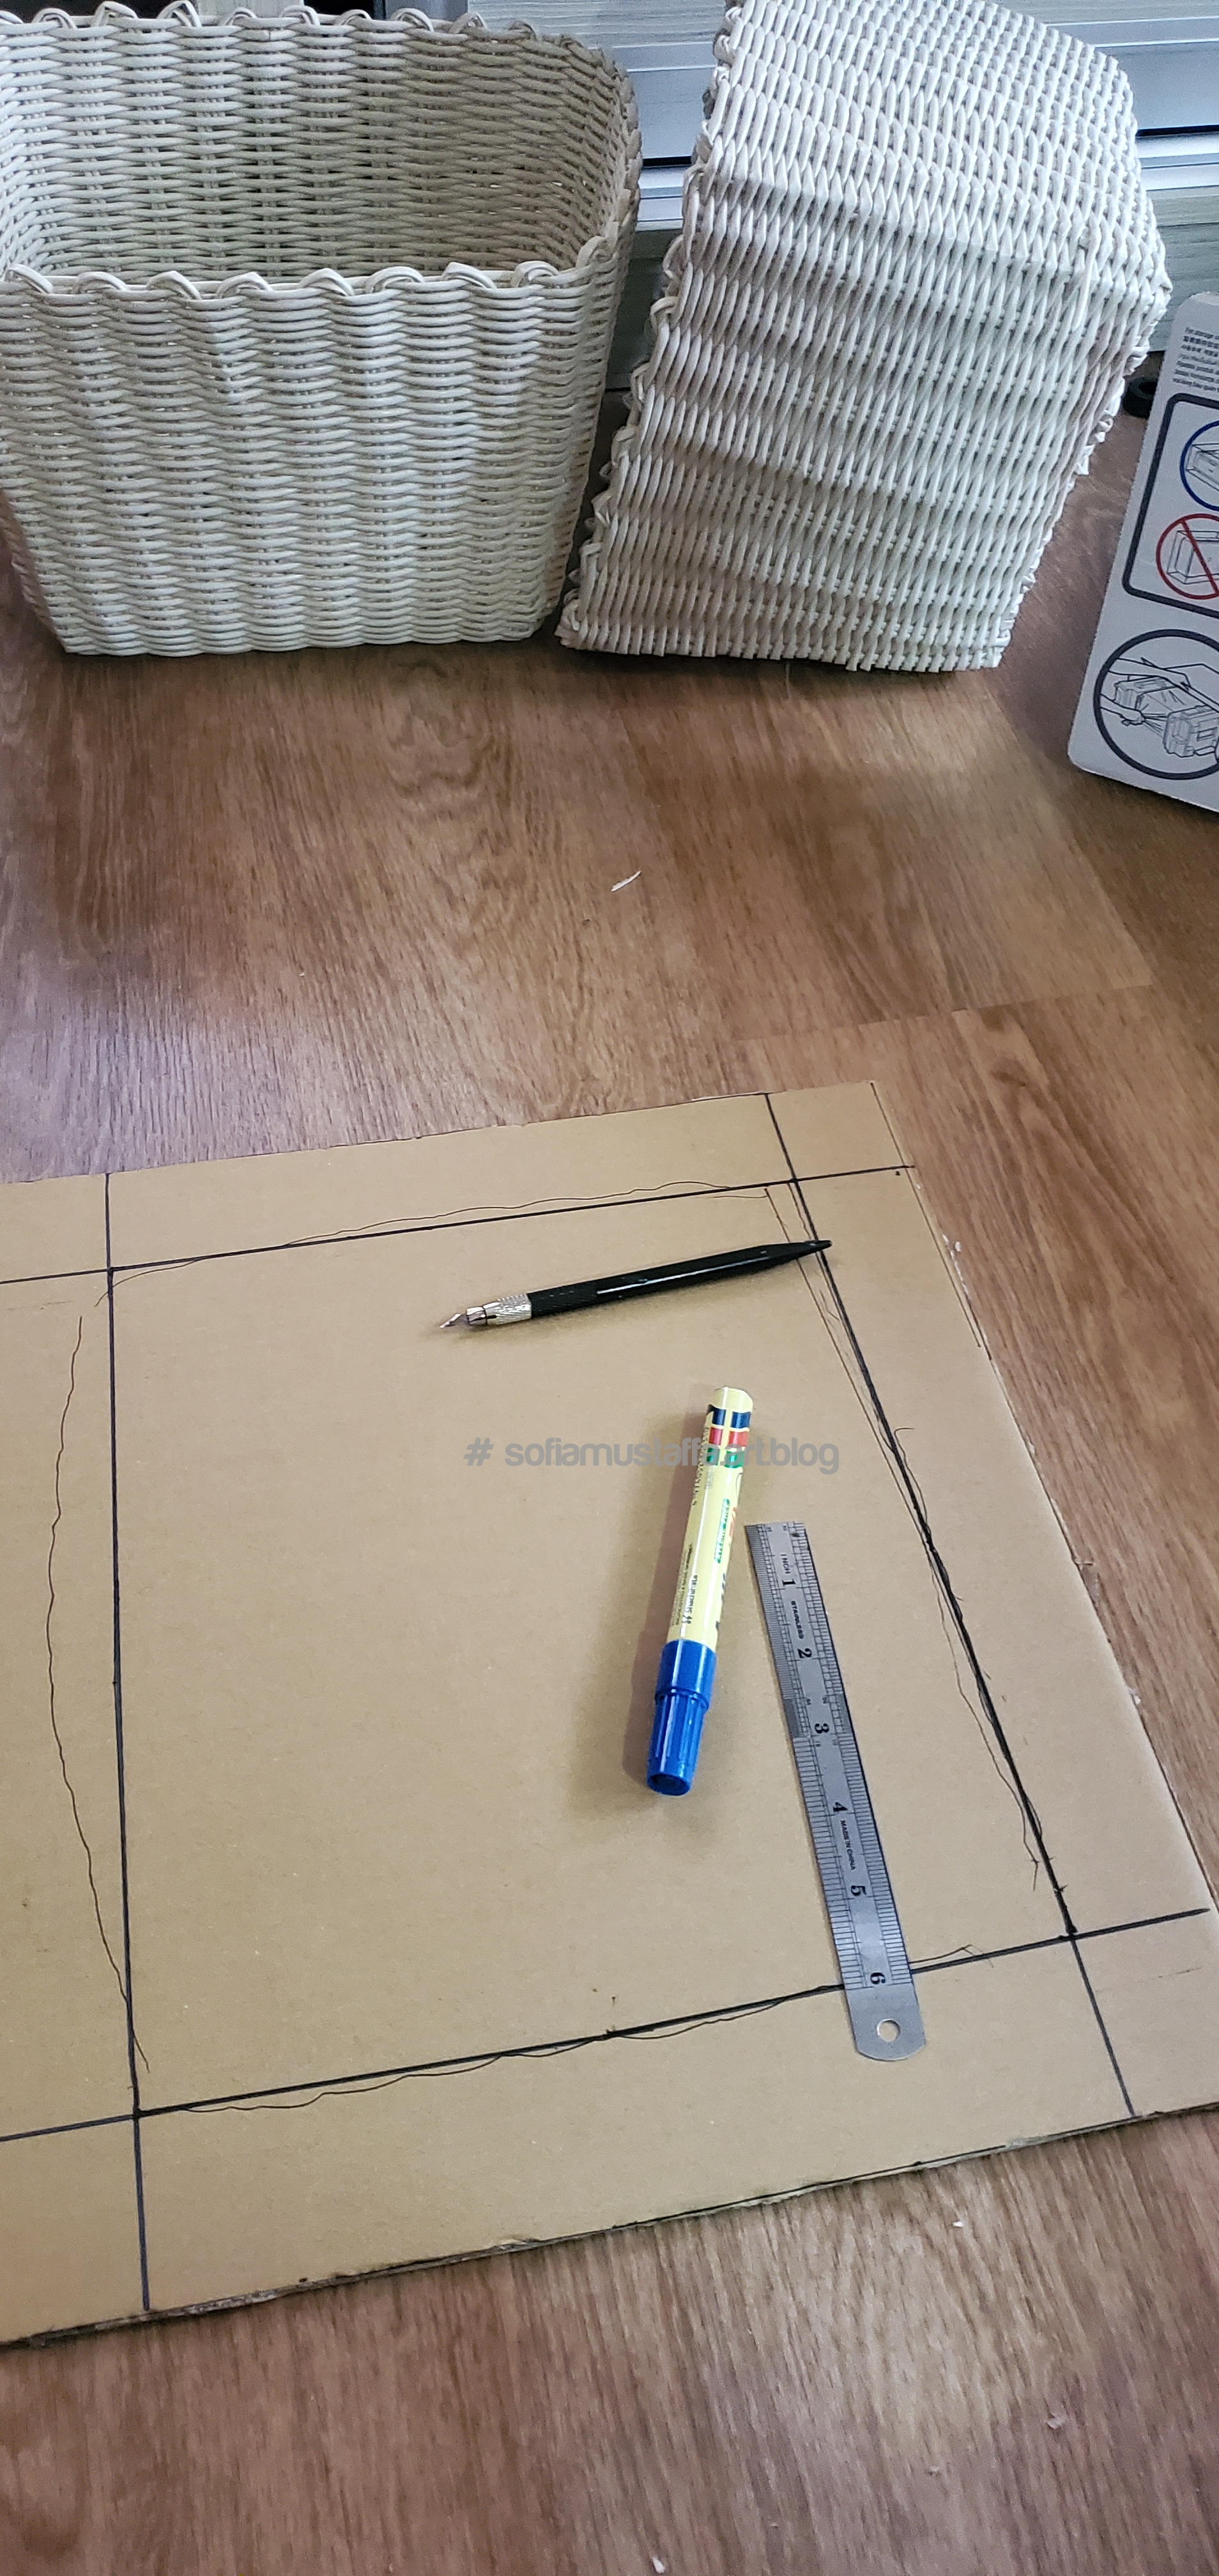
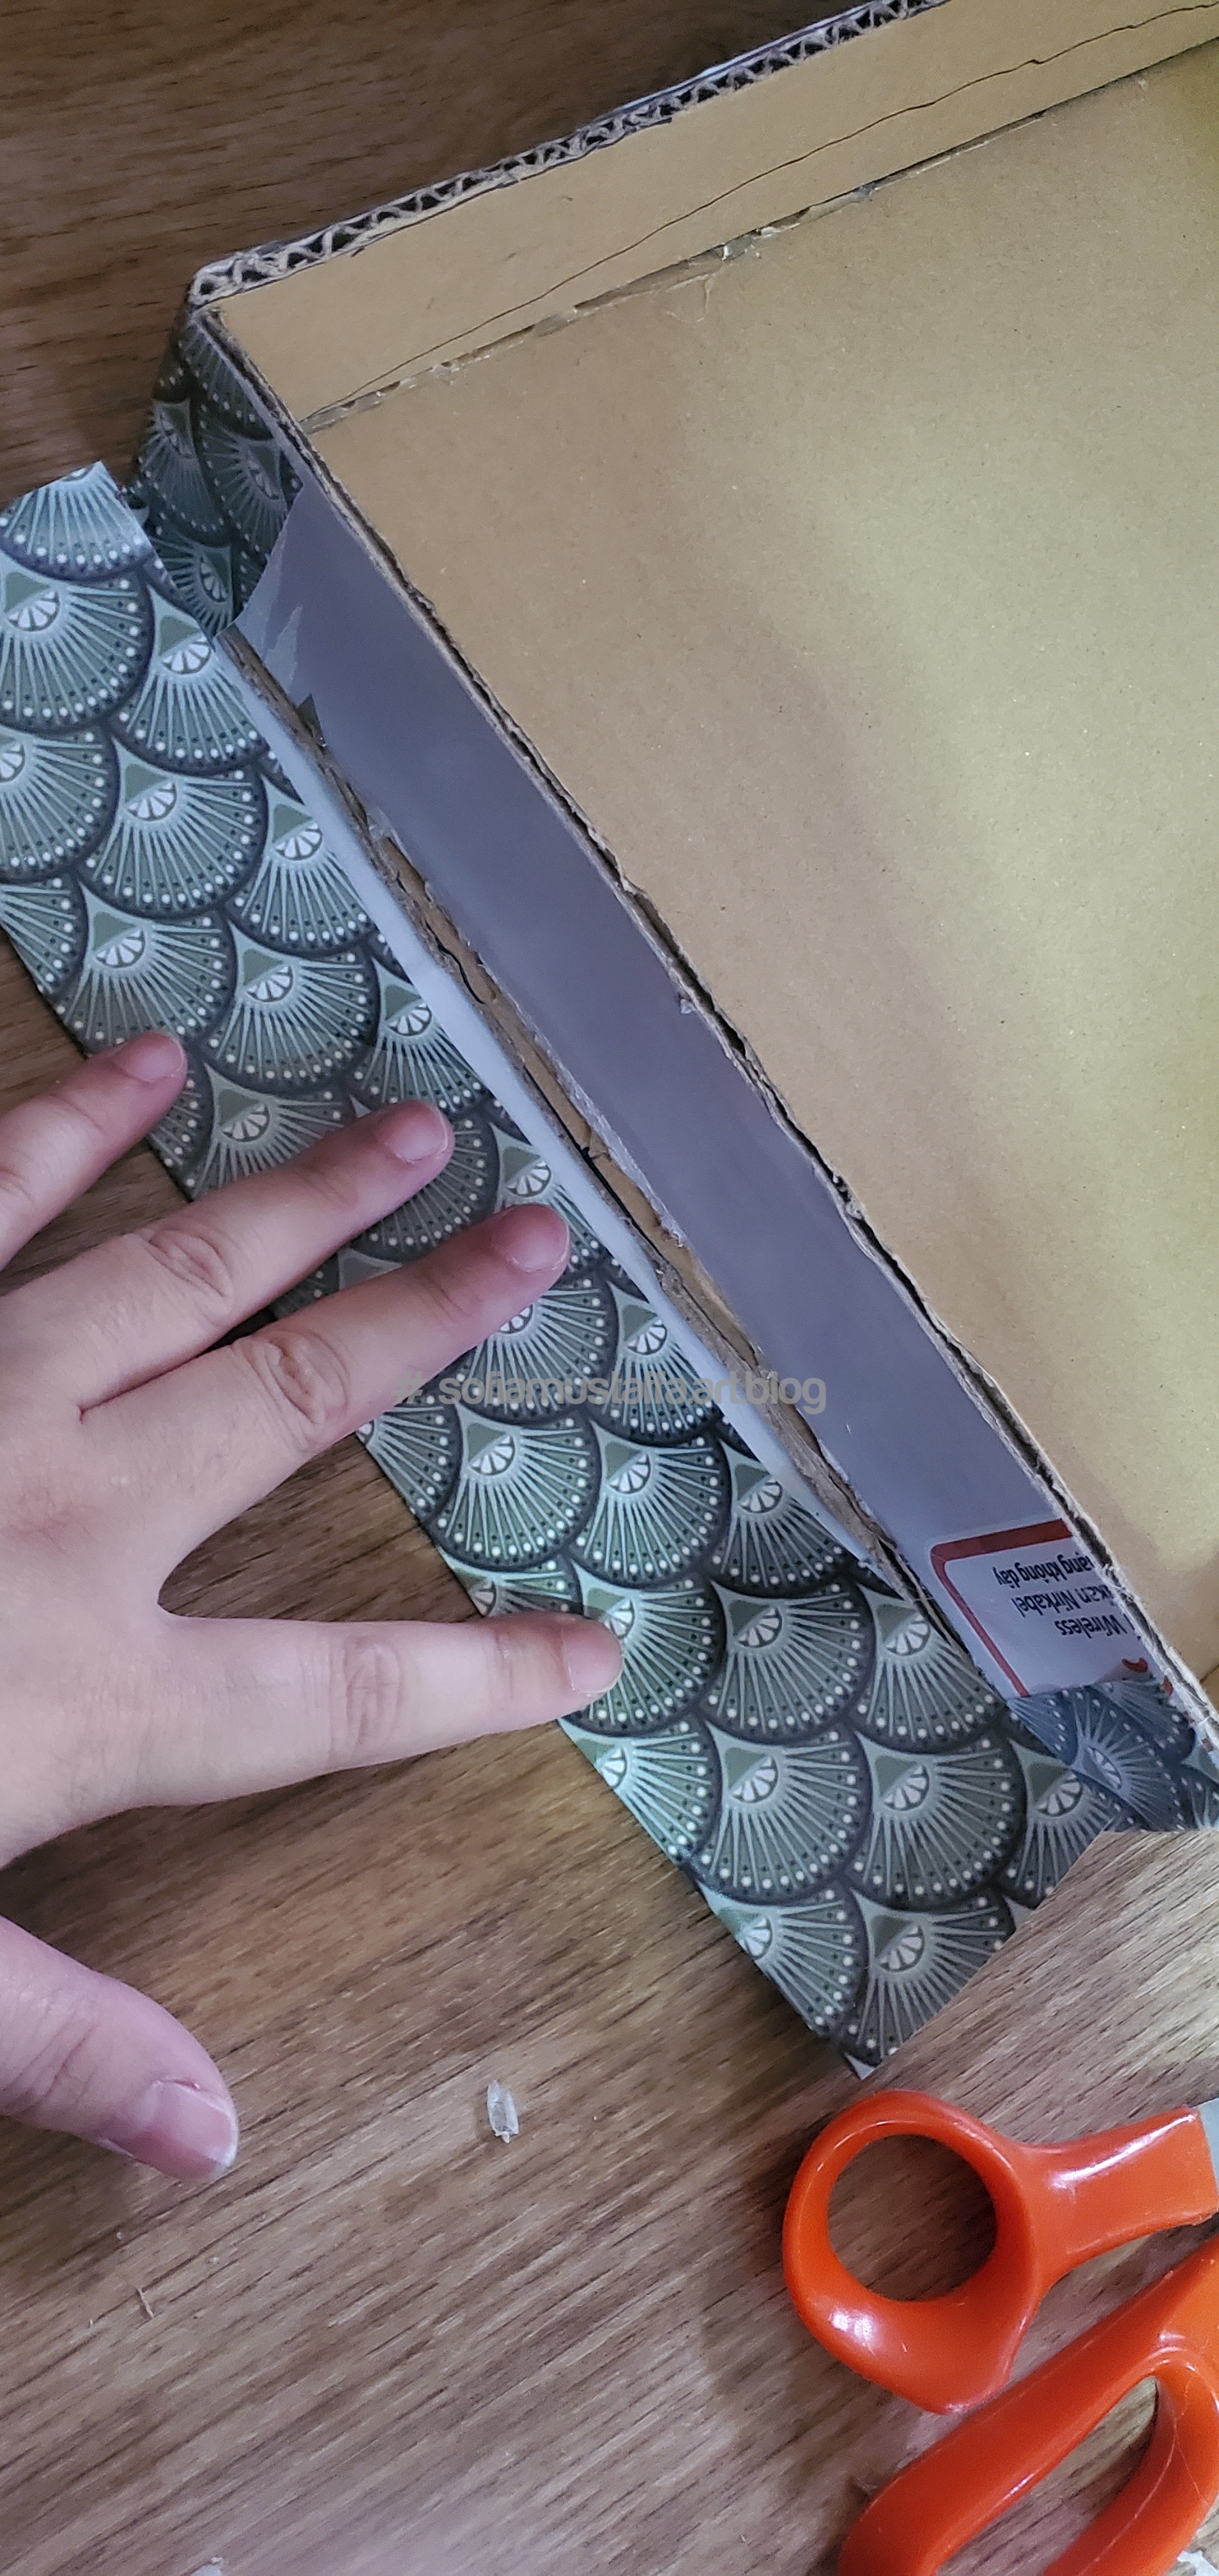
1. Make a measurement of the existing box. Well, u can measure using the ruler, but I prefer easier way. Just put the basket like this on the box, then line it 😂
Cut the box, line it with pen.
2. Then, u make a straigh line with all points with thicker marker pen.
I make few points on the box, then straight it with ruler and thick marker pen.
3. Cut all the lines!! I cut it with blade first, then cut it with scissor because the box is soo thick 😀
Straight cut
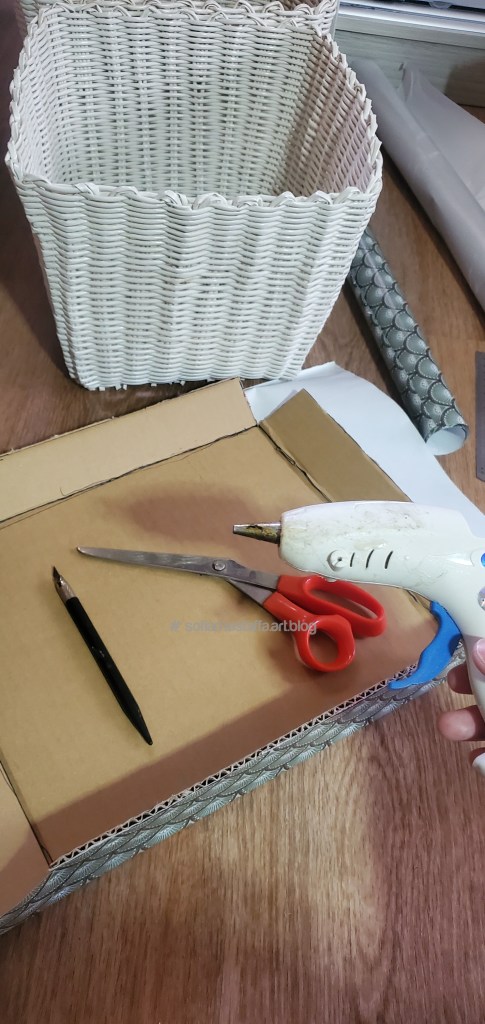
4. After cut all the lines, I glue the lid with glue gun. U need to wait for quite some times before applying the glue, to ensure the glue is smooth, coz we want a smooth surface for the glue. Until, its liquid state, then only u apply it on the box. Or else, it will easily tearoff and not glue properly 🙂
Cut the lines, and glue all the edges, make a rectangle lid.
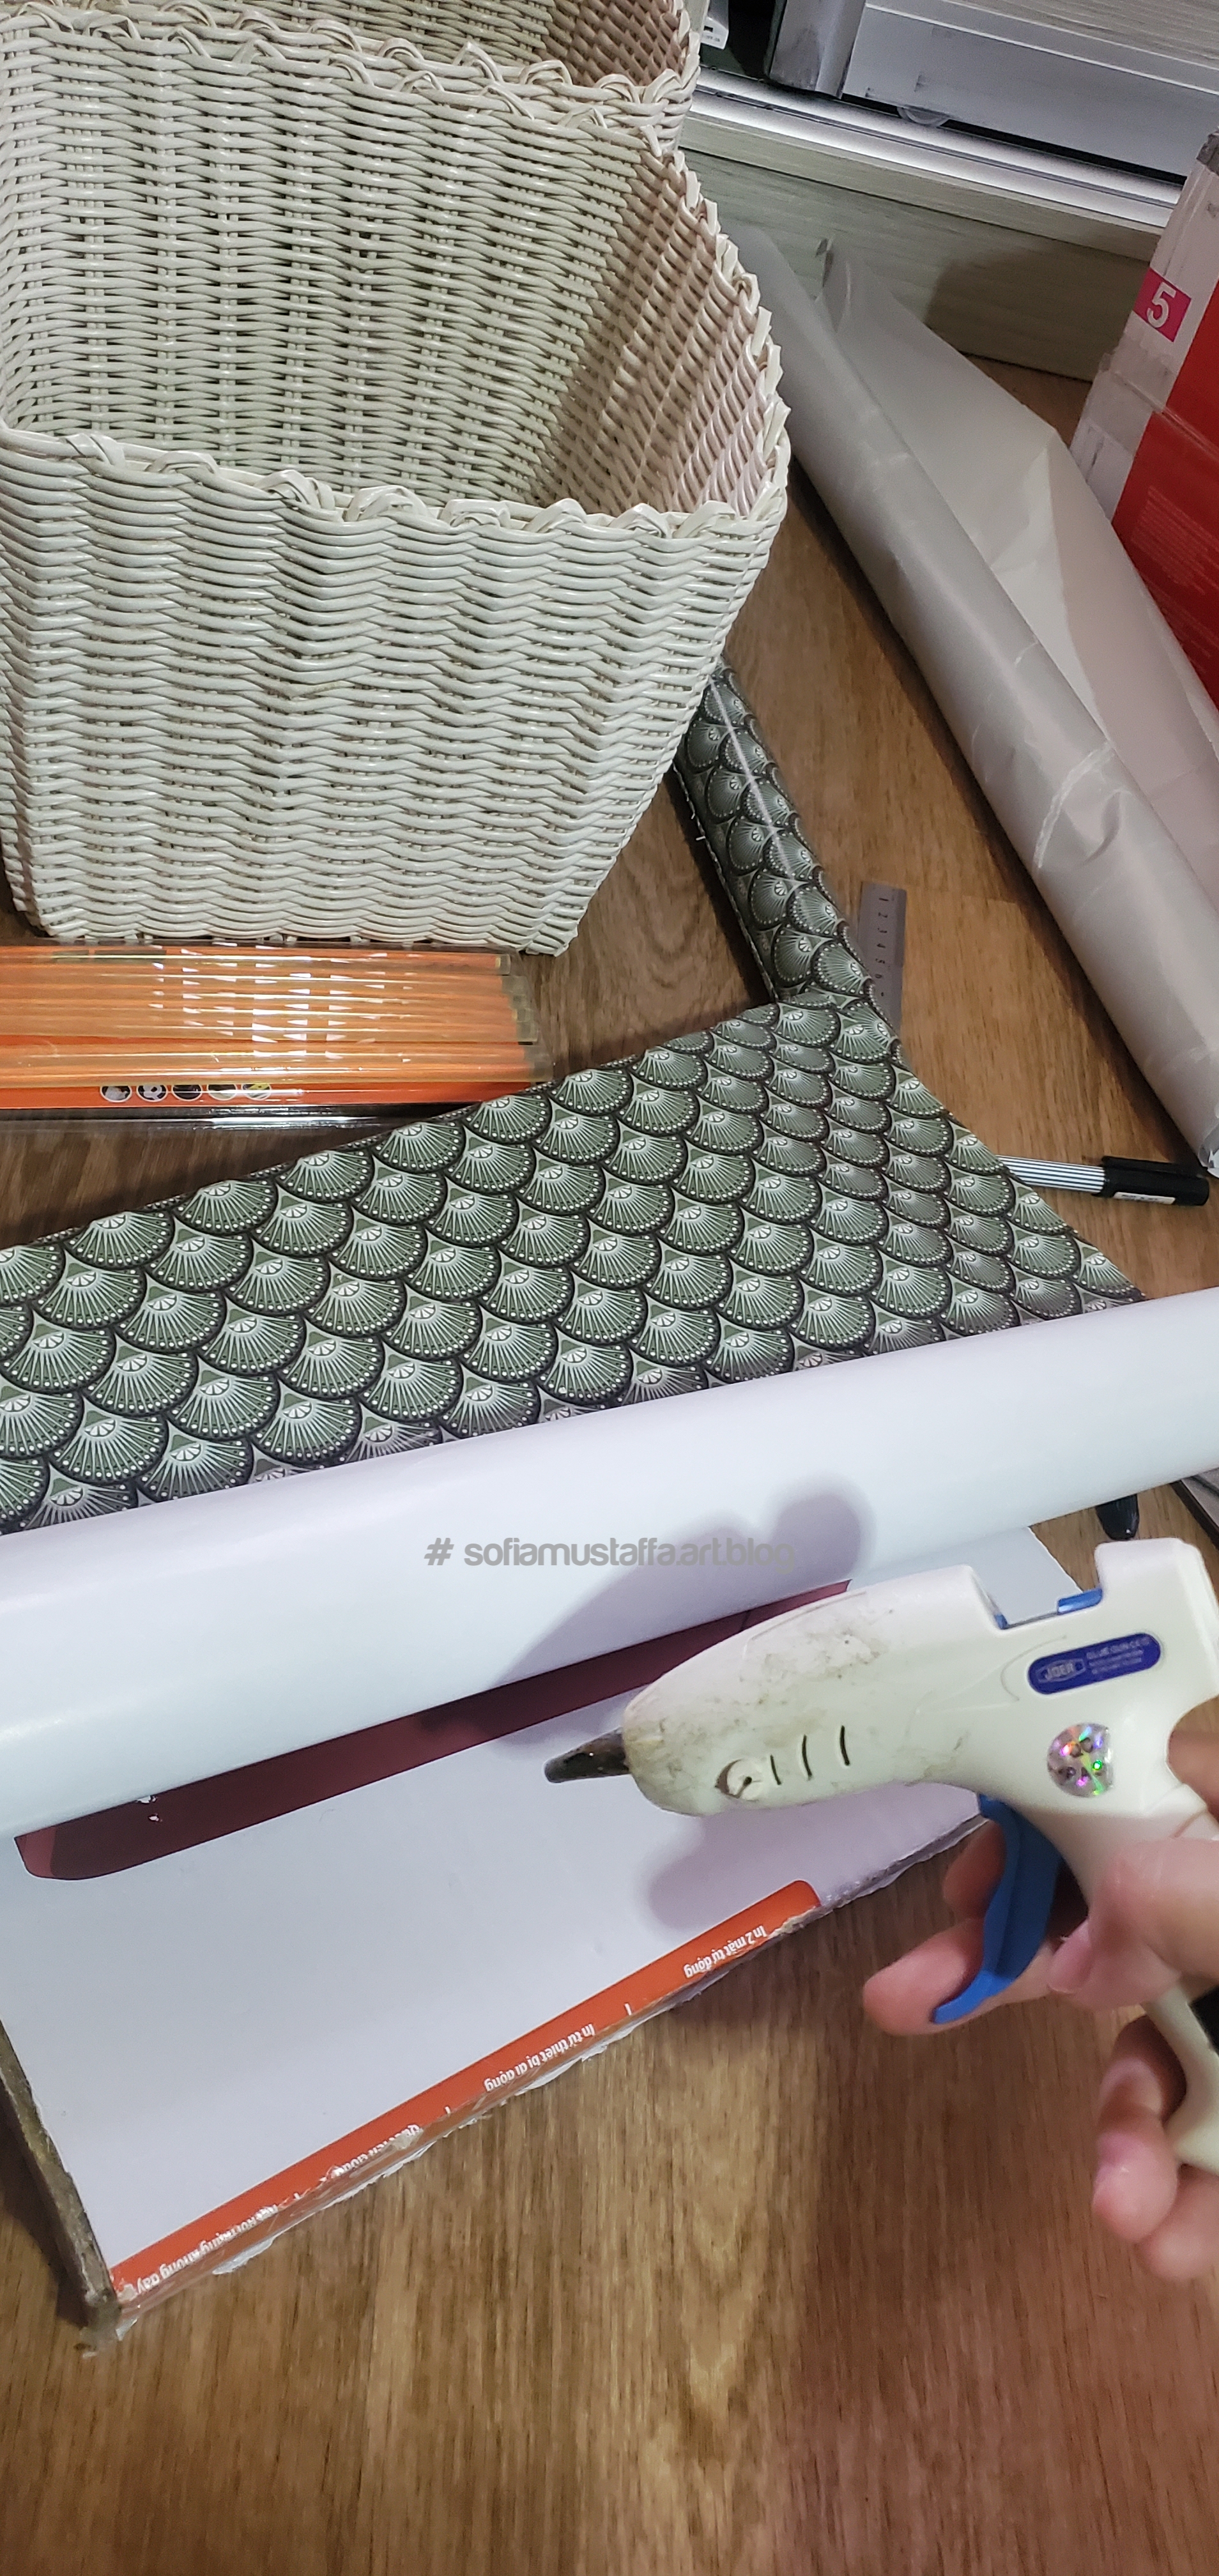
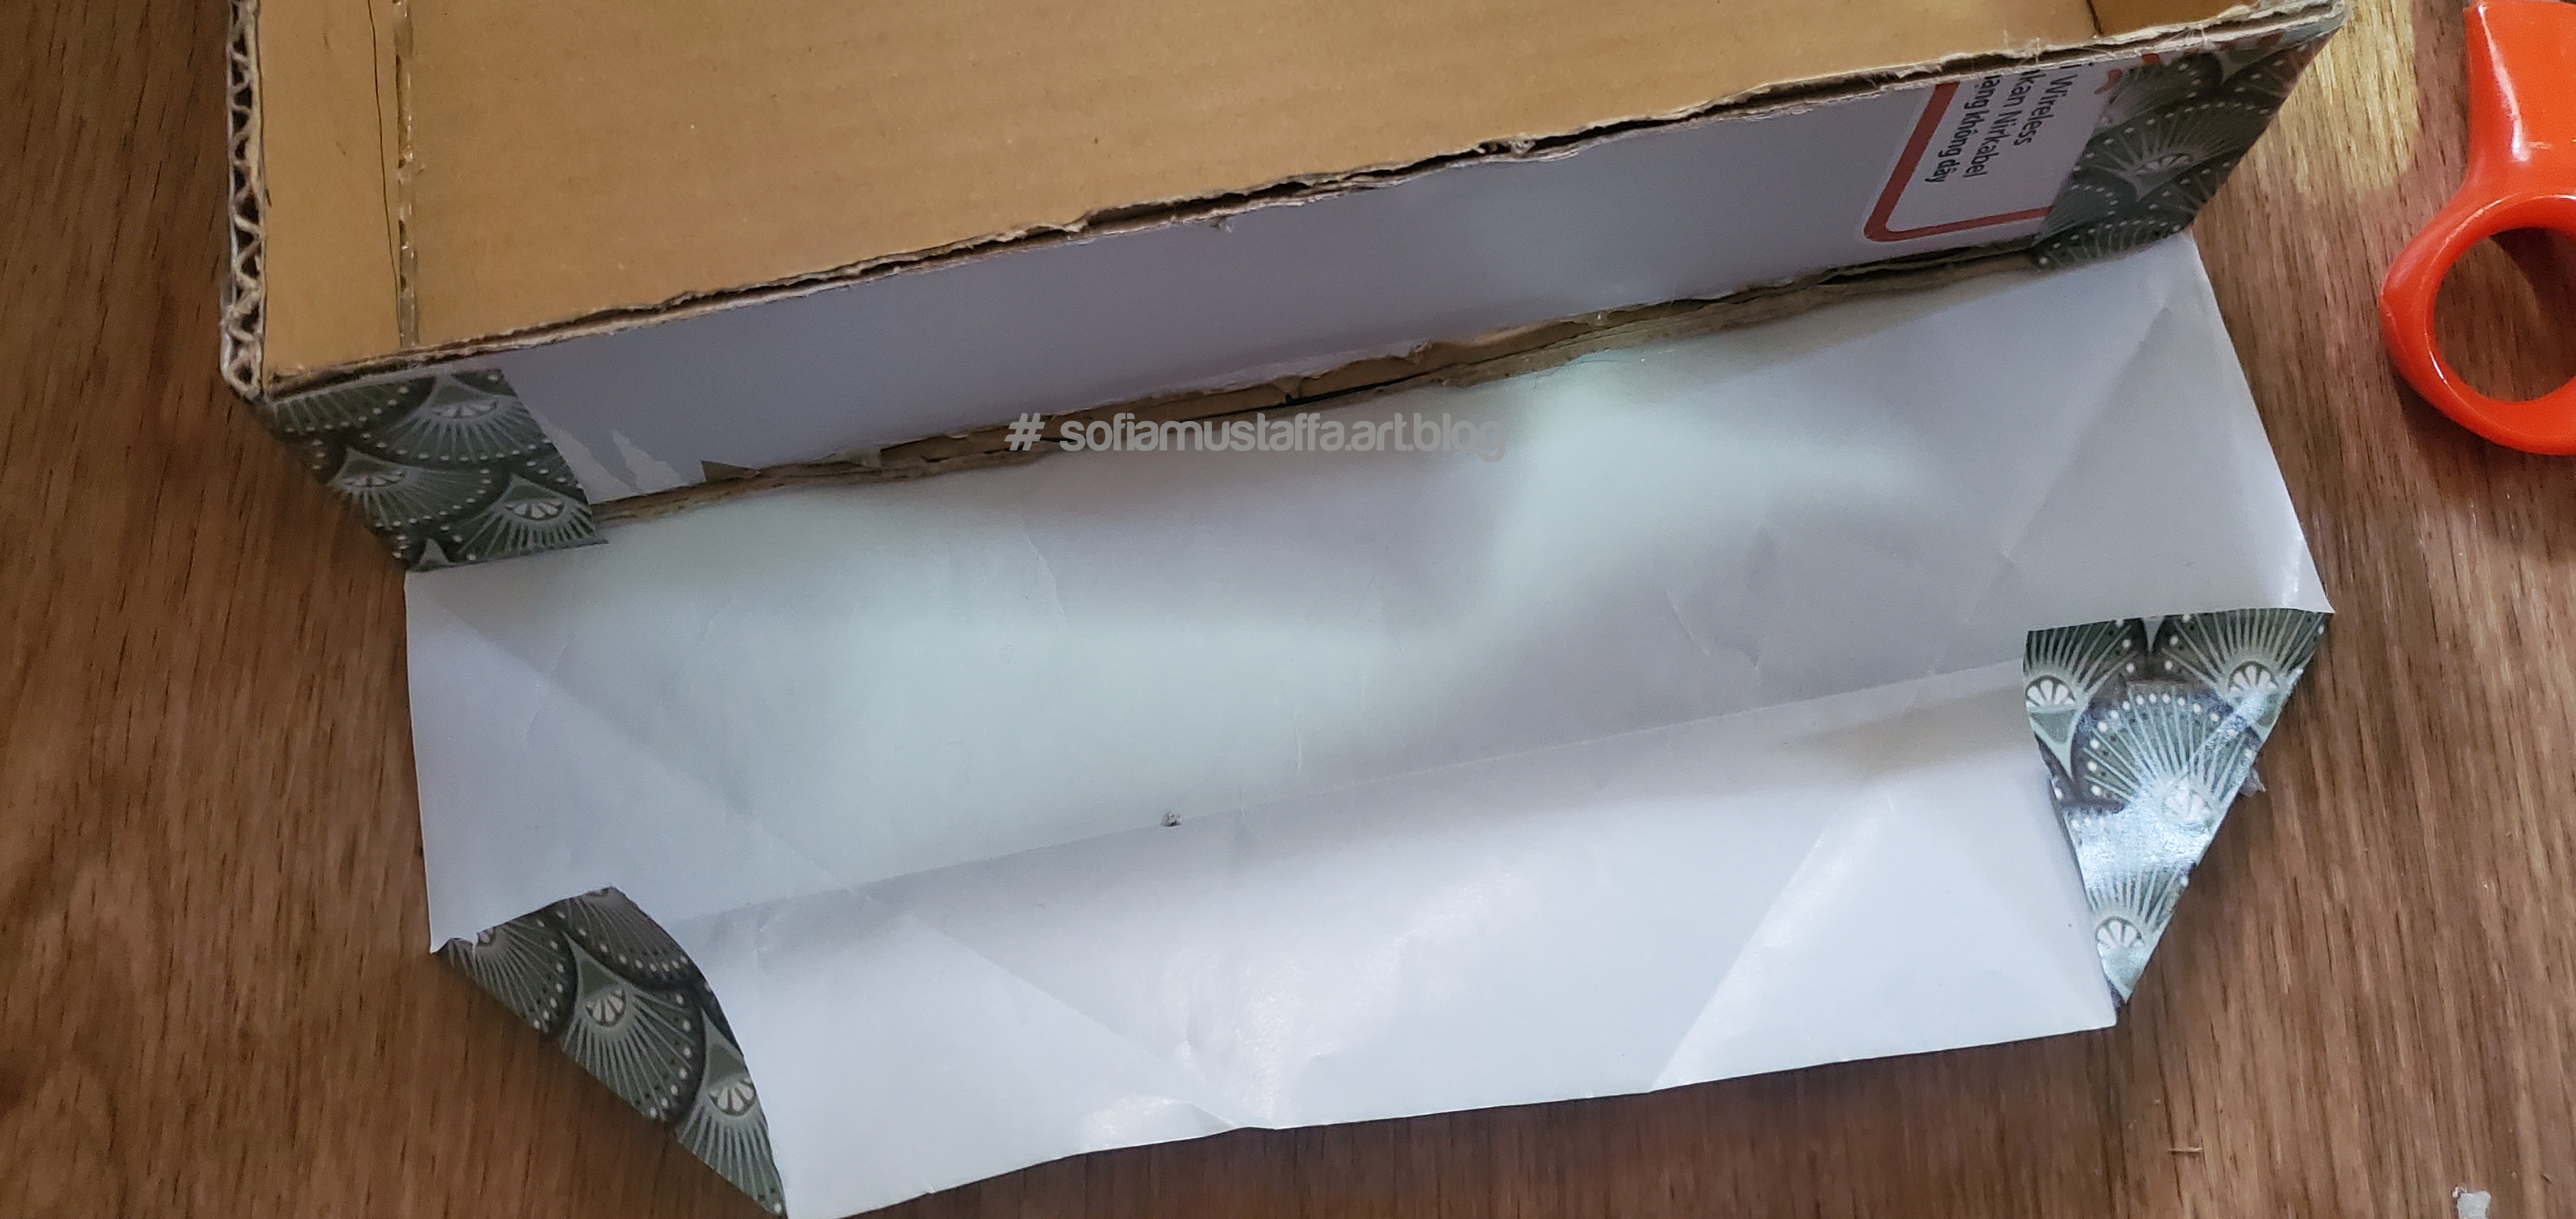
5. Once u can see the lid shape, wrap all way with wrapping paper. I prefer use whatever I have now. U can do ur own creativity to decor your box.
Glue all the wrapping paper using glue gun 😁
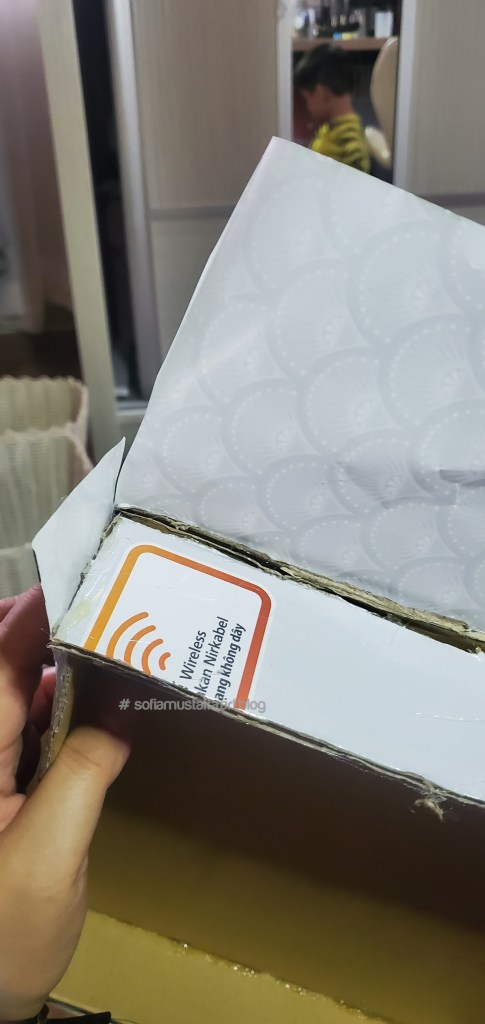
6. I glue it all the way. At the both ends of the box, there are some extra paper. So I fold it and glue nicely.
Cut it then glueMeasure first and make some fold. Then fold it into 2 like this..And…fold like this…i glue the end and glue it all the way…hahaha. Im glue here…glue there..glue here..glue there and glue all the way…haha..gluing while singing the song!! 😂
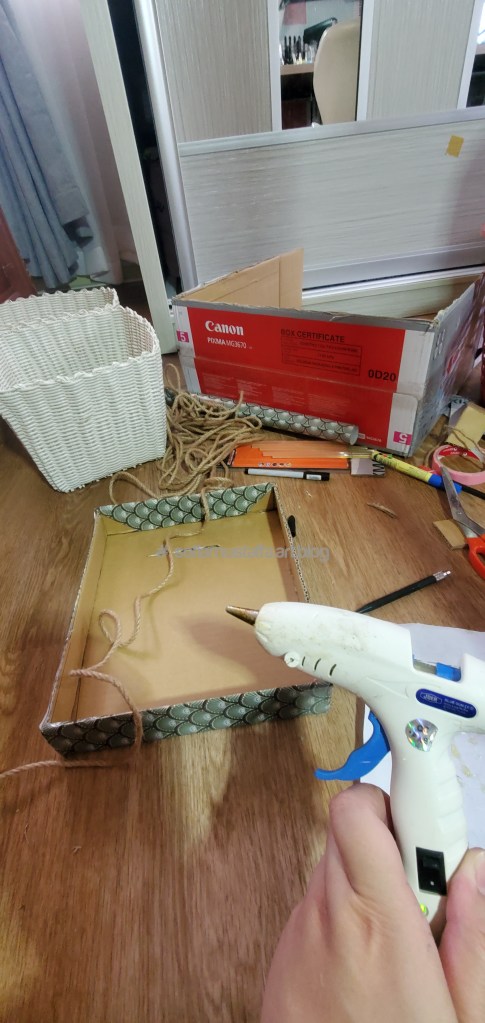
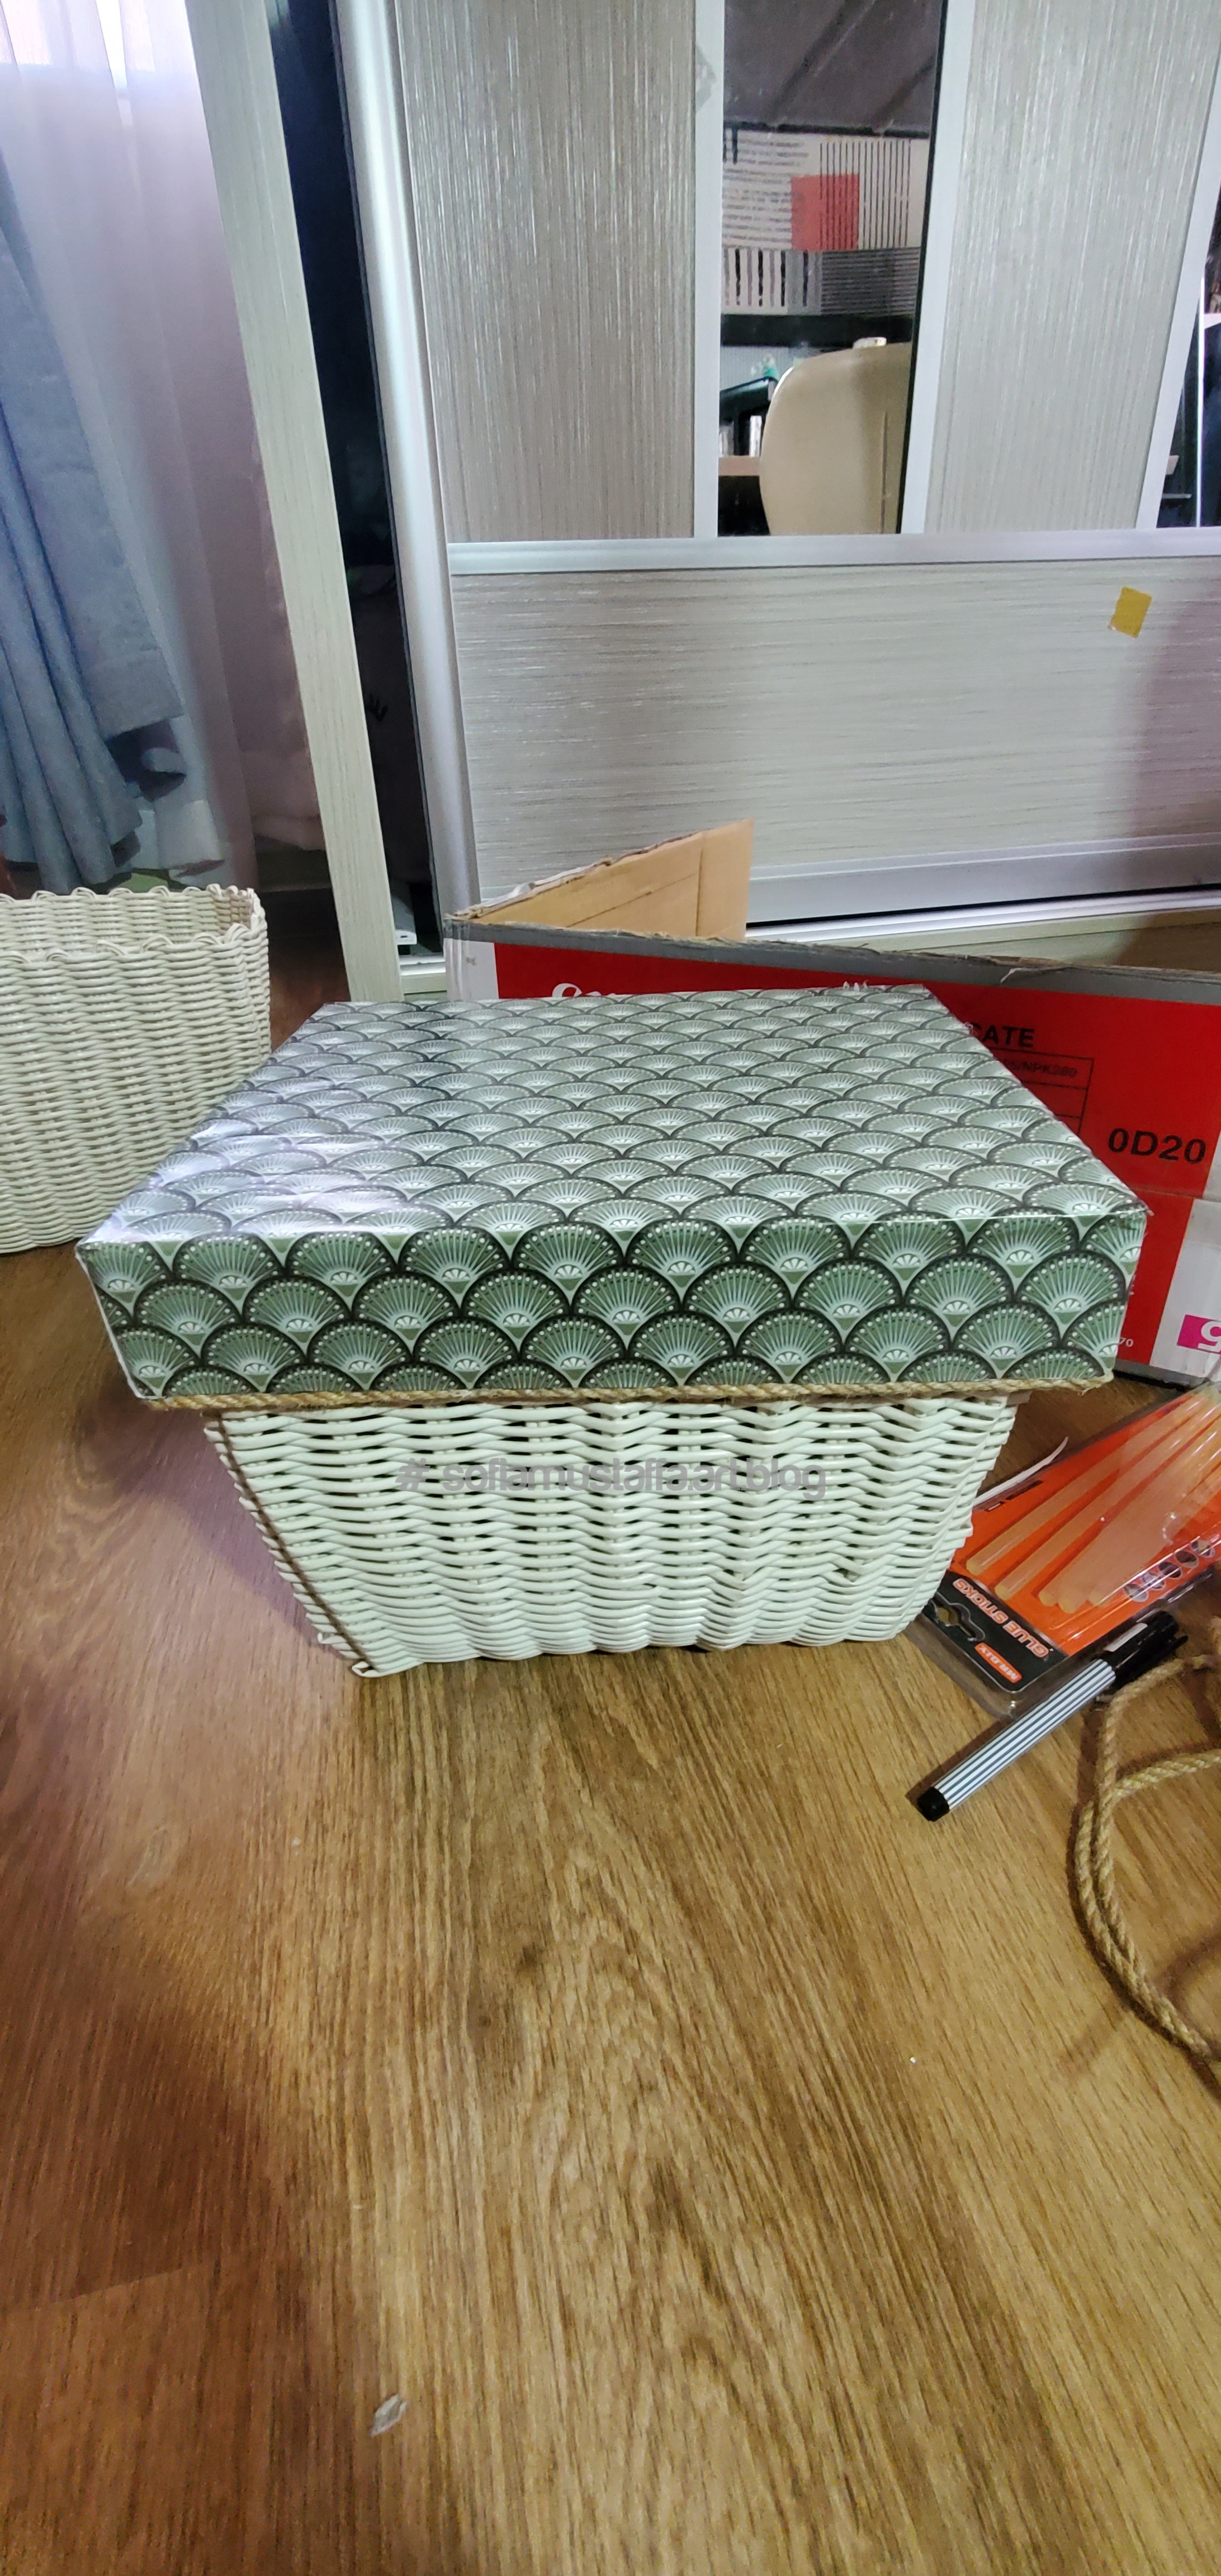
7. Tadaa!!! My box’s lid is DONE!!! Just a finish touch up to make it a smooth finished product, I glued jute rope at the edge of the box.
Glue gun all the wayyy…yeppie!!! 😆😆🥰Tadaaa!! Okay, u need a lot of patience when gluing this. U can’t do it fast, because it will smear or glue wont stick longer. U need to do it, slow and steady..then u will have a smooth nicely glued jute rope 🥰
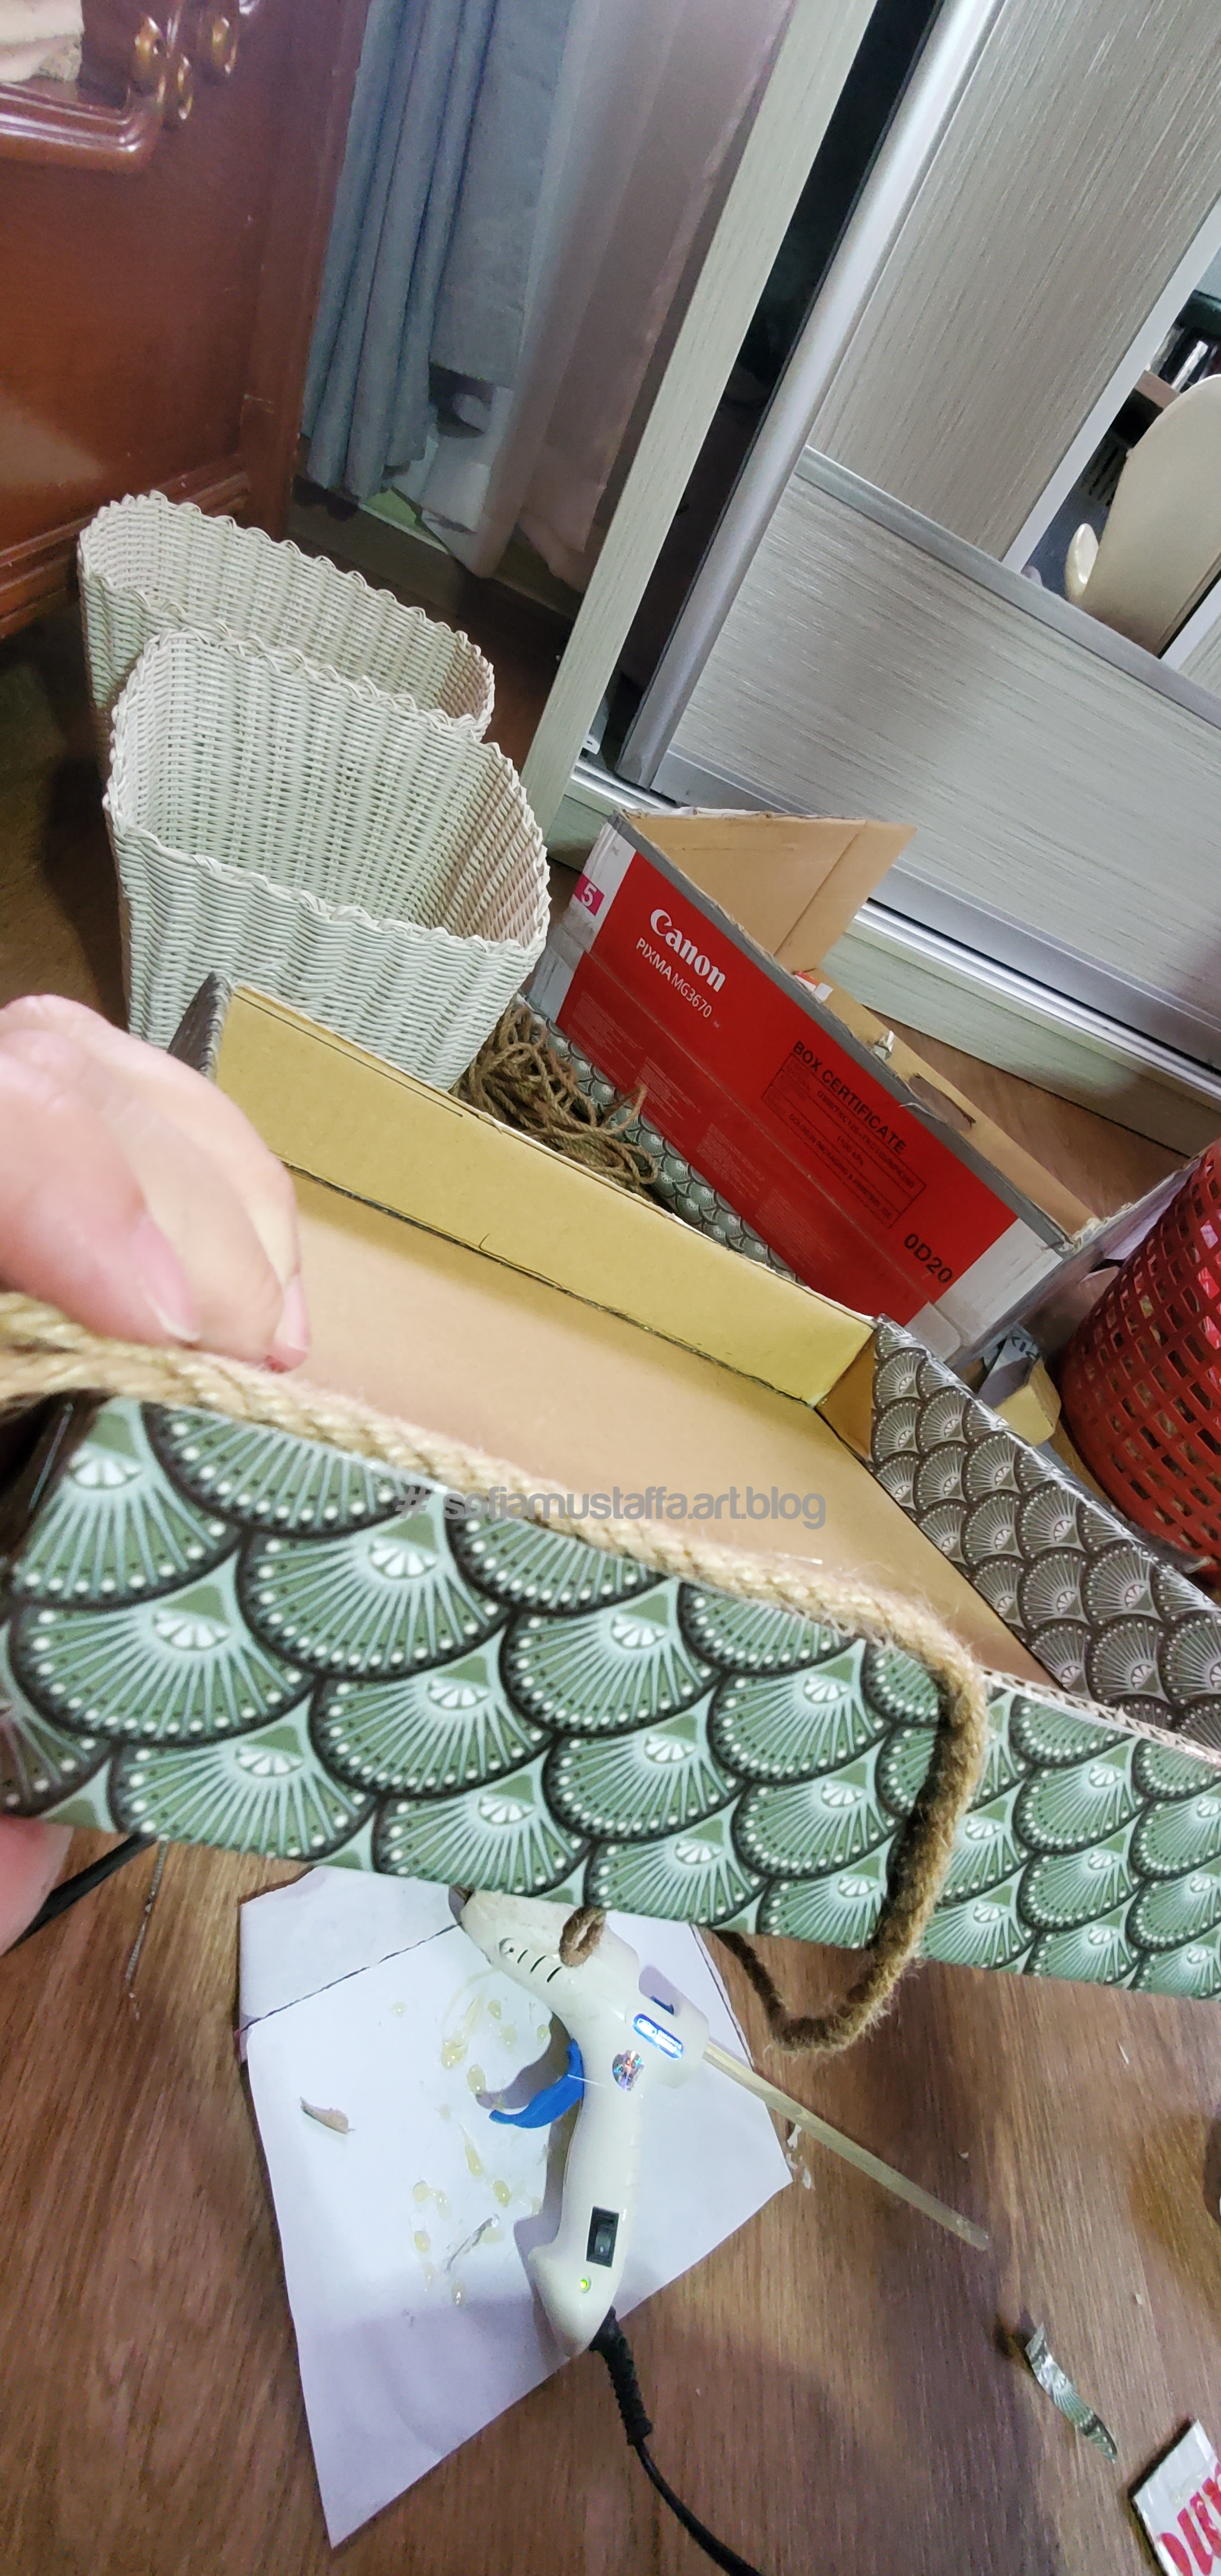
8. ALL DONE!!! 😍 My basket is a flexi material. I can bend it to fit the lid 😂😂 Doesn’t fit? Just make it fit right there by force 😆
Jeng jeng!!! The finished product is here. Now dust can’t easily go into my things in that basket..hahahaha. Problem solved 😆
Hello everybody!!! Good Friday morning, everyone 😘
Sorry, was busy with some deployments job. Just want to share with you a simple, easy and unique present wrap that I made for my niece. Haha, yes….you heard it right!! I love something which is easy, beautiful, unique and also cheap. 😂
So here u go, what you really need is…
1. Scissor
2. Glue
3. 2 plain color of paper
4. Cute ribbon or chocolate cover *optional
How to wrap a present – Cheap, Easy and Unique way (chocolate design)
1. Wrap the whole present like this, and put doible sided tape at the end of the paper. Make sure you fold it before put on the double sided tape.
Fold and put on double sided tape
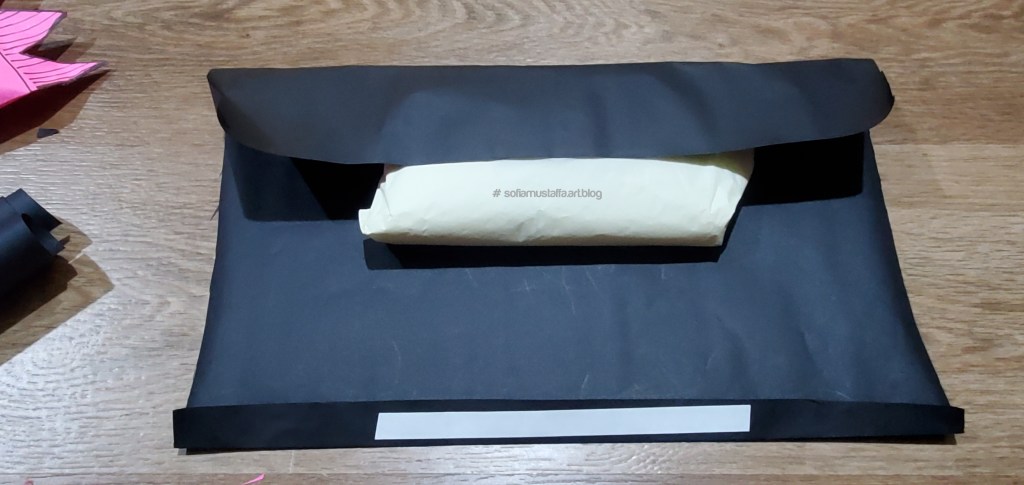
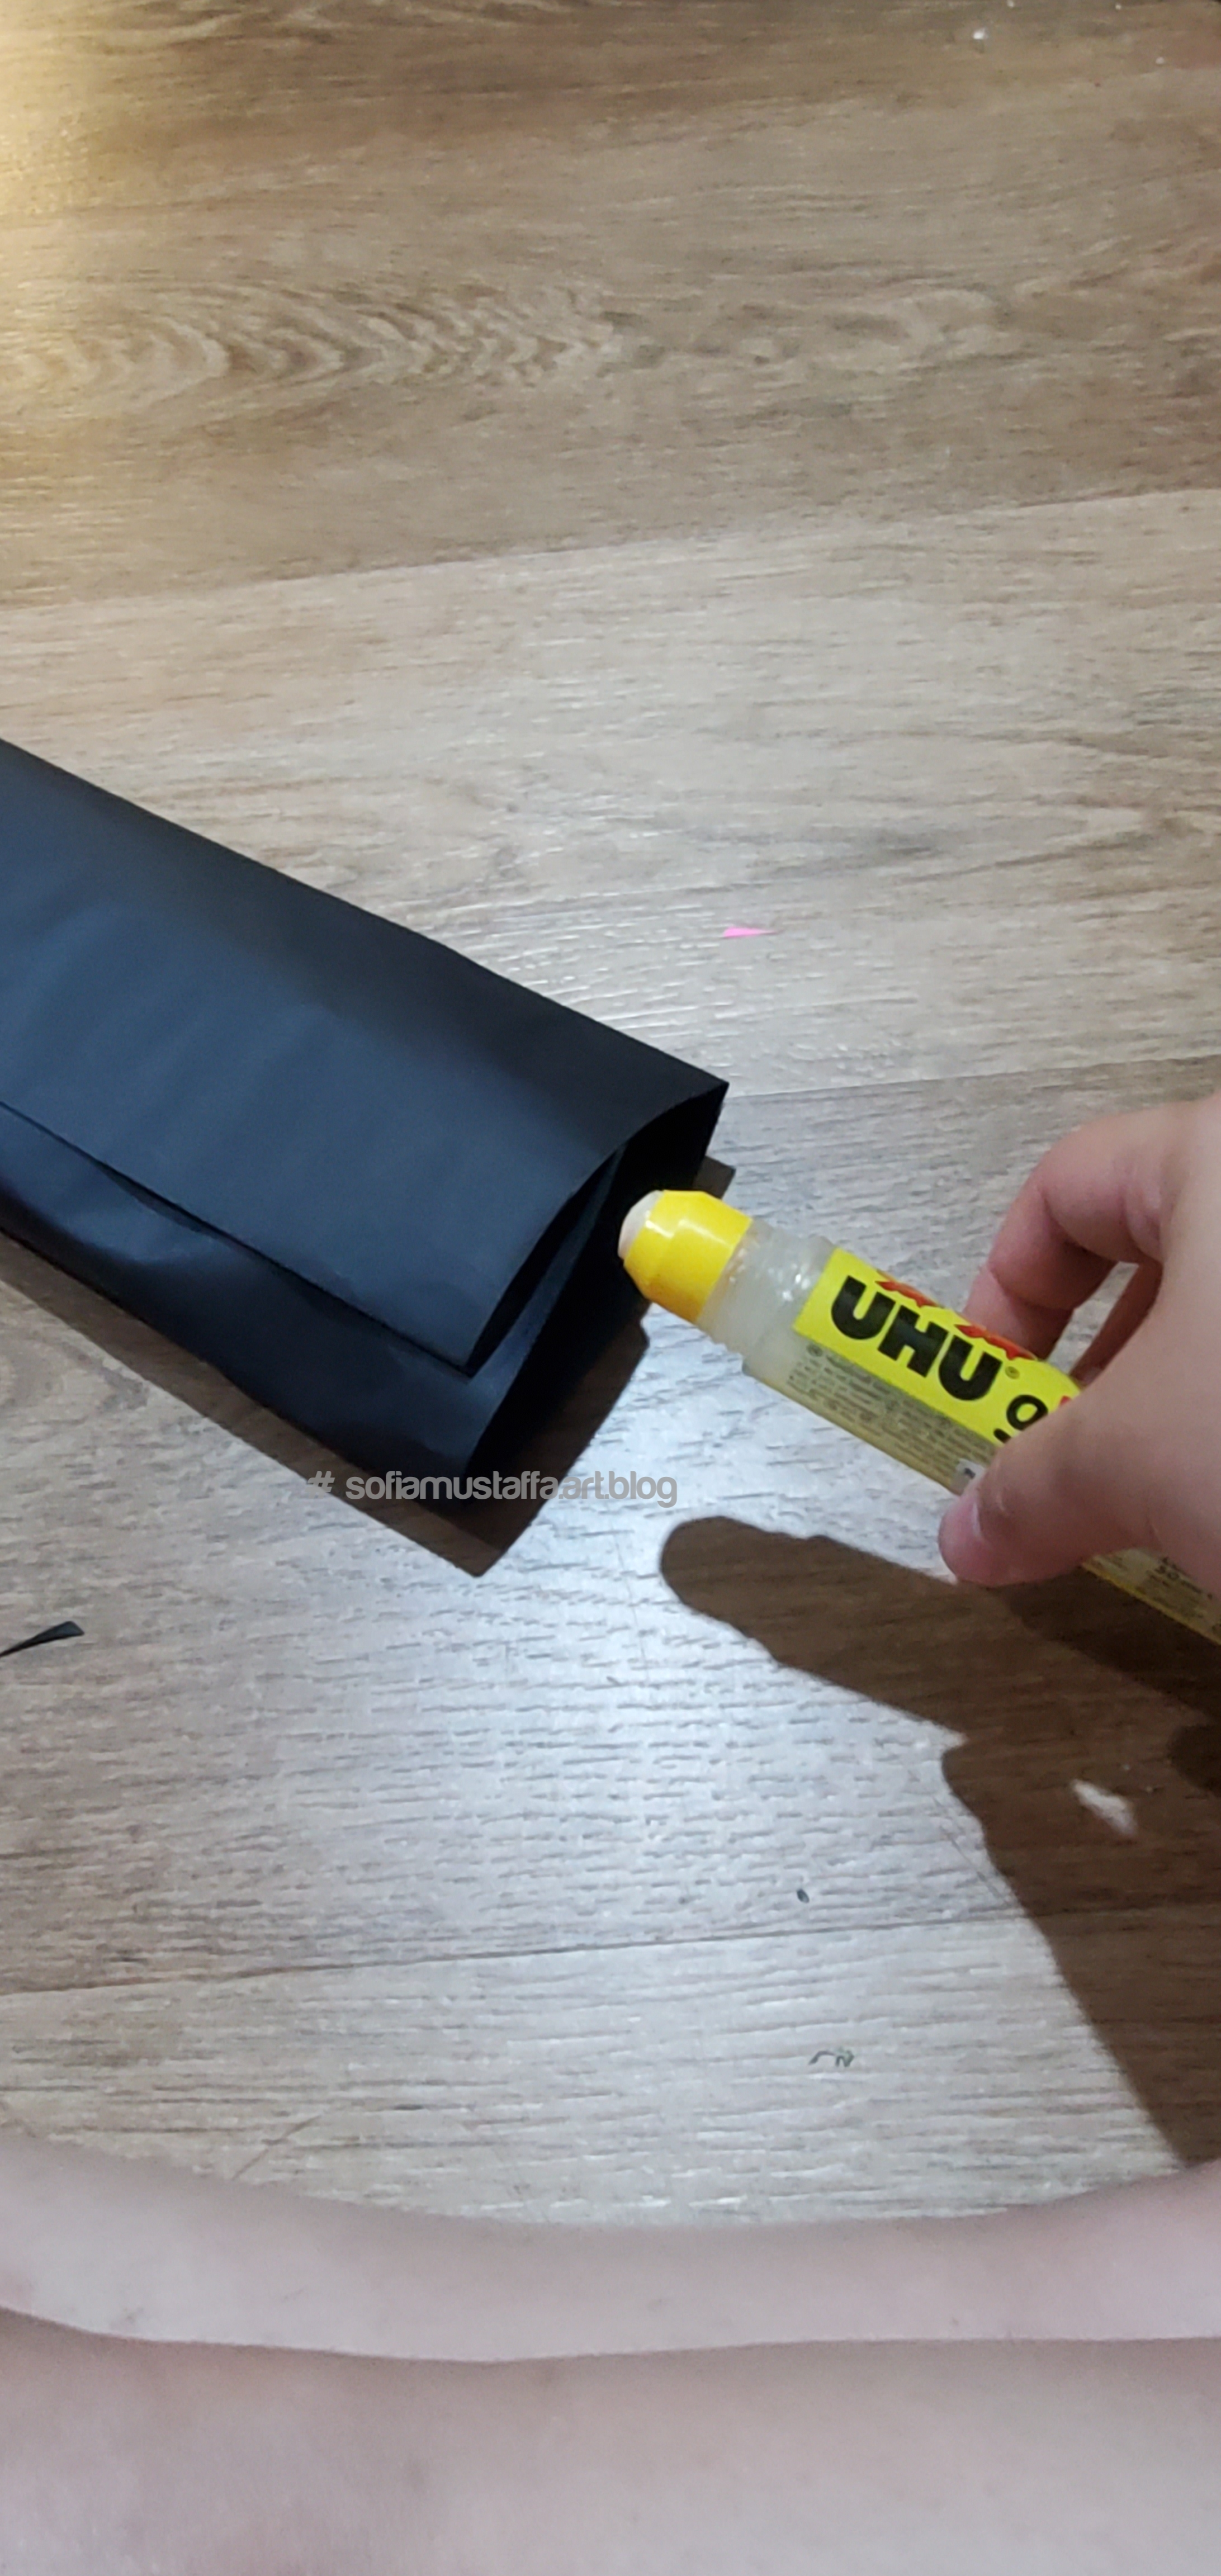
2. Then, at both end of the present, just put in the glue inside, and keep it together like this..
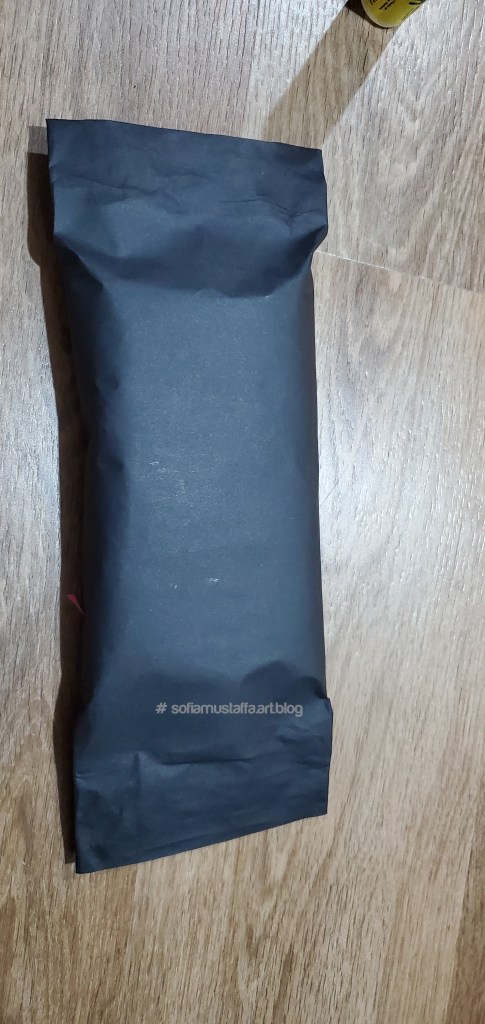
Put in glue inside both endsTadaaa 🥰
3. Cut the edge of both side, with zig-zag design..
Cut it zig-zag, u can refer below picture
4. Cut off another color of paper square, and simply glue on top of the present like this..
Zig-zag cut at end of present. Cut off another color of paper, and simply glue on top of the present..then you done!! 🥰😘Tadaaa!!! The end product will look something like this. You can put on the cover wrap chocolate paper, or ribbon for decoration ❤
That’s all for now, to be continue if i got any some other time..take care guys!!! 😘
Hey Everyone! Happy Sunday! I wish I’m too late to wish for that. Haha!!
It’s been for over a week, I didn’t post anything here. Because I’m trying to split my page from Minimalist stuff and other stuff. Seems, it’s kind of stuffy here and mix up. I want to declutter my site 😁. So, yeah, feel free to visit my new site – sofiamustaffa.com 🥰
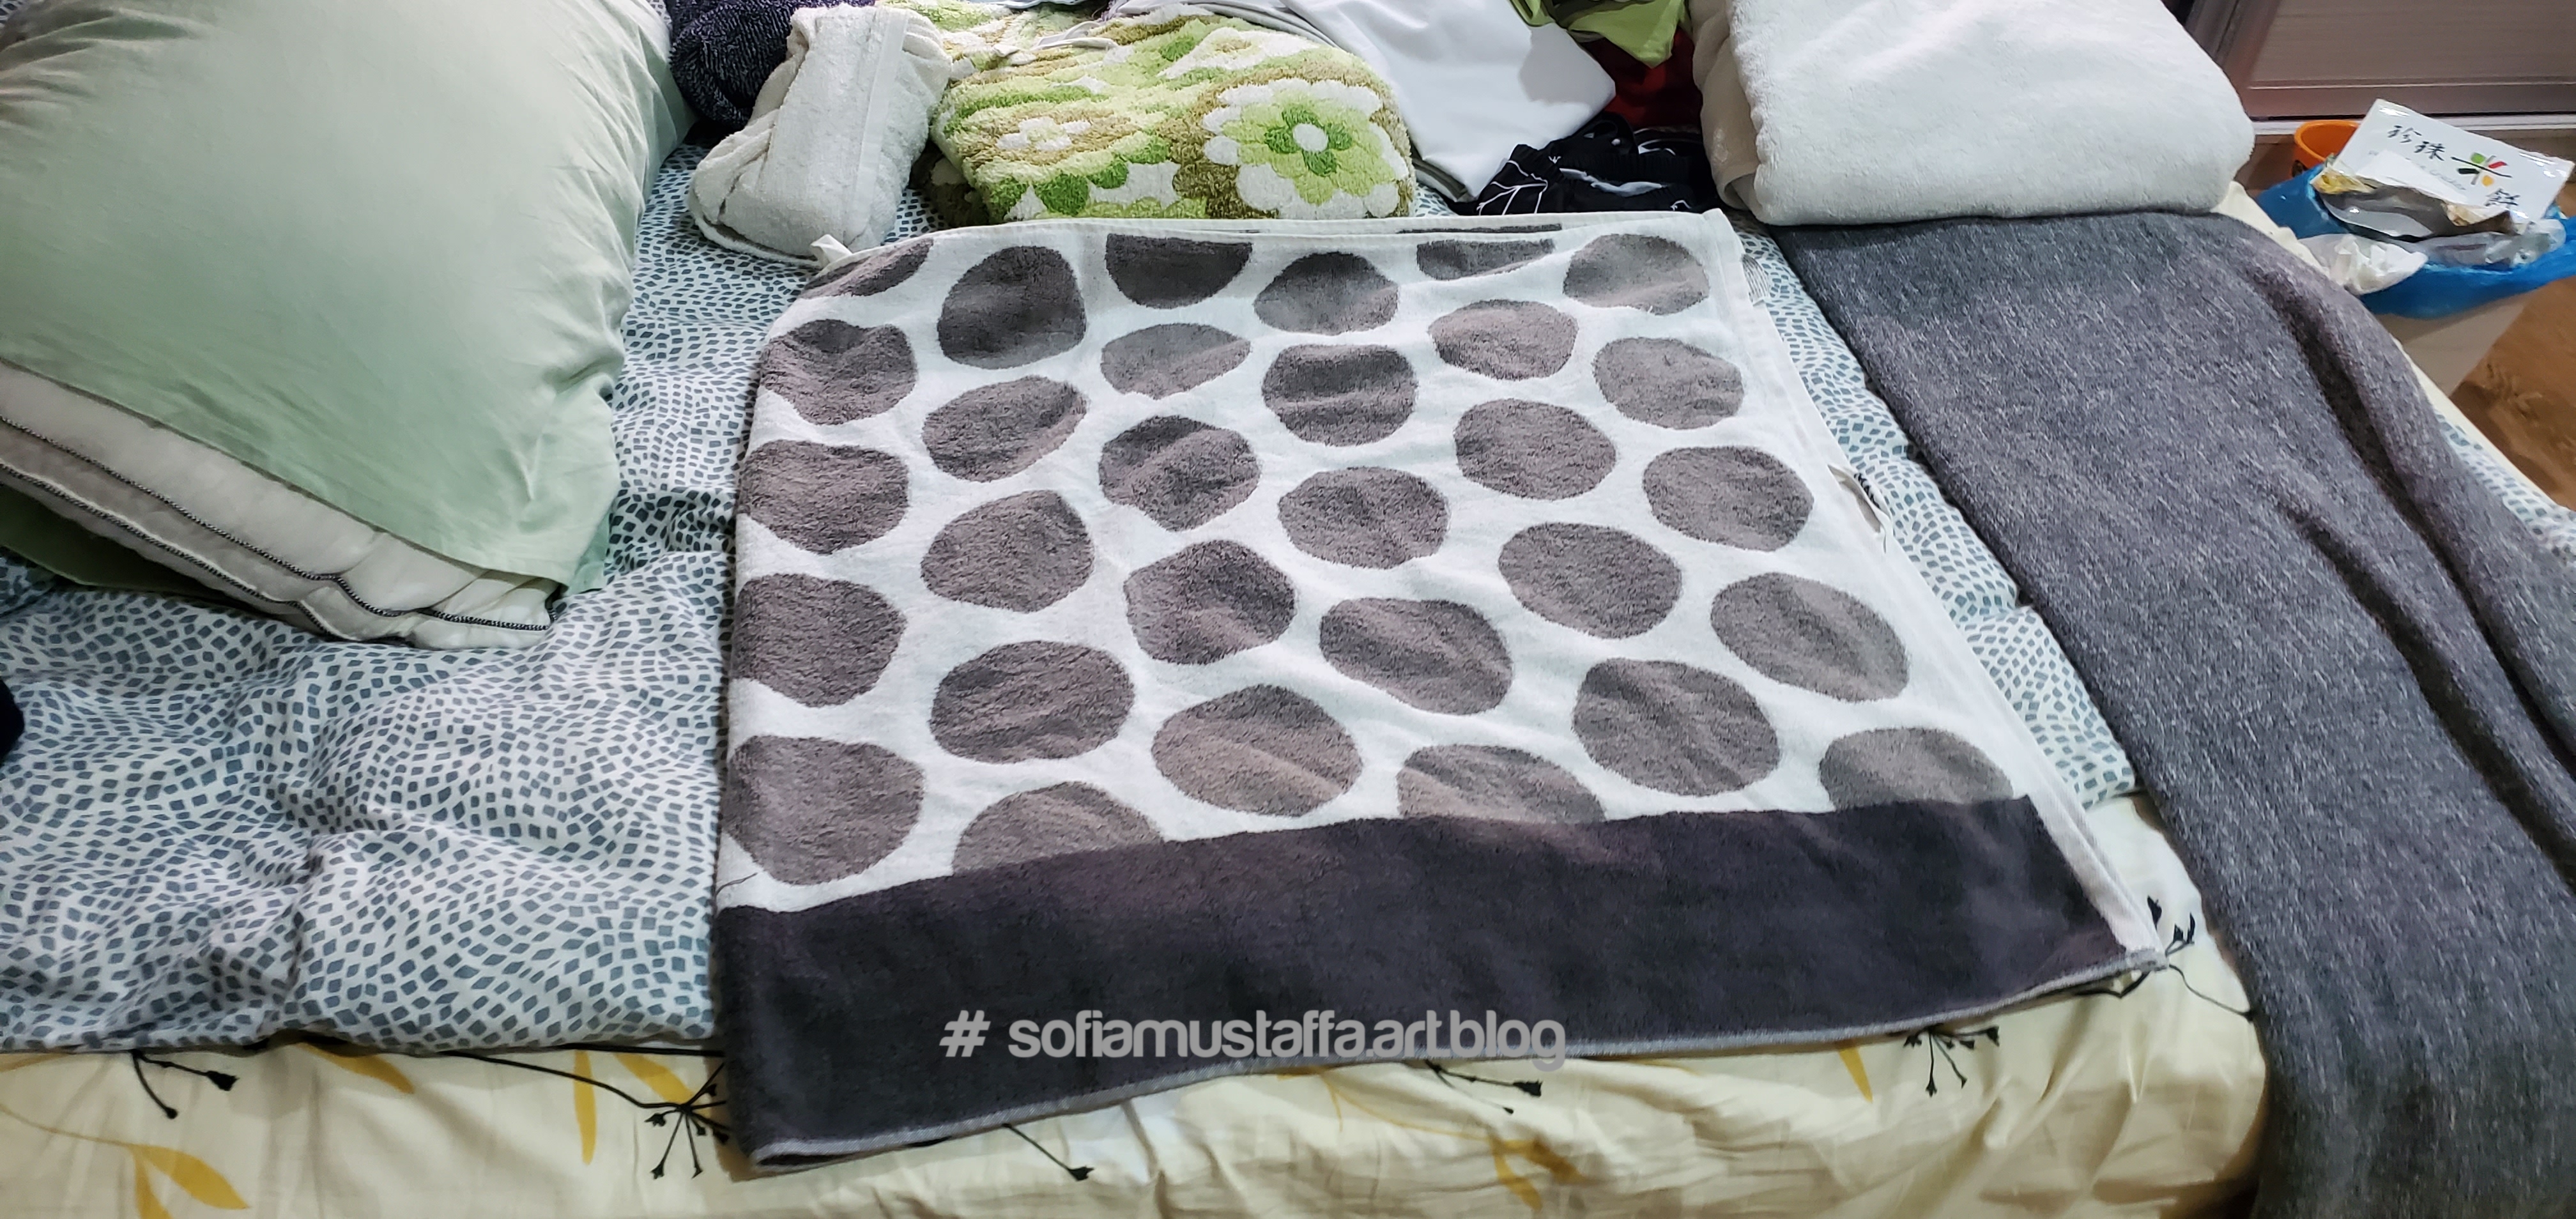
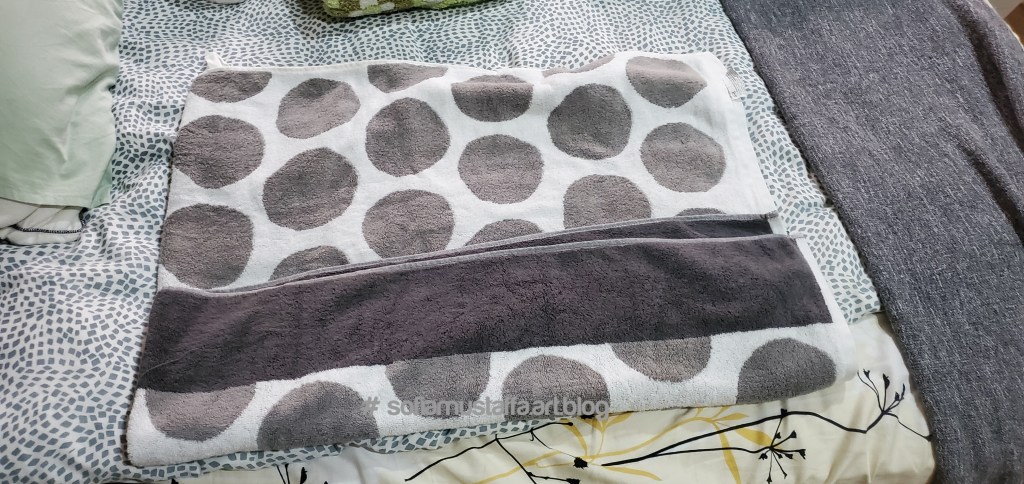
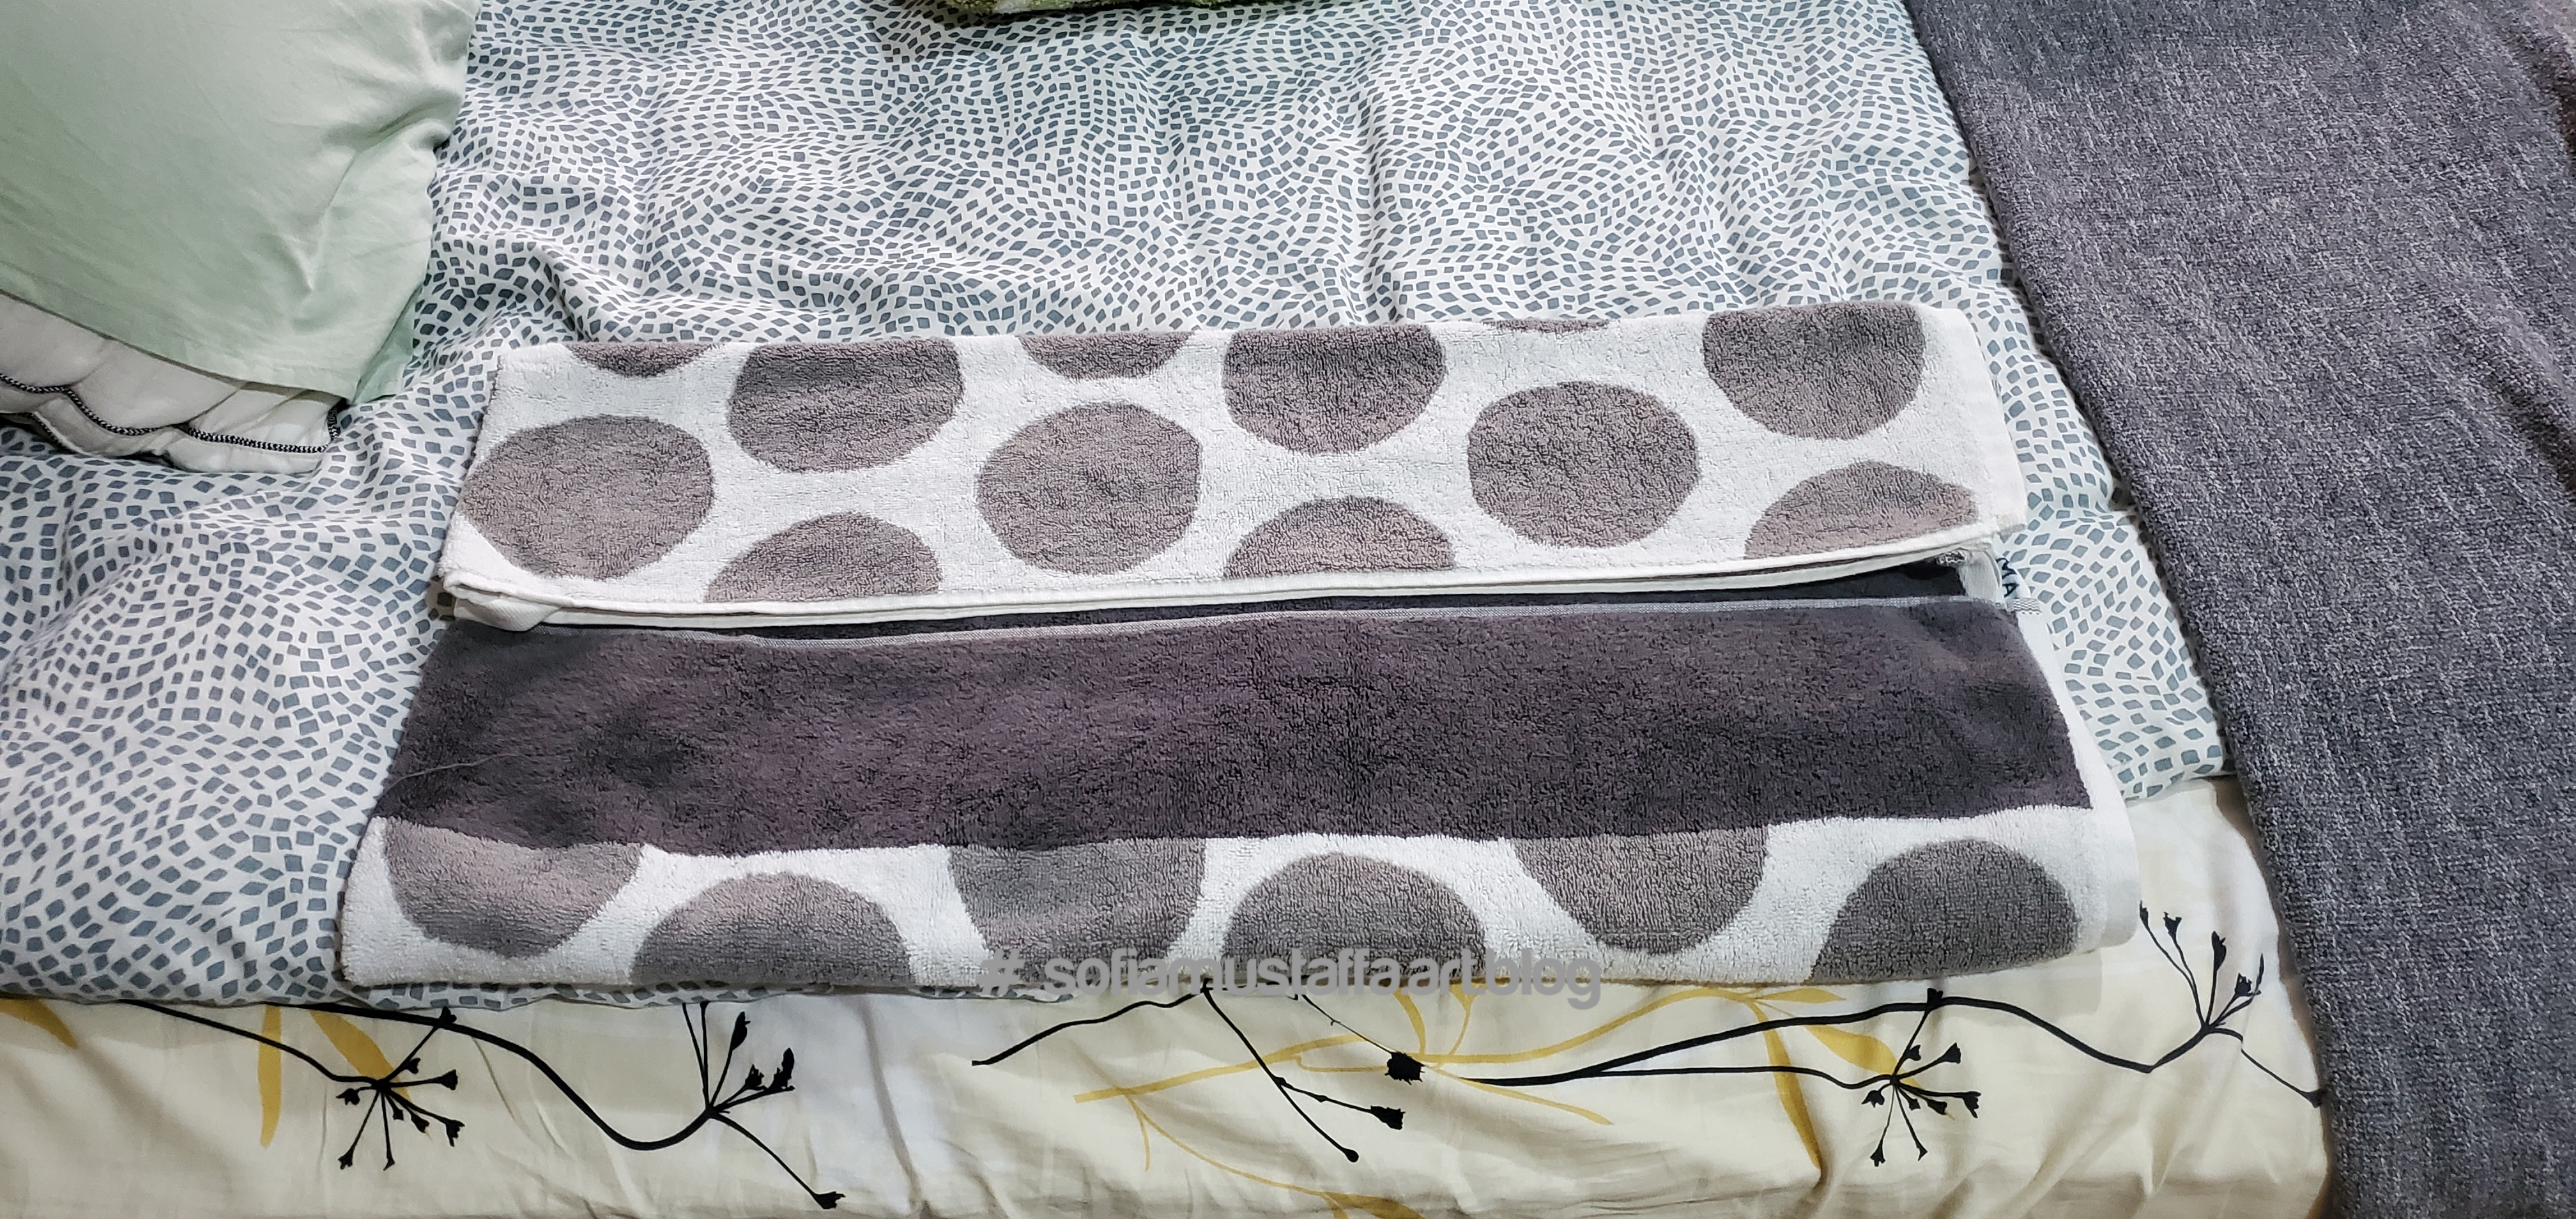
I’m still struggling for my wardrobe, up until today. I should say, it is not fully 100% organize, and I’m still having issue on how to store my towel, blanket, linen sets and also my prayer clothes in a proper and neat way. So, I was googling and found this method, which I found works for the rest of clothes. 1 easy way/method, which works for the rest of clothess..Weeee Yeppie!!~
Check this out, guys!!
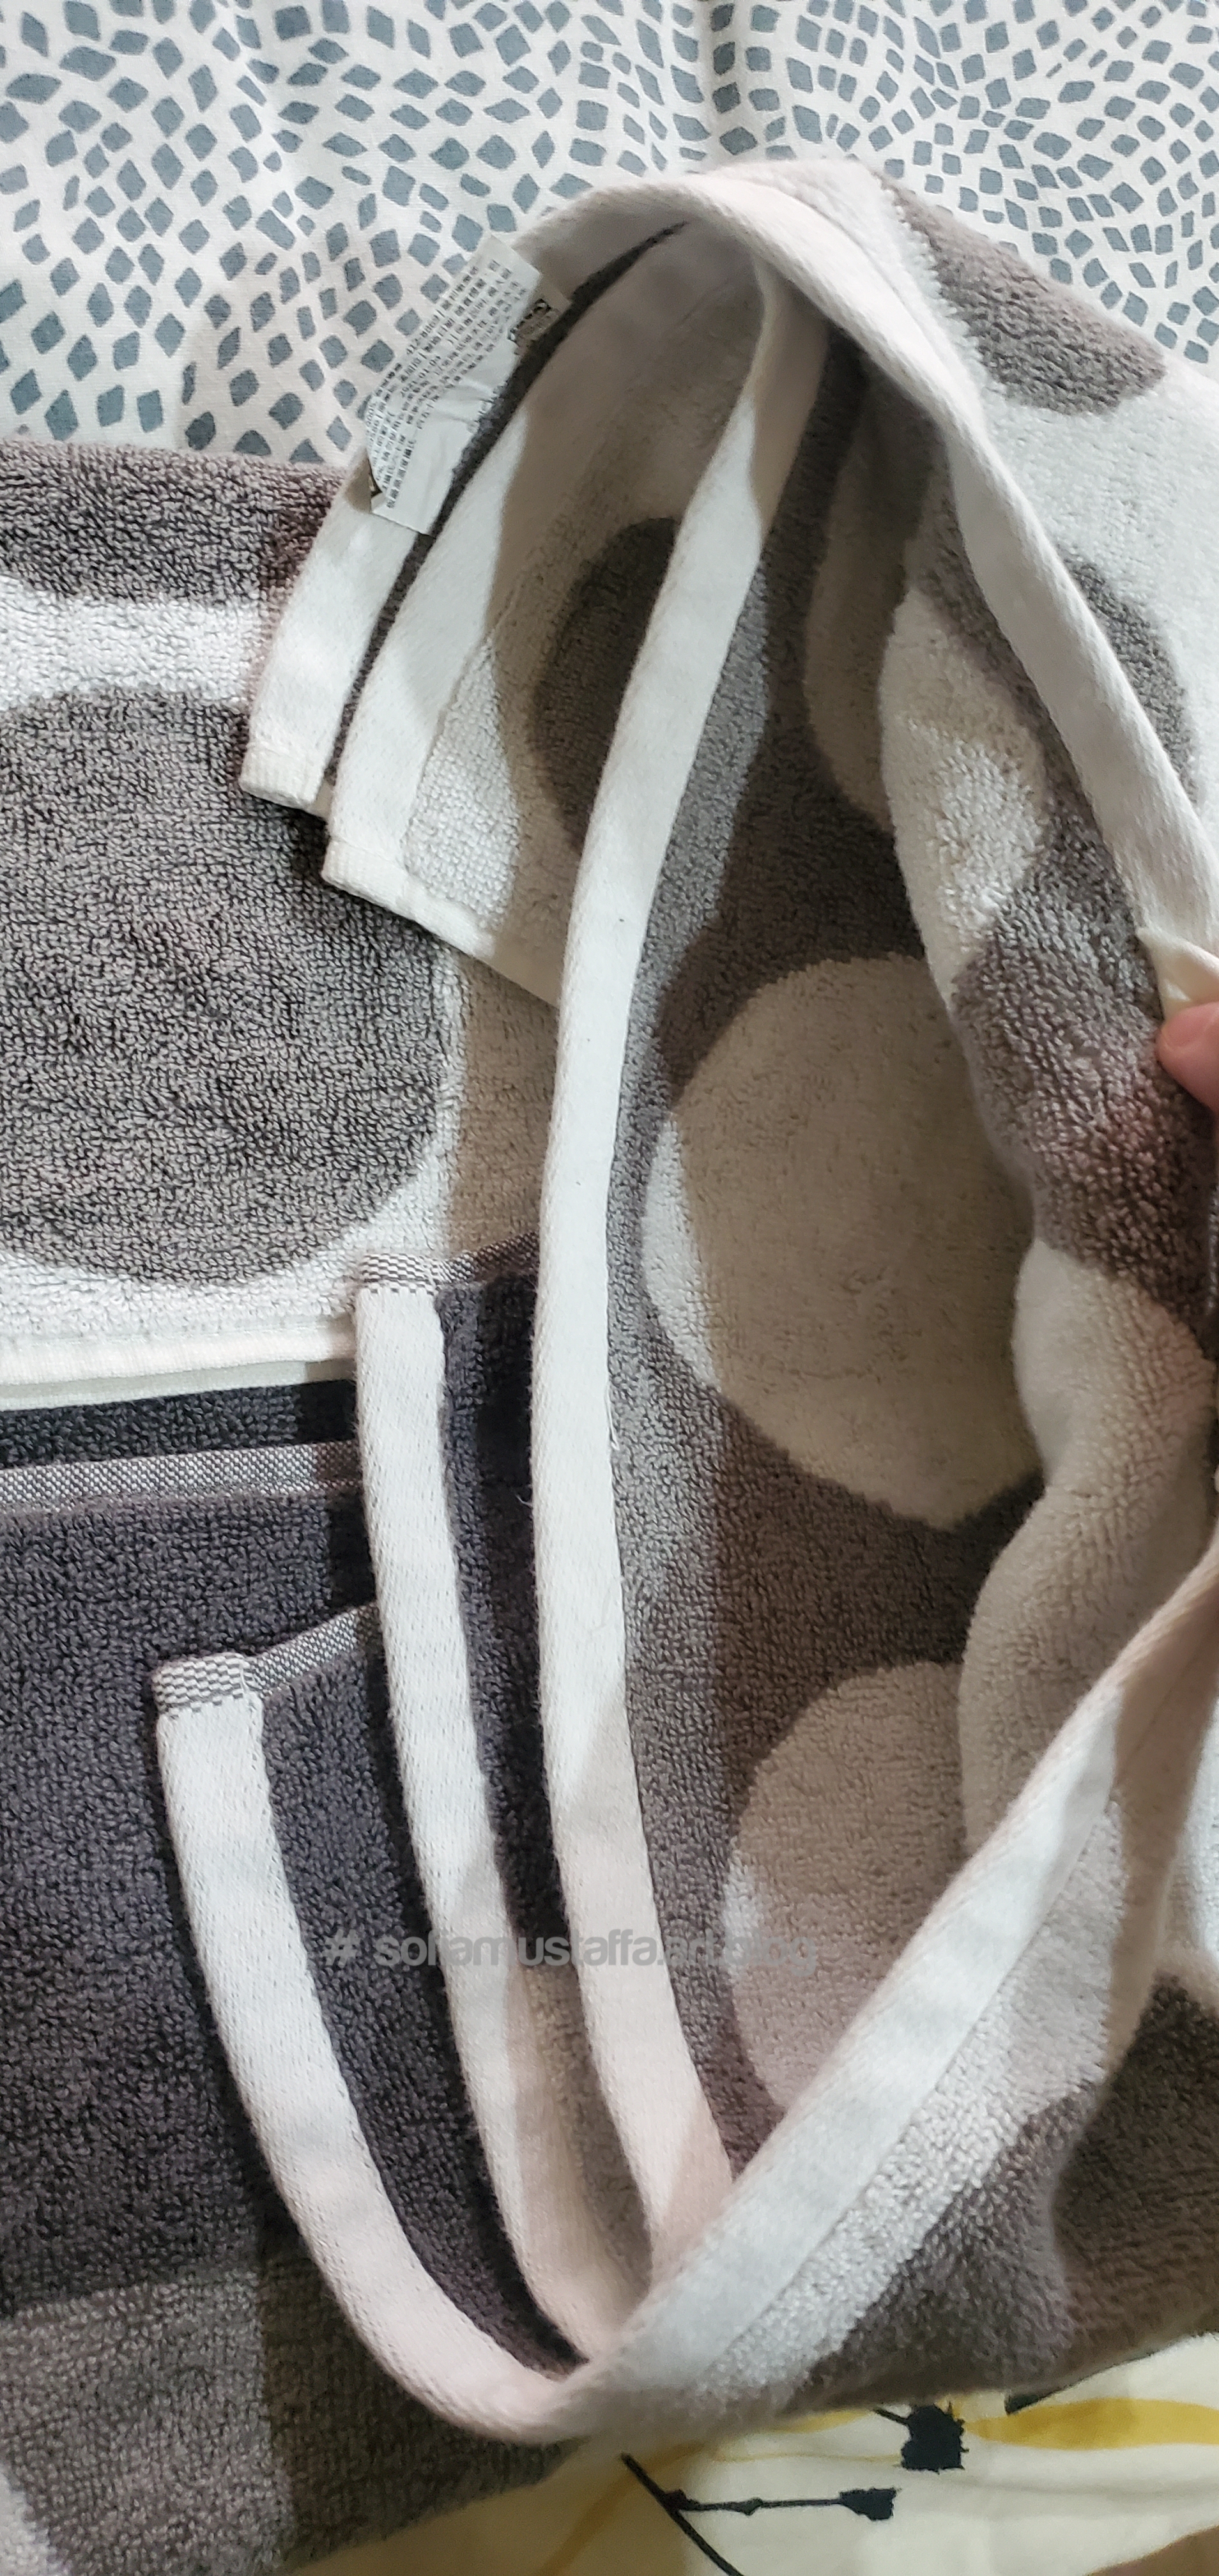
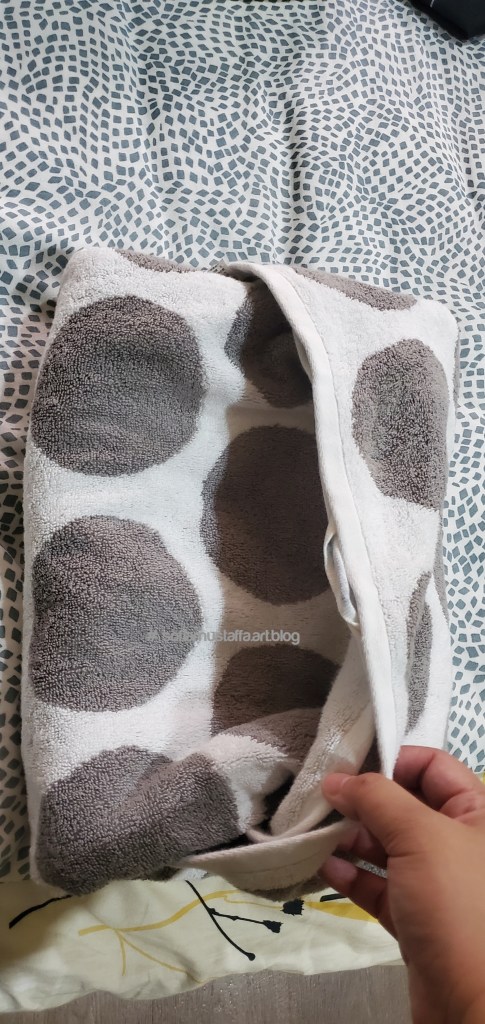
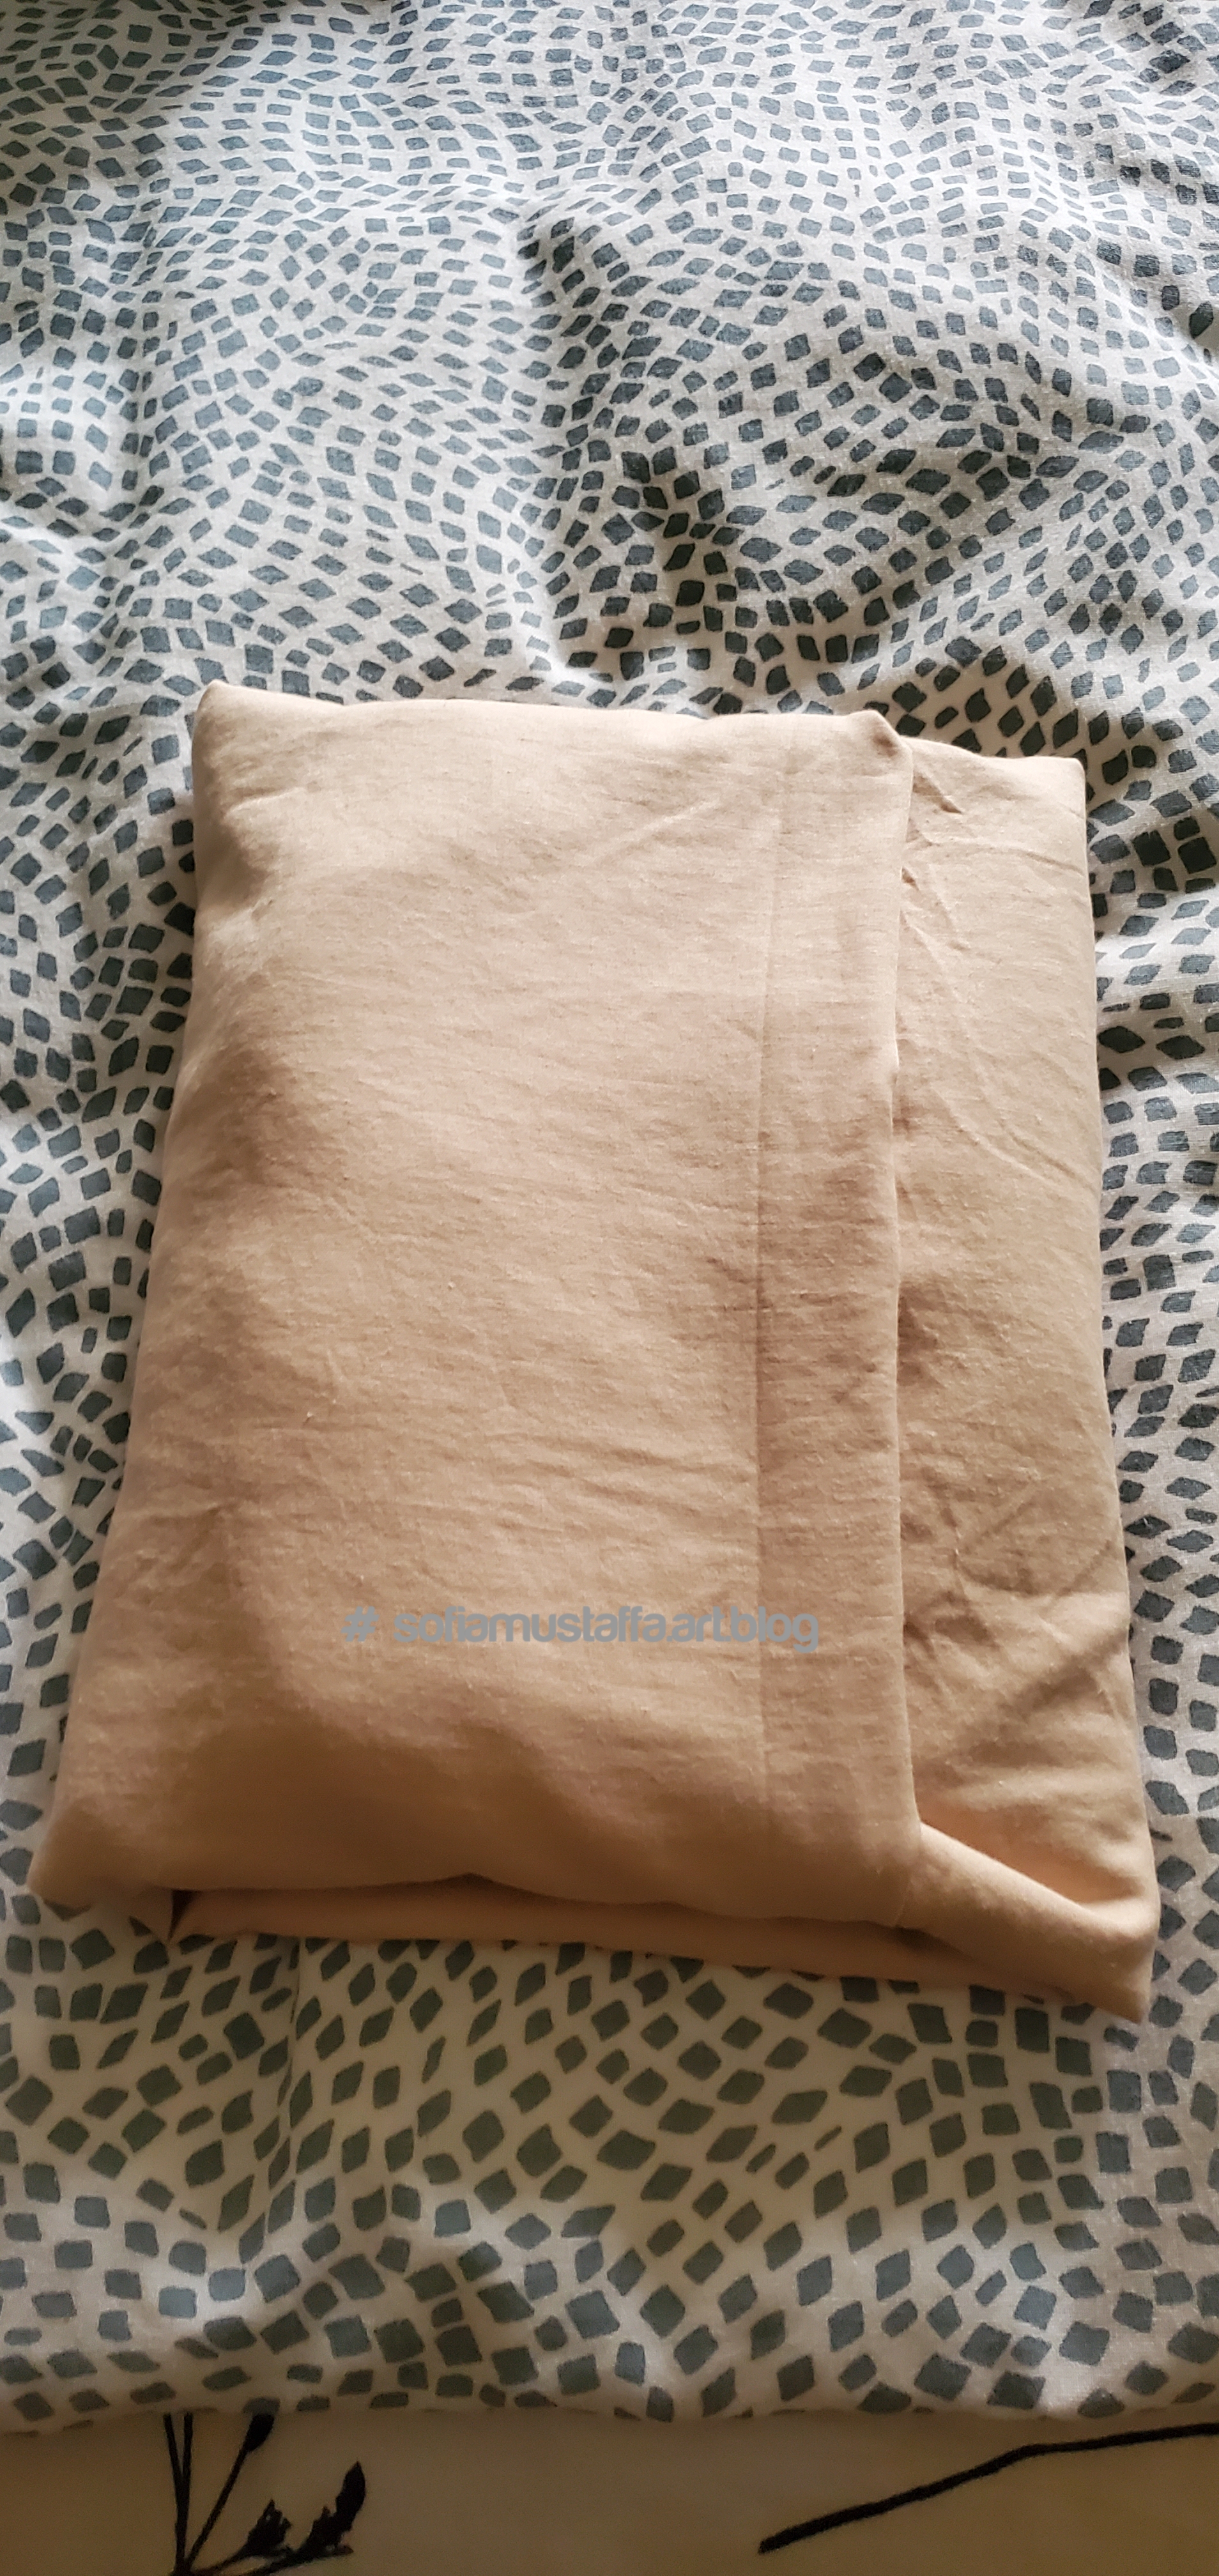
How to Fold Towel, Blanket etc….Easily & Neatly 🥰
1. Firstly, spread your towel like this.2. Then, you fold into two like this.3. Then, bring the bottom up, and meet at the center..4. Bring the upper part down, and meet the bottom at center like this. From here, you divide into 3 part. 5. Fold one to another inside this pocket. 6. One end, fold into the other end. A neat fold. 7. Tada!!~ 😍 You will get something like this. Its neat as one side folding inside the other.
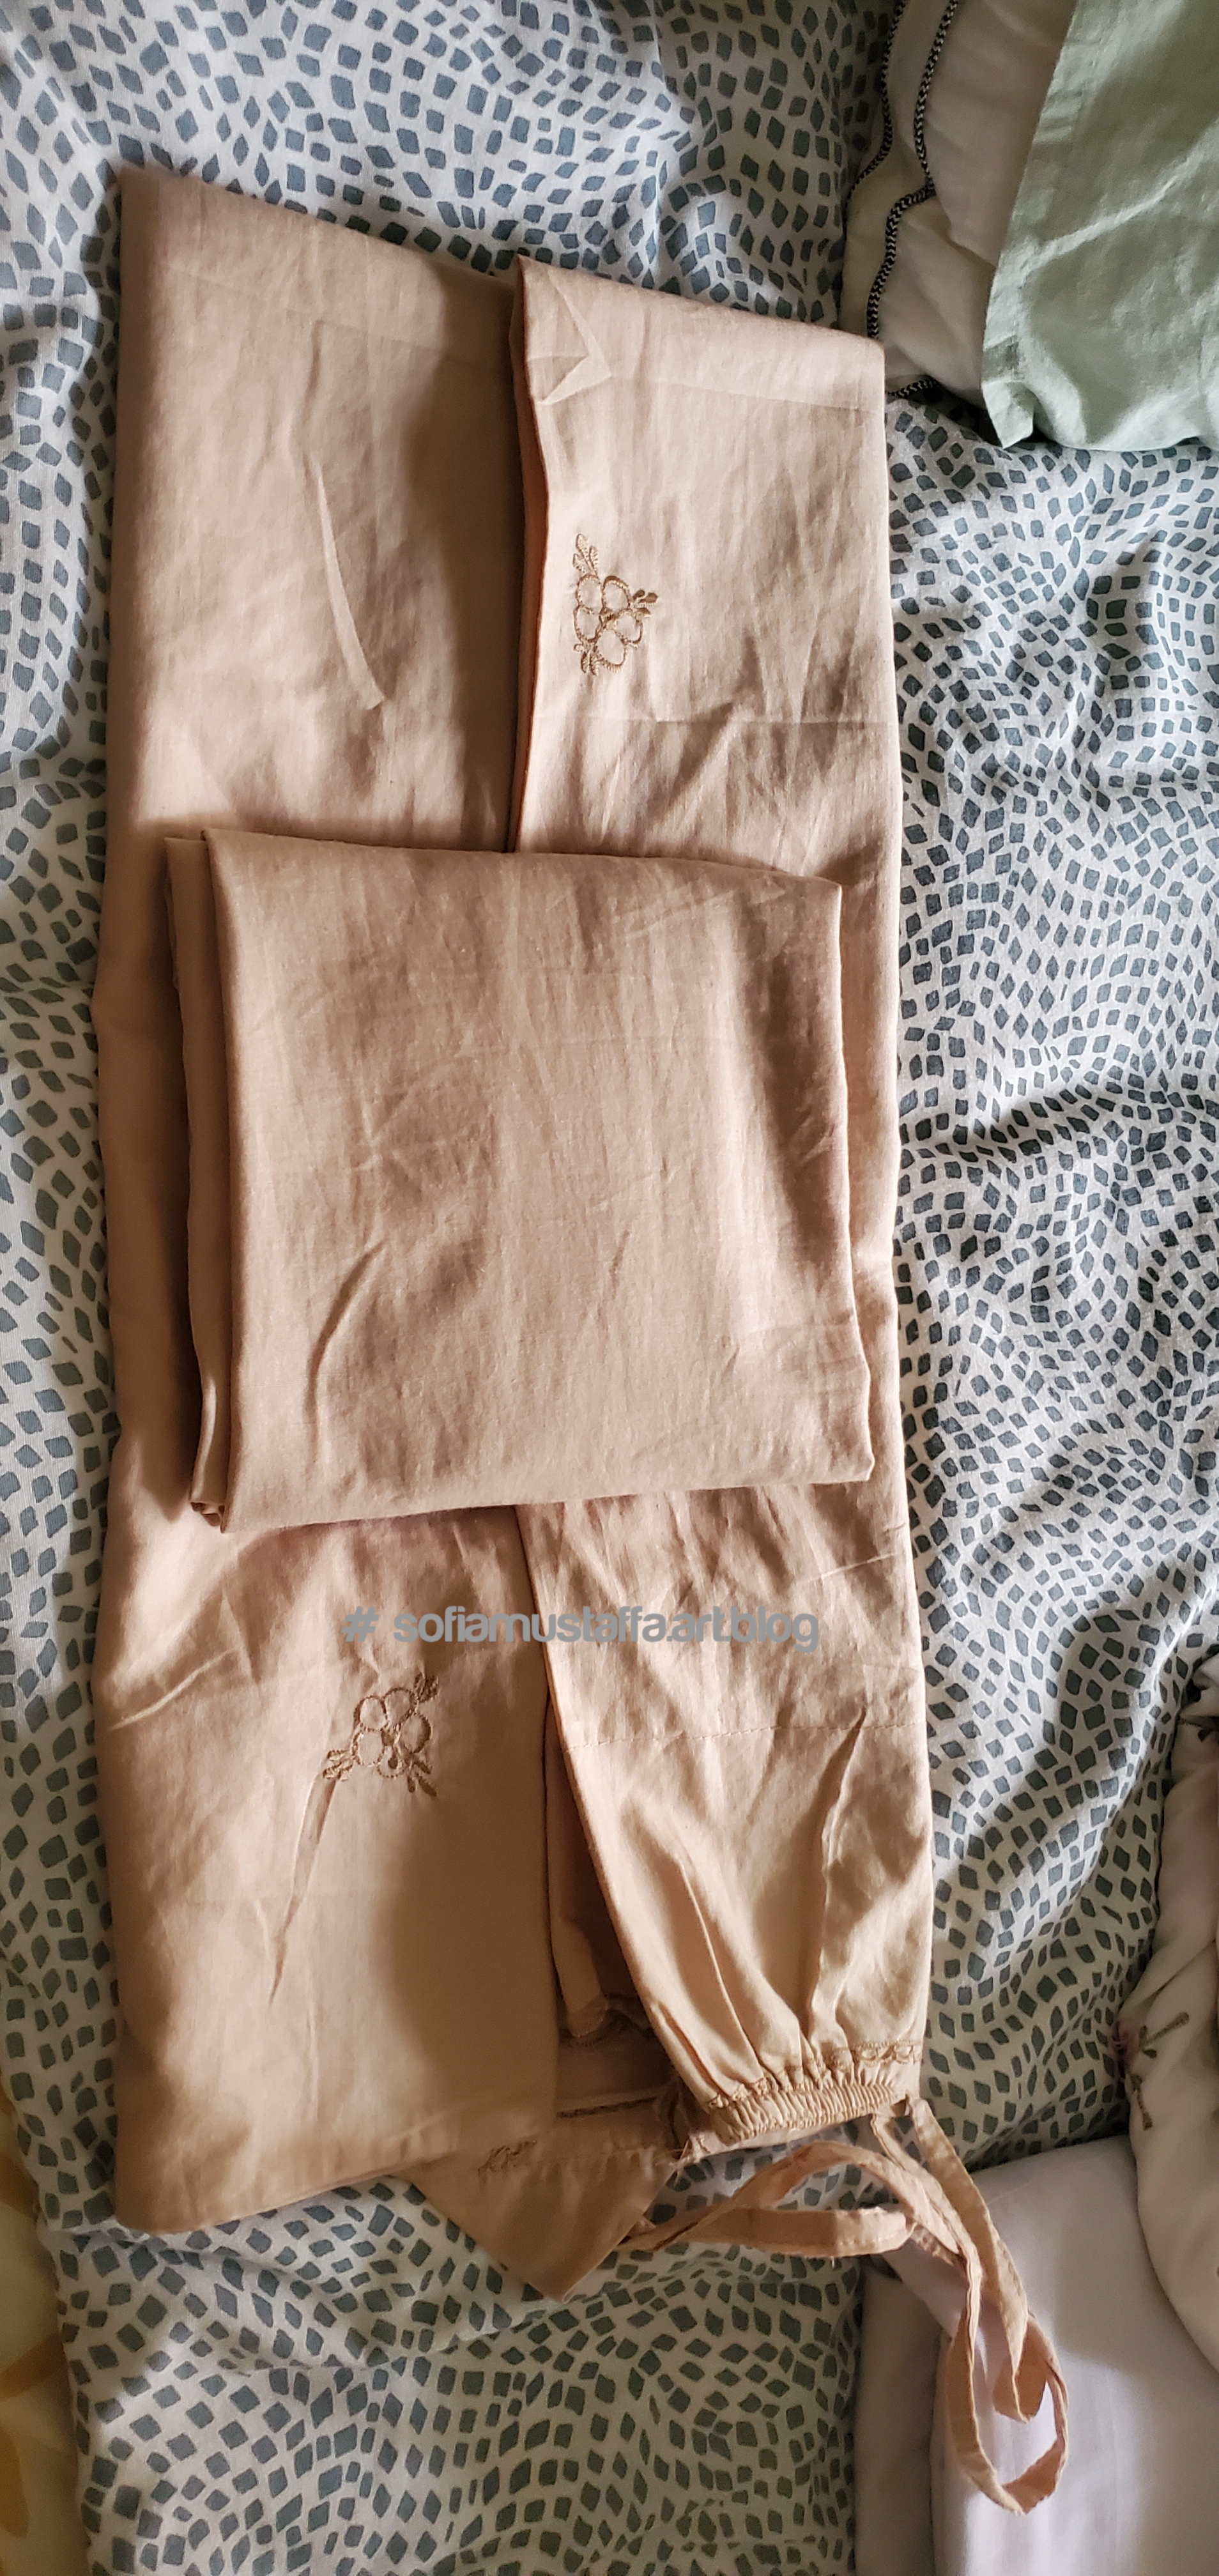
Experimenting the fold method for my prayer clothes 😁
1. Folding the other cloth as usual, and I put on top of the other clothes like this. 2. Tried the method, from one end, folding into the other ends. It works perfectly!! Easy and Neat as well. Tadaaa!!~~
Okay, guys. My blanket and other clothes done for now. Next post, I’m going to explore on hanging clothes item.