Hey everyone!! The weekend is over …now we need to get back to work!
Okay, talking about work, I still remember when I work with Great Eastern, back in 2019-2020. I missed working with them at Great Eastern, the staffs are very kind. I still do remember, each time whenever we have a new staff, they will celebrate and bought a welcome food for us. It’s a really nice environment to work there.
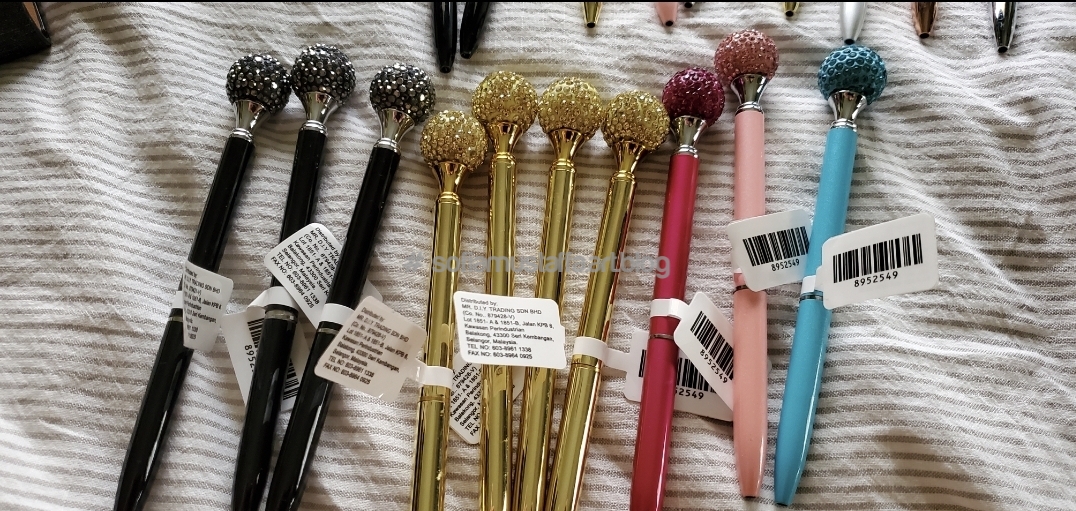
Throwback, I got an opportunity as my recruiter sending me off, to change to another client after 10months joining the company. So, I have to say goodbye to all of them. I bought some cute souvenirs for all the team members. The cute pen 🥰
Just a random pick from the shop
Then, I made a bouquet flower from the pens. Isn’t cute? 🥰
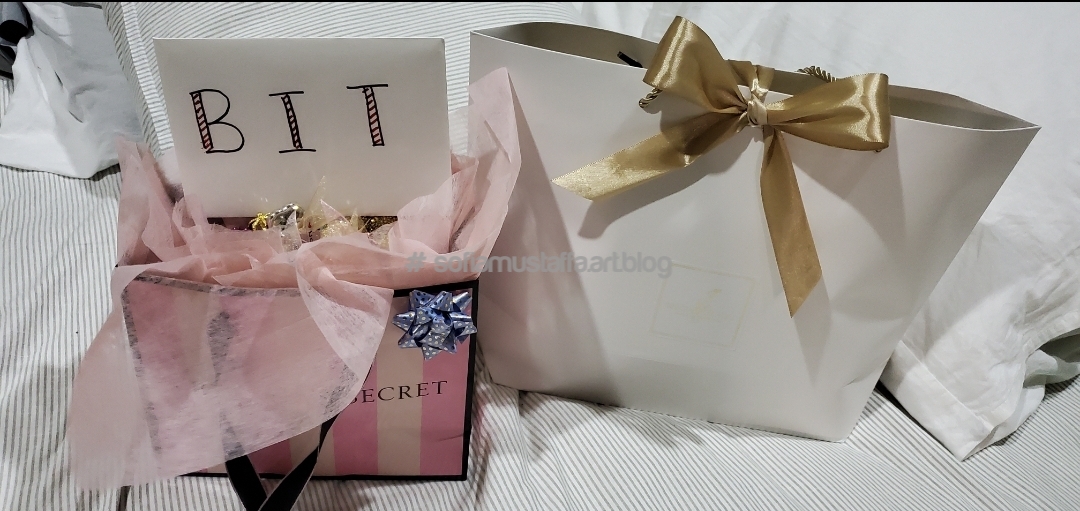
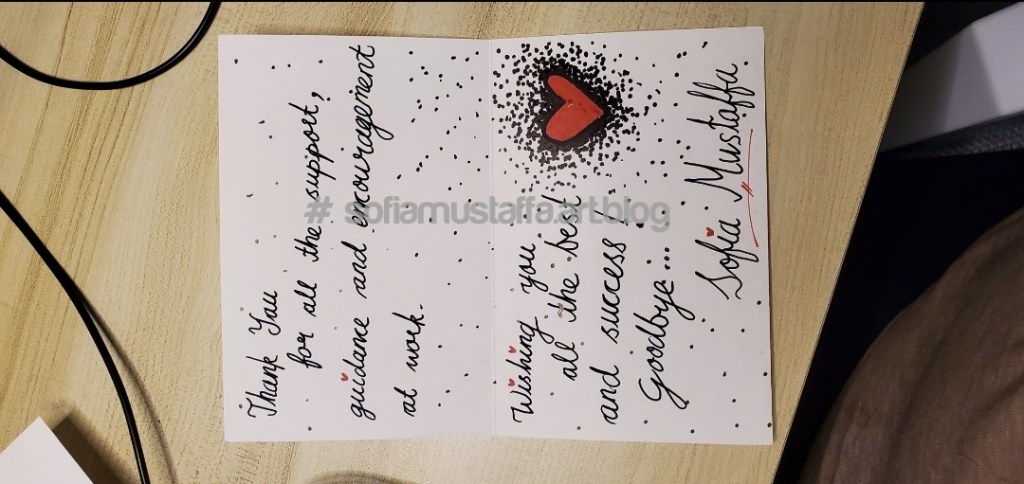
The final package ❤Wrote some thank you card to the team ❣
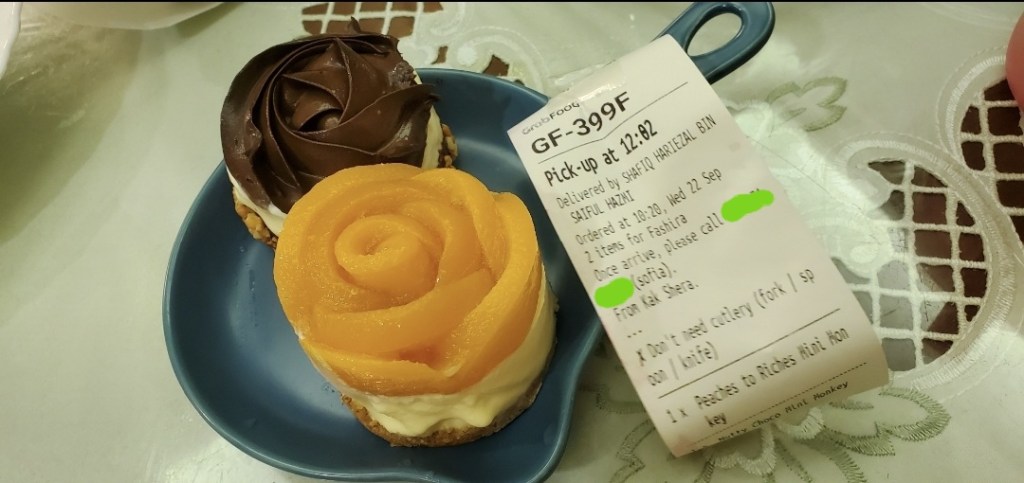
There is one day, I received a mystery food delivery. When I saw on the paper, it’s written small notes said, “Once arrived, please call Sofia”, from Kak Shera. It was so touching that my manager secretly sending me 2 cupcakes for me. Thank you, Kak Shera. I will do always keep in touch with you. Hope one day we can still work together 🥺
Its a very delicious cupcake🤤 yummy..bought one for my family recently, and they love it.
Okay, I think that’s all for now..I still have a week to go, before going for my long vacation with my family 🥰
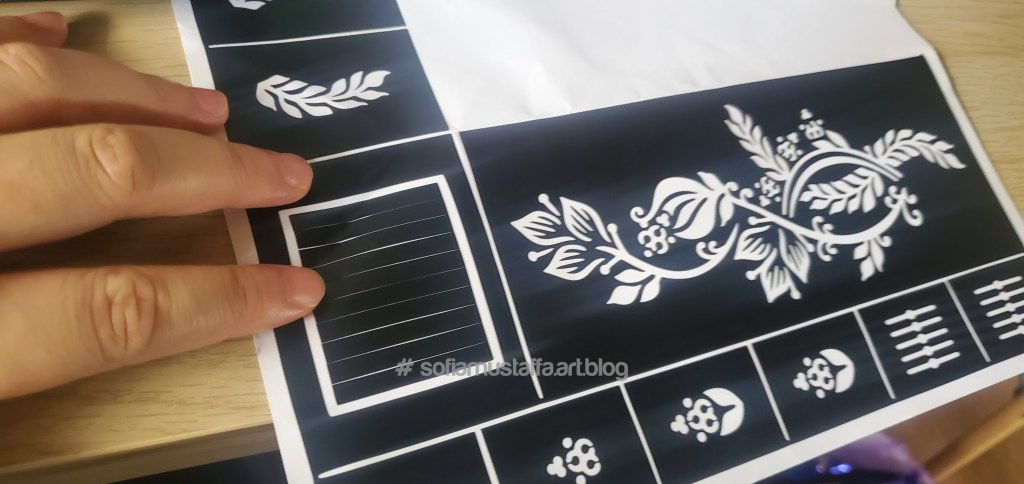
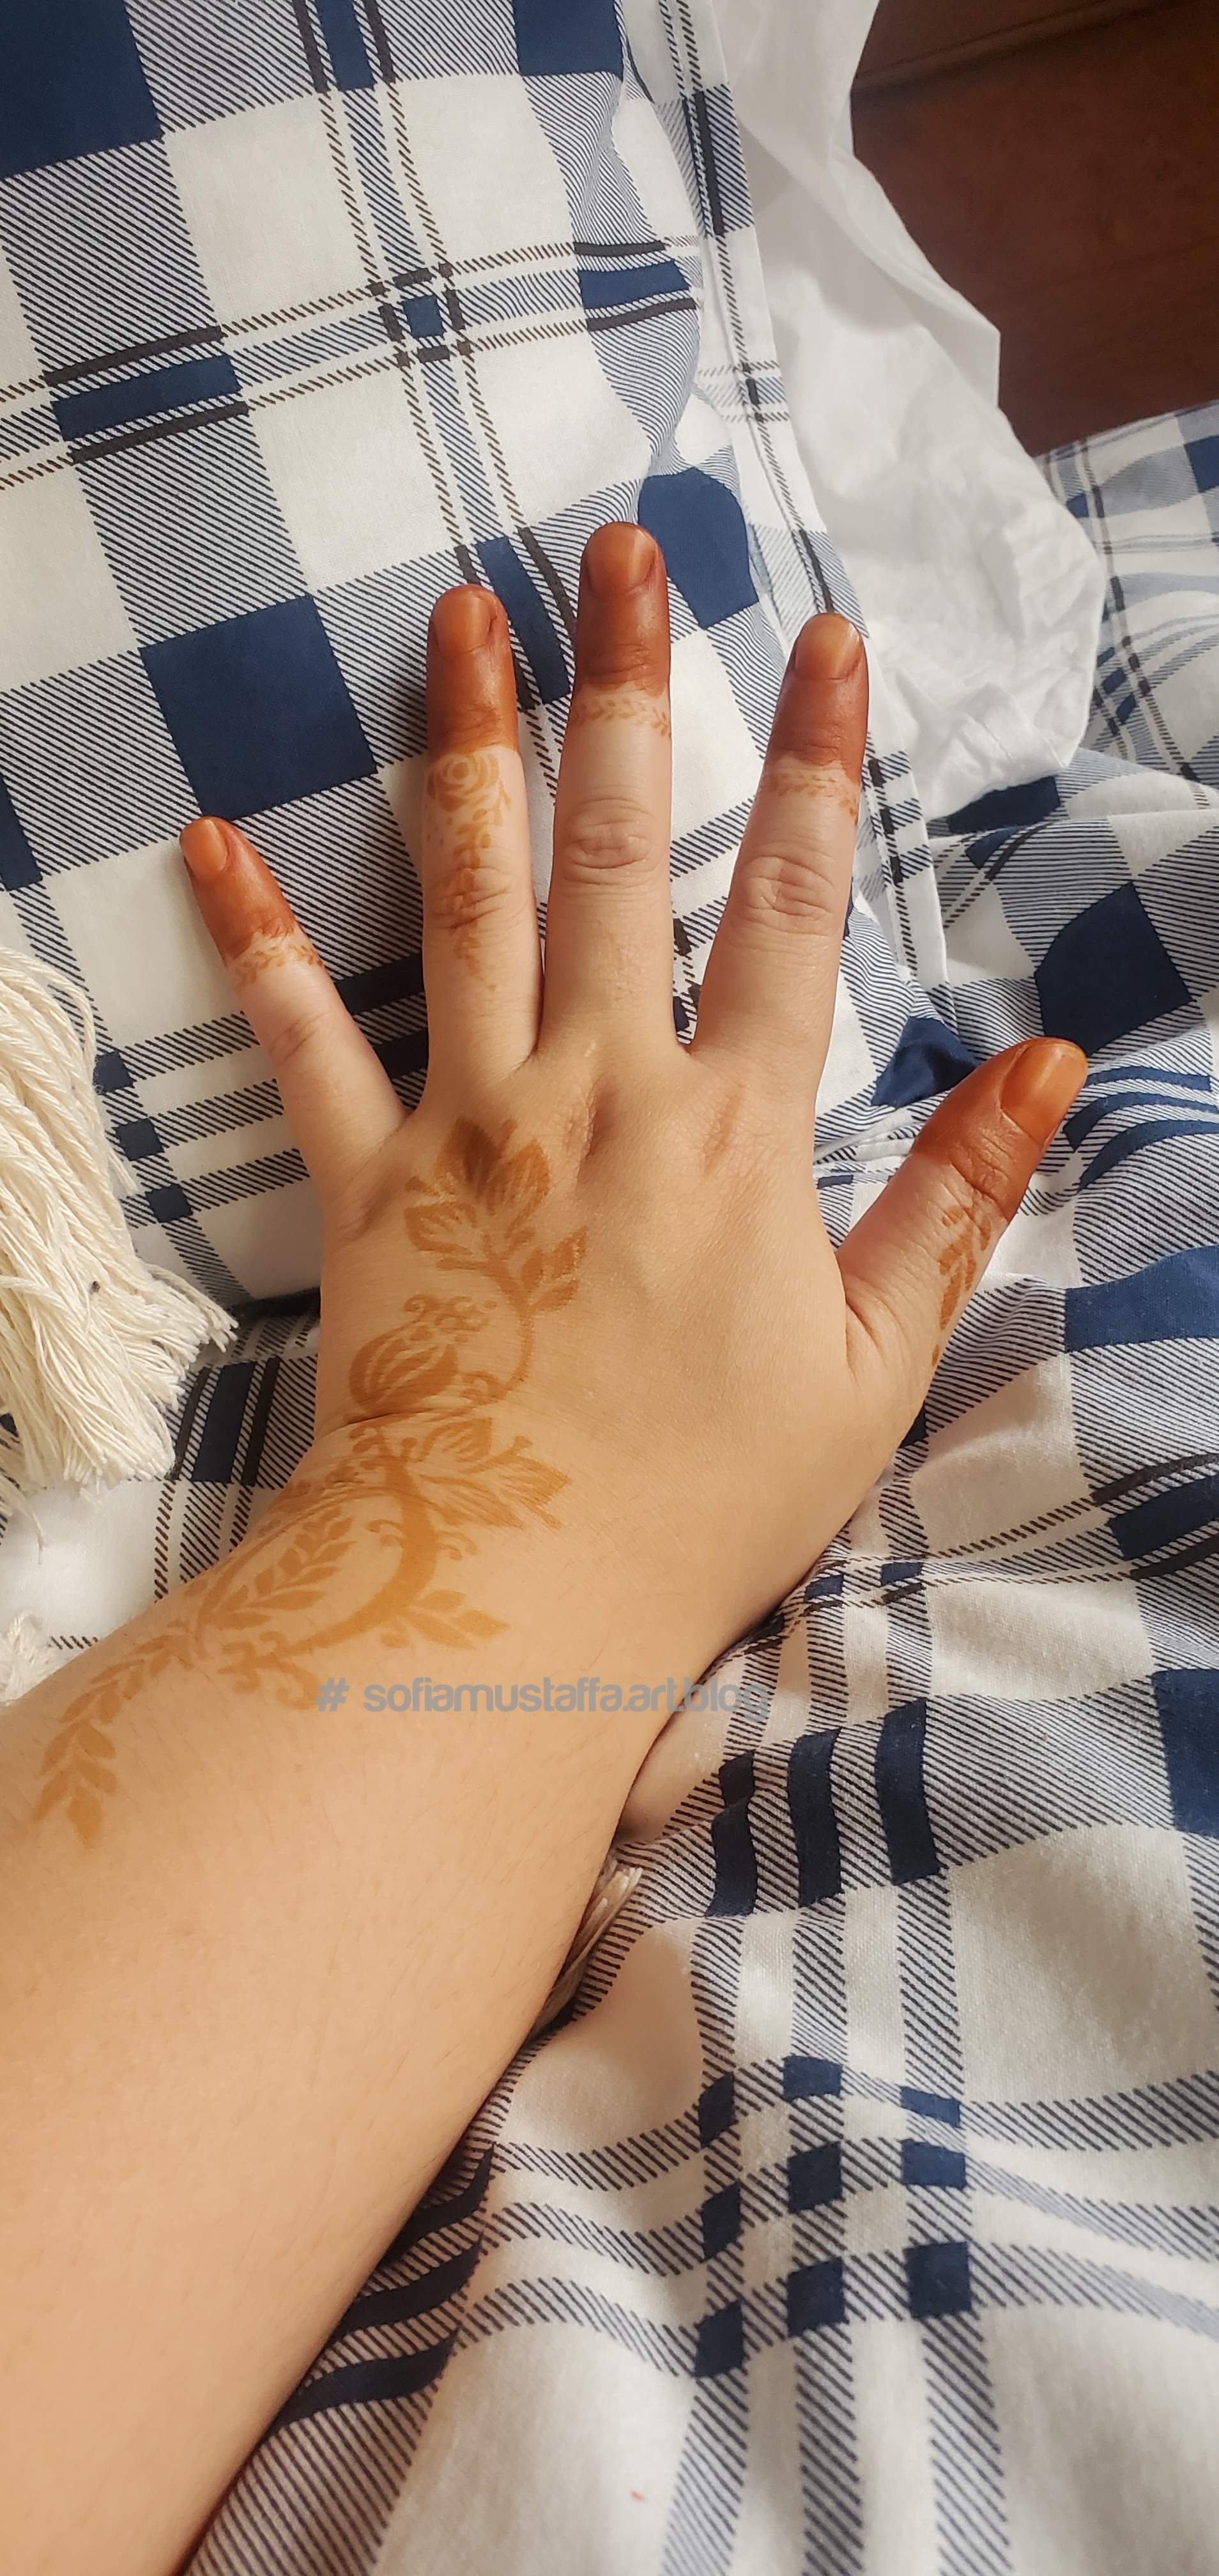
Raya Aidilfitri is just around the corner. I bought these DIY mahendi online and thought wanna give it a try 😃
Do you know how much it will cost for 1 hand mahendi in 2015? RM 15 (3.44 USD) per hand. Yes, that price was in 2015, I believe it will be more now, in 2022. Do you know how much I bought all of these kit? RM 31.50 (7.23USD) and you can use the sticker template over and over again, and wherever you want 😄
I bought 3 varieties of the finger design, 1 overall hand design and of course the henna (chose natural henna). You can choose your own fav design, coz sometimes when I did mahendi outside, they make a different design from what I chose. Myb they simply don’t know how to draw it. Idk😶
So…..here we gOoOoooo…let’s start….😃🥰
How to DIY your own mahendi 😍
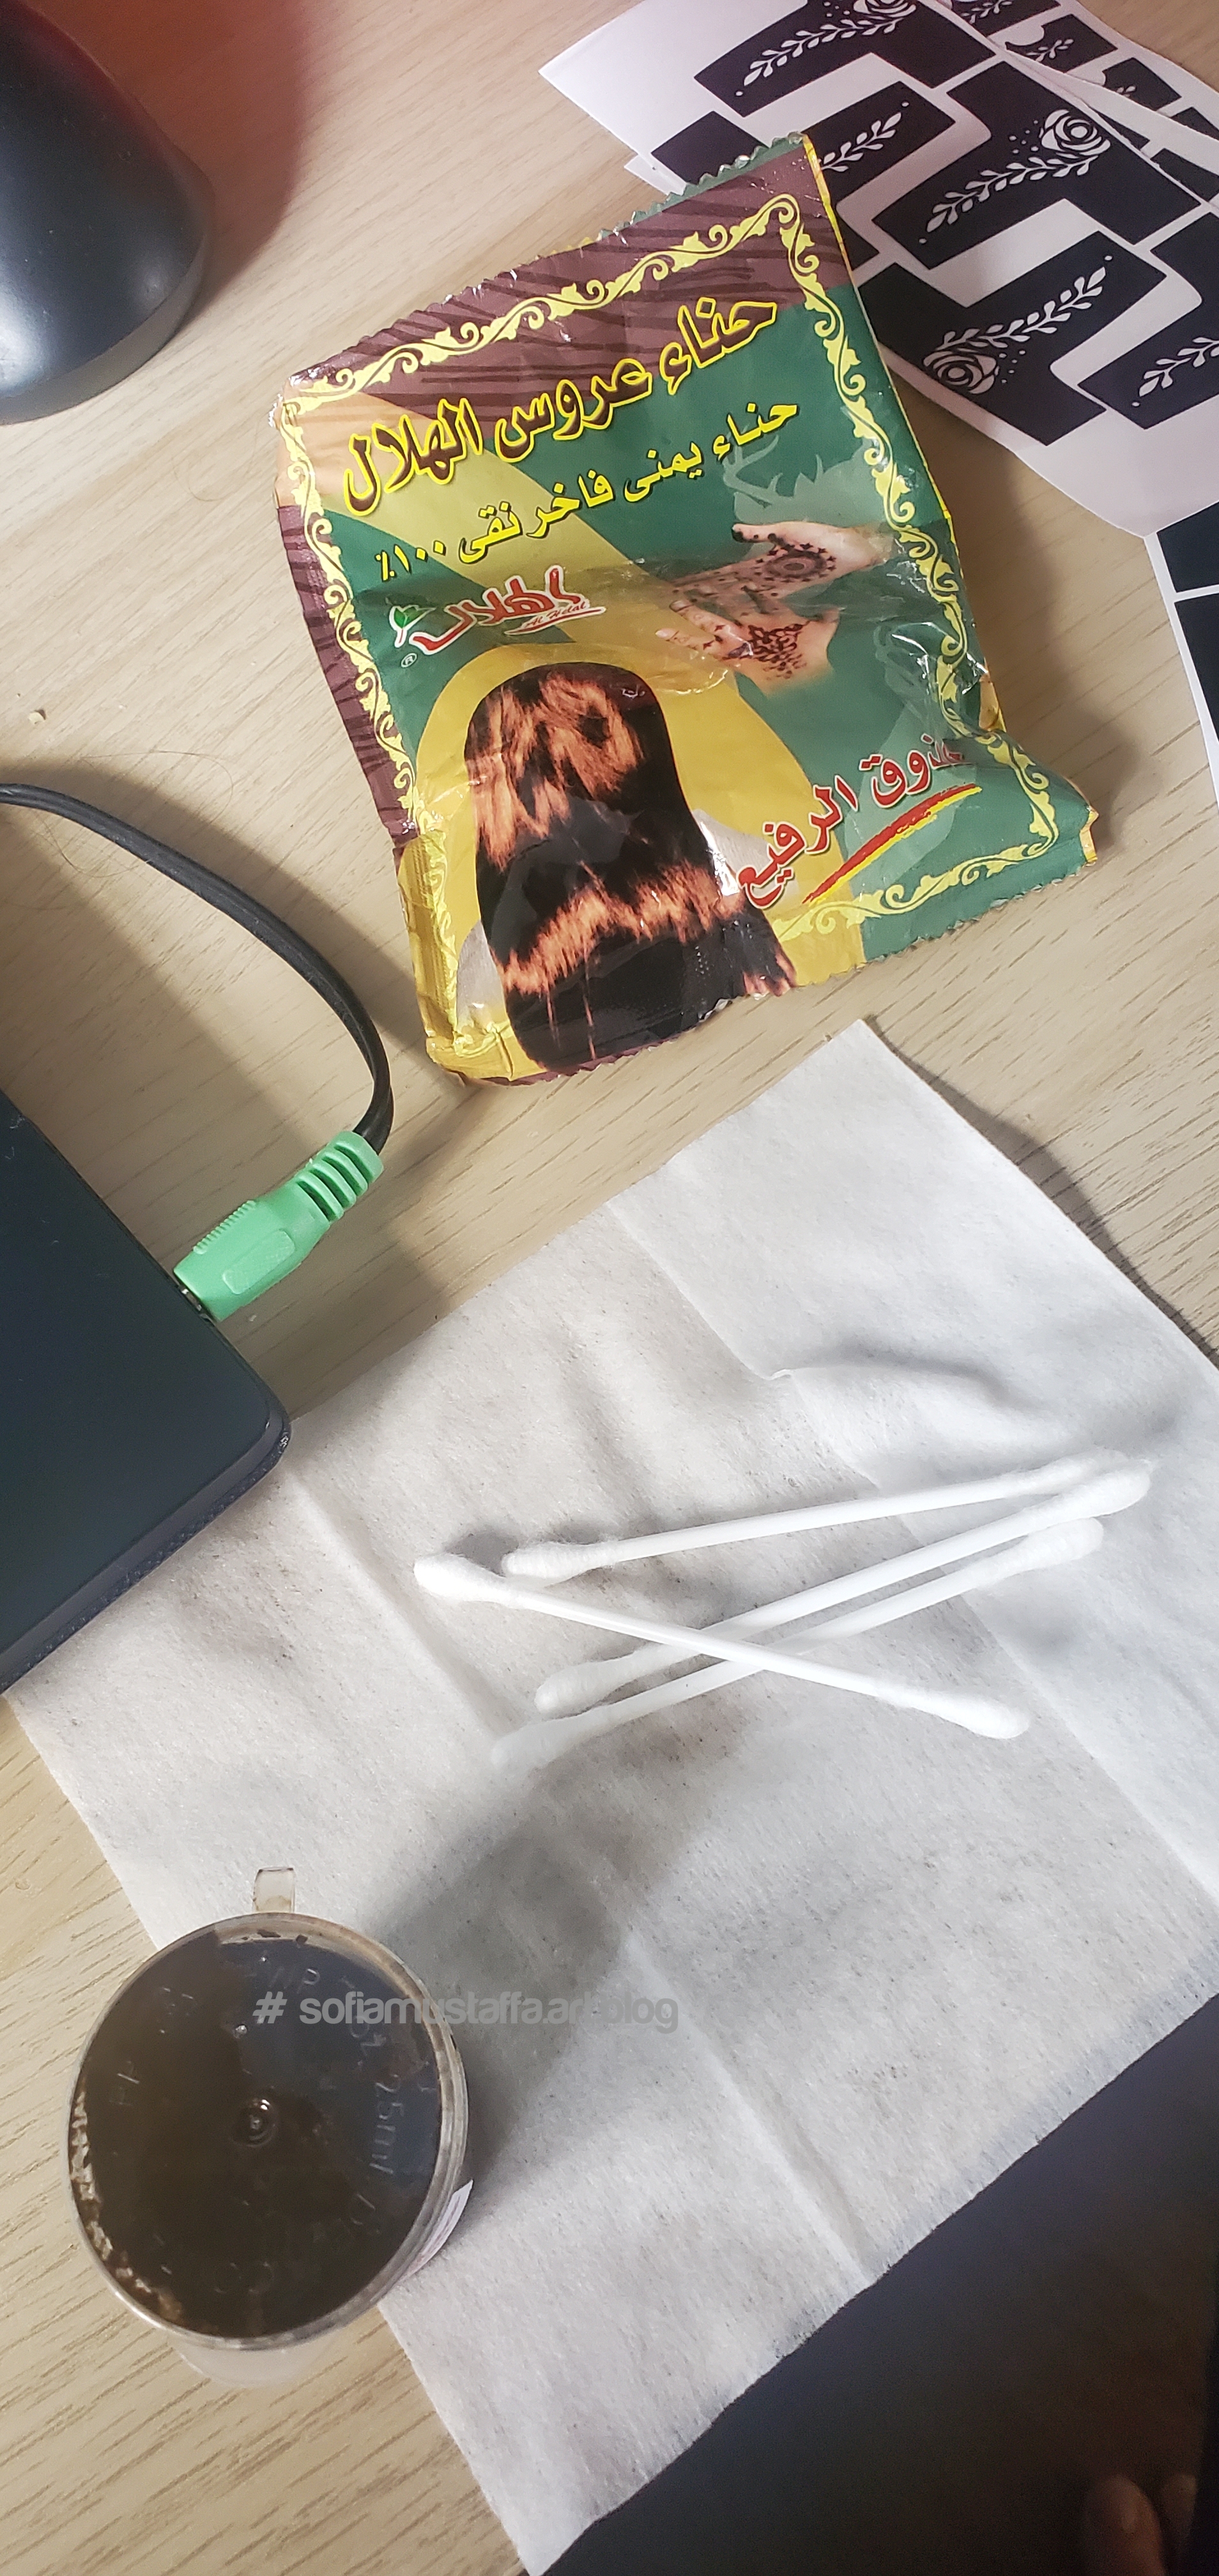
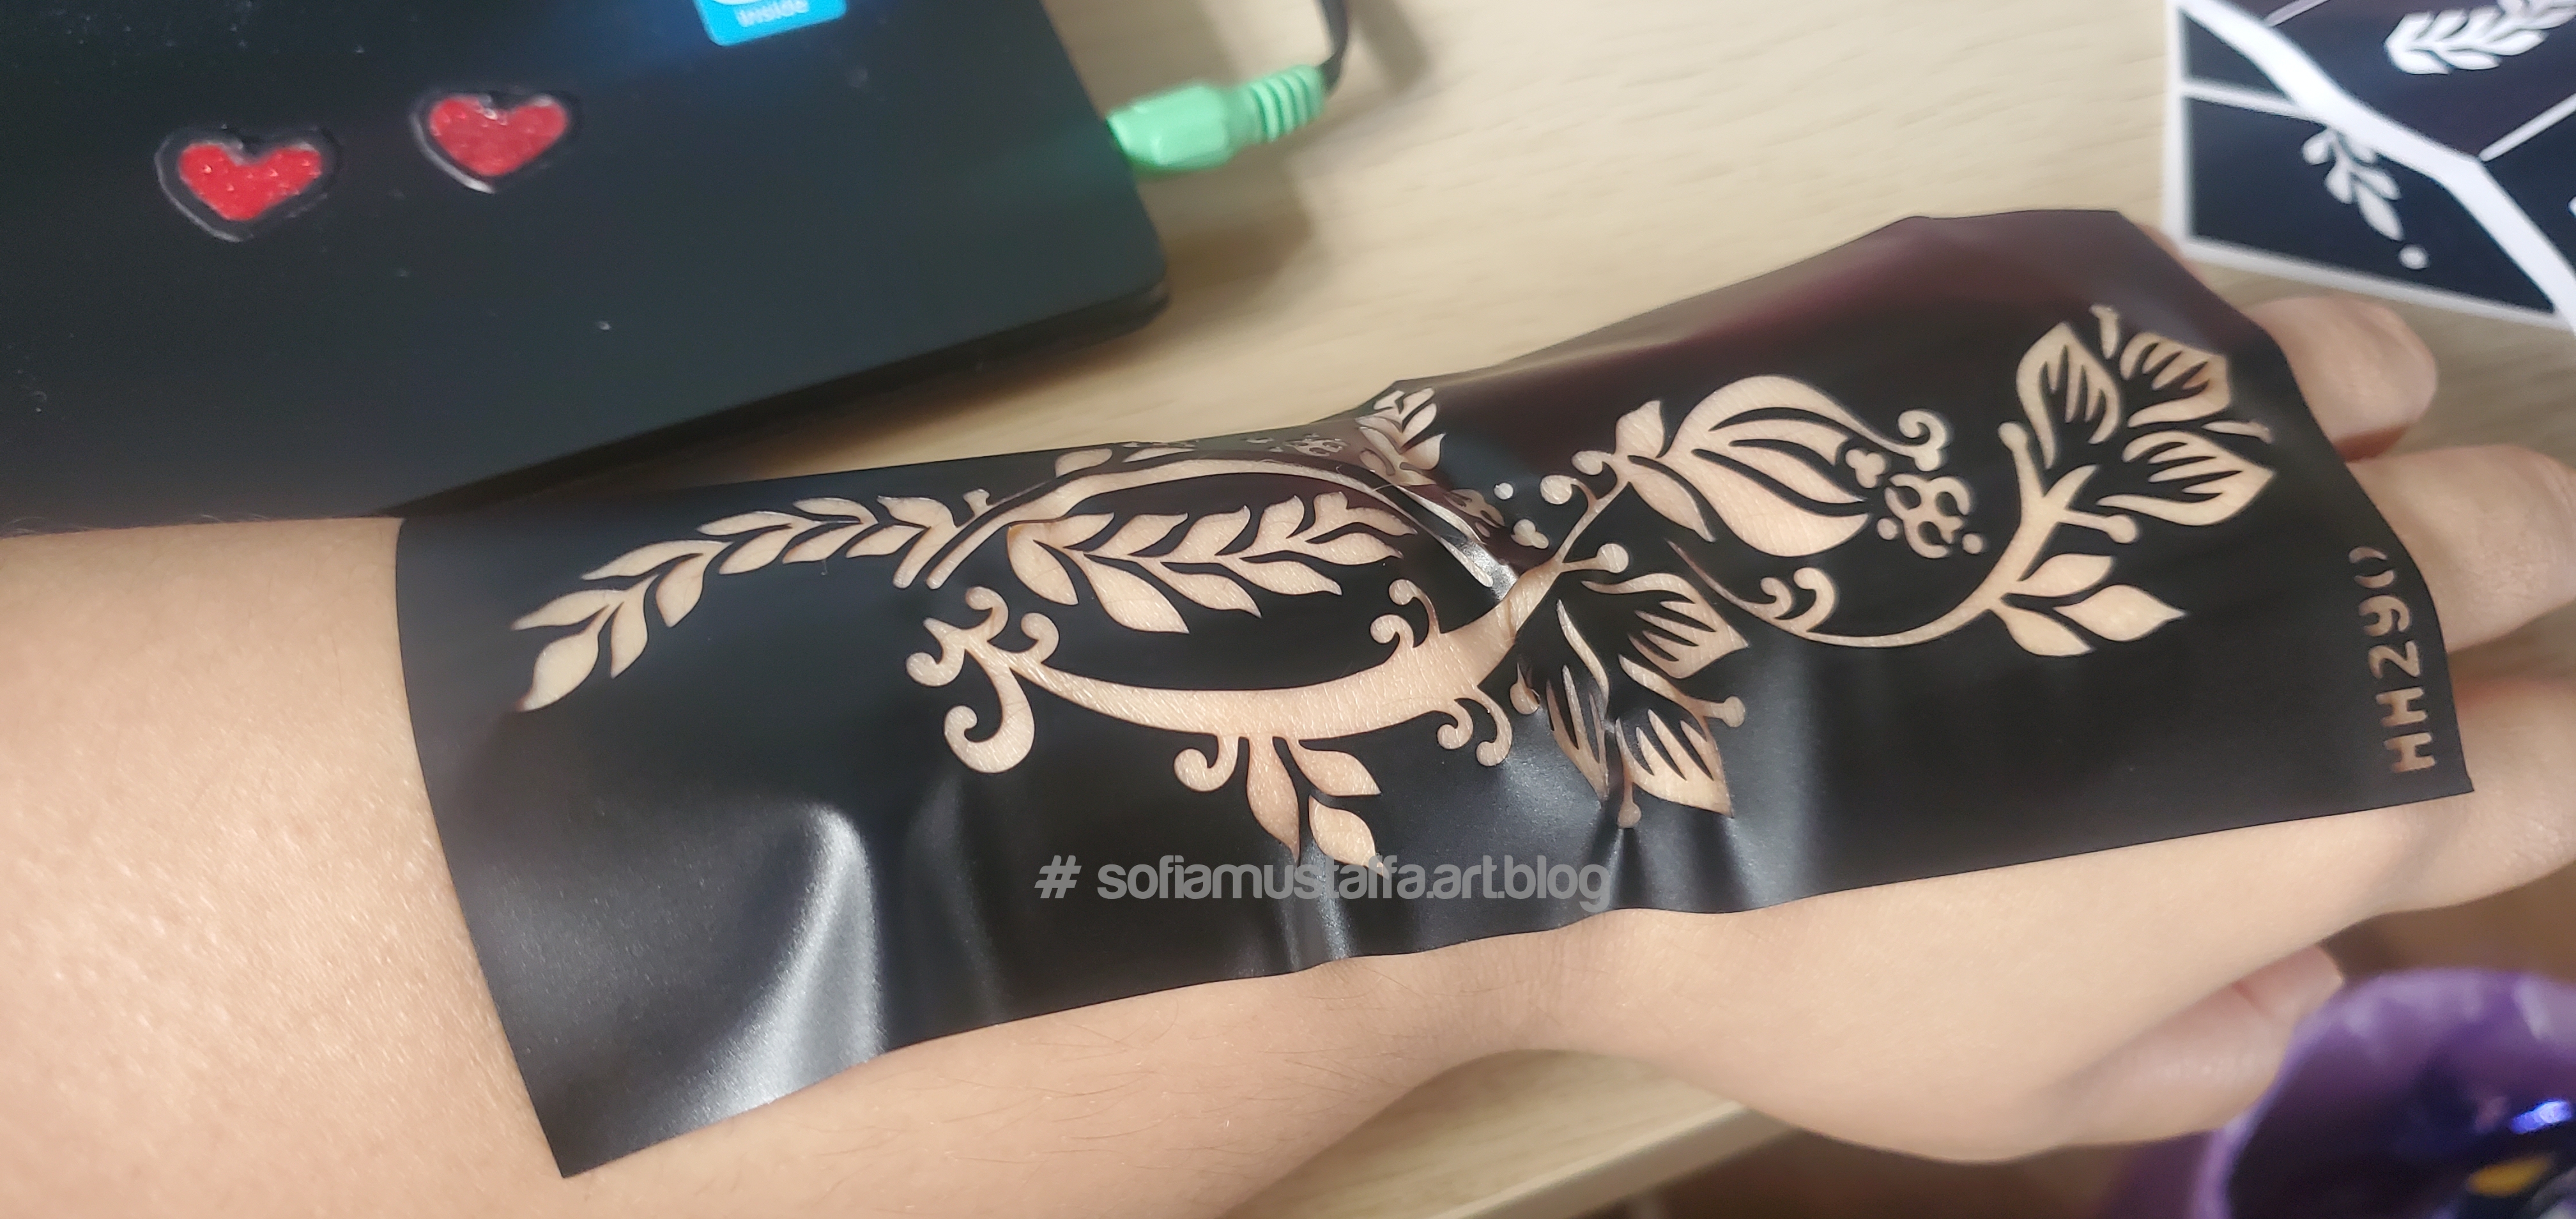
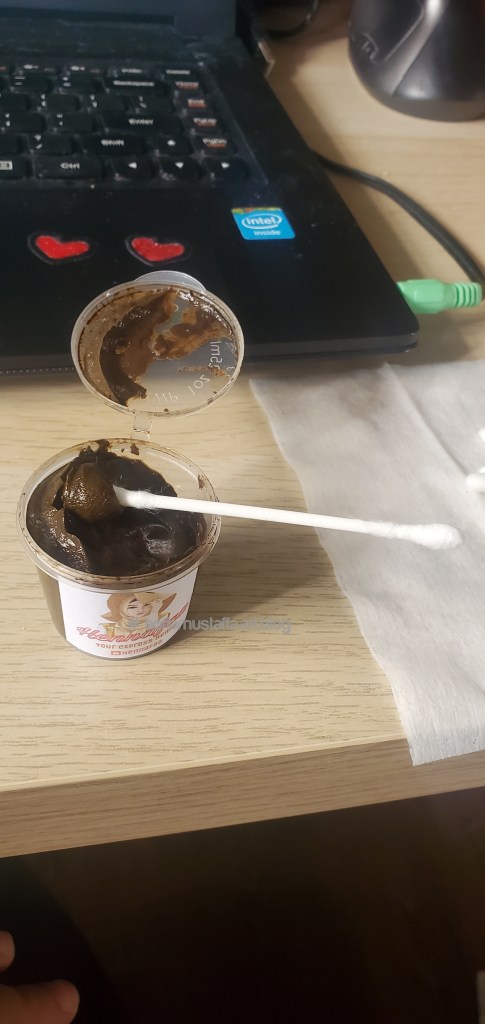
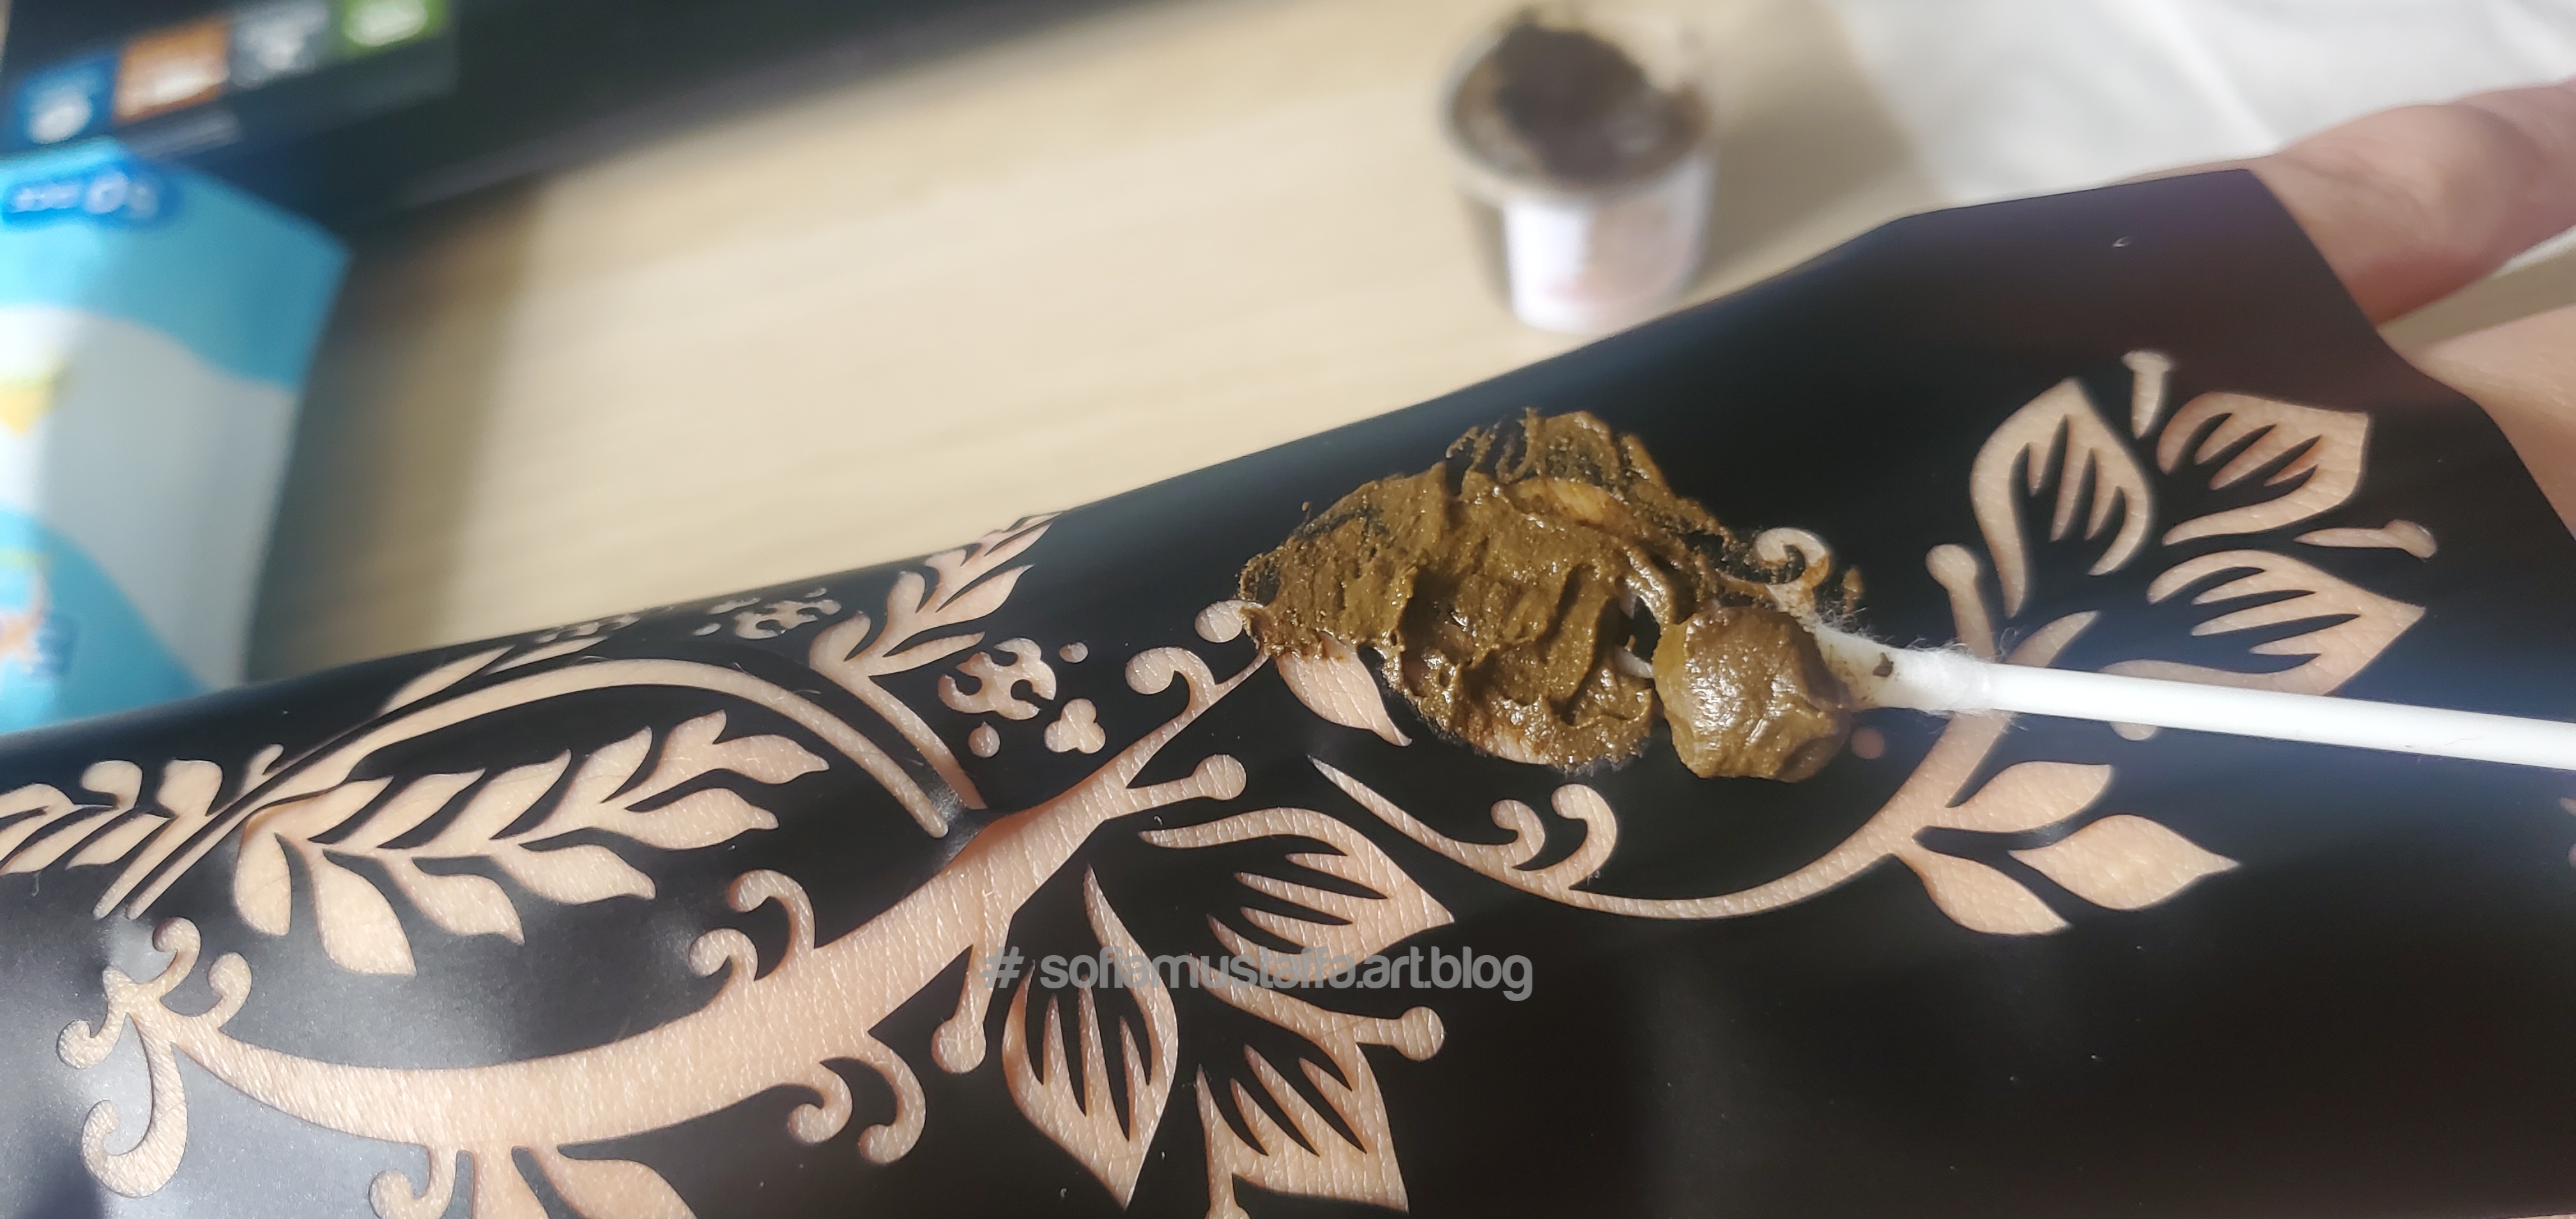
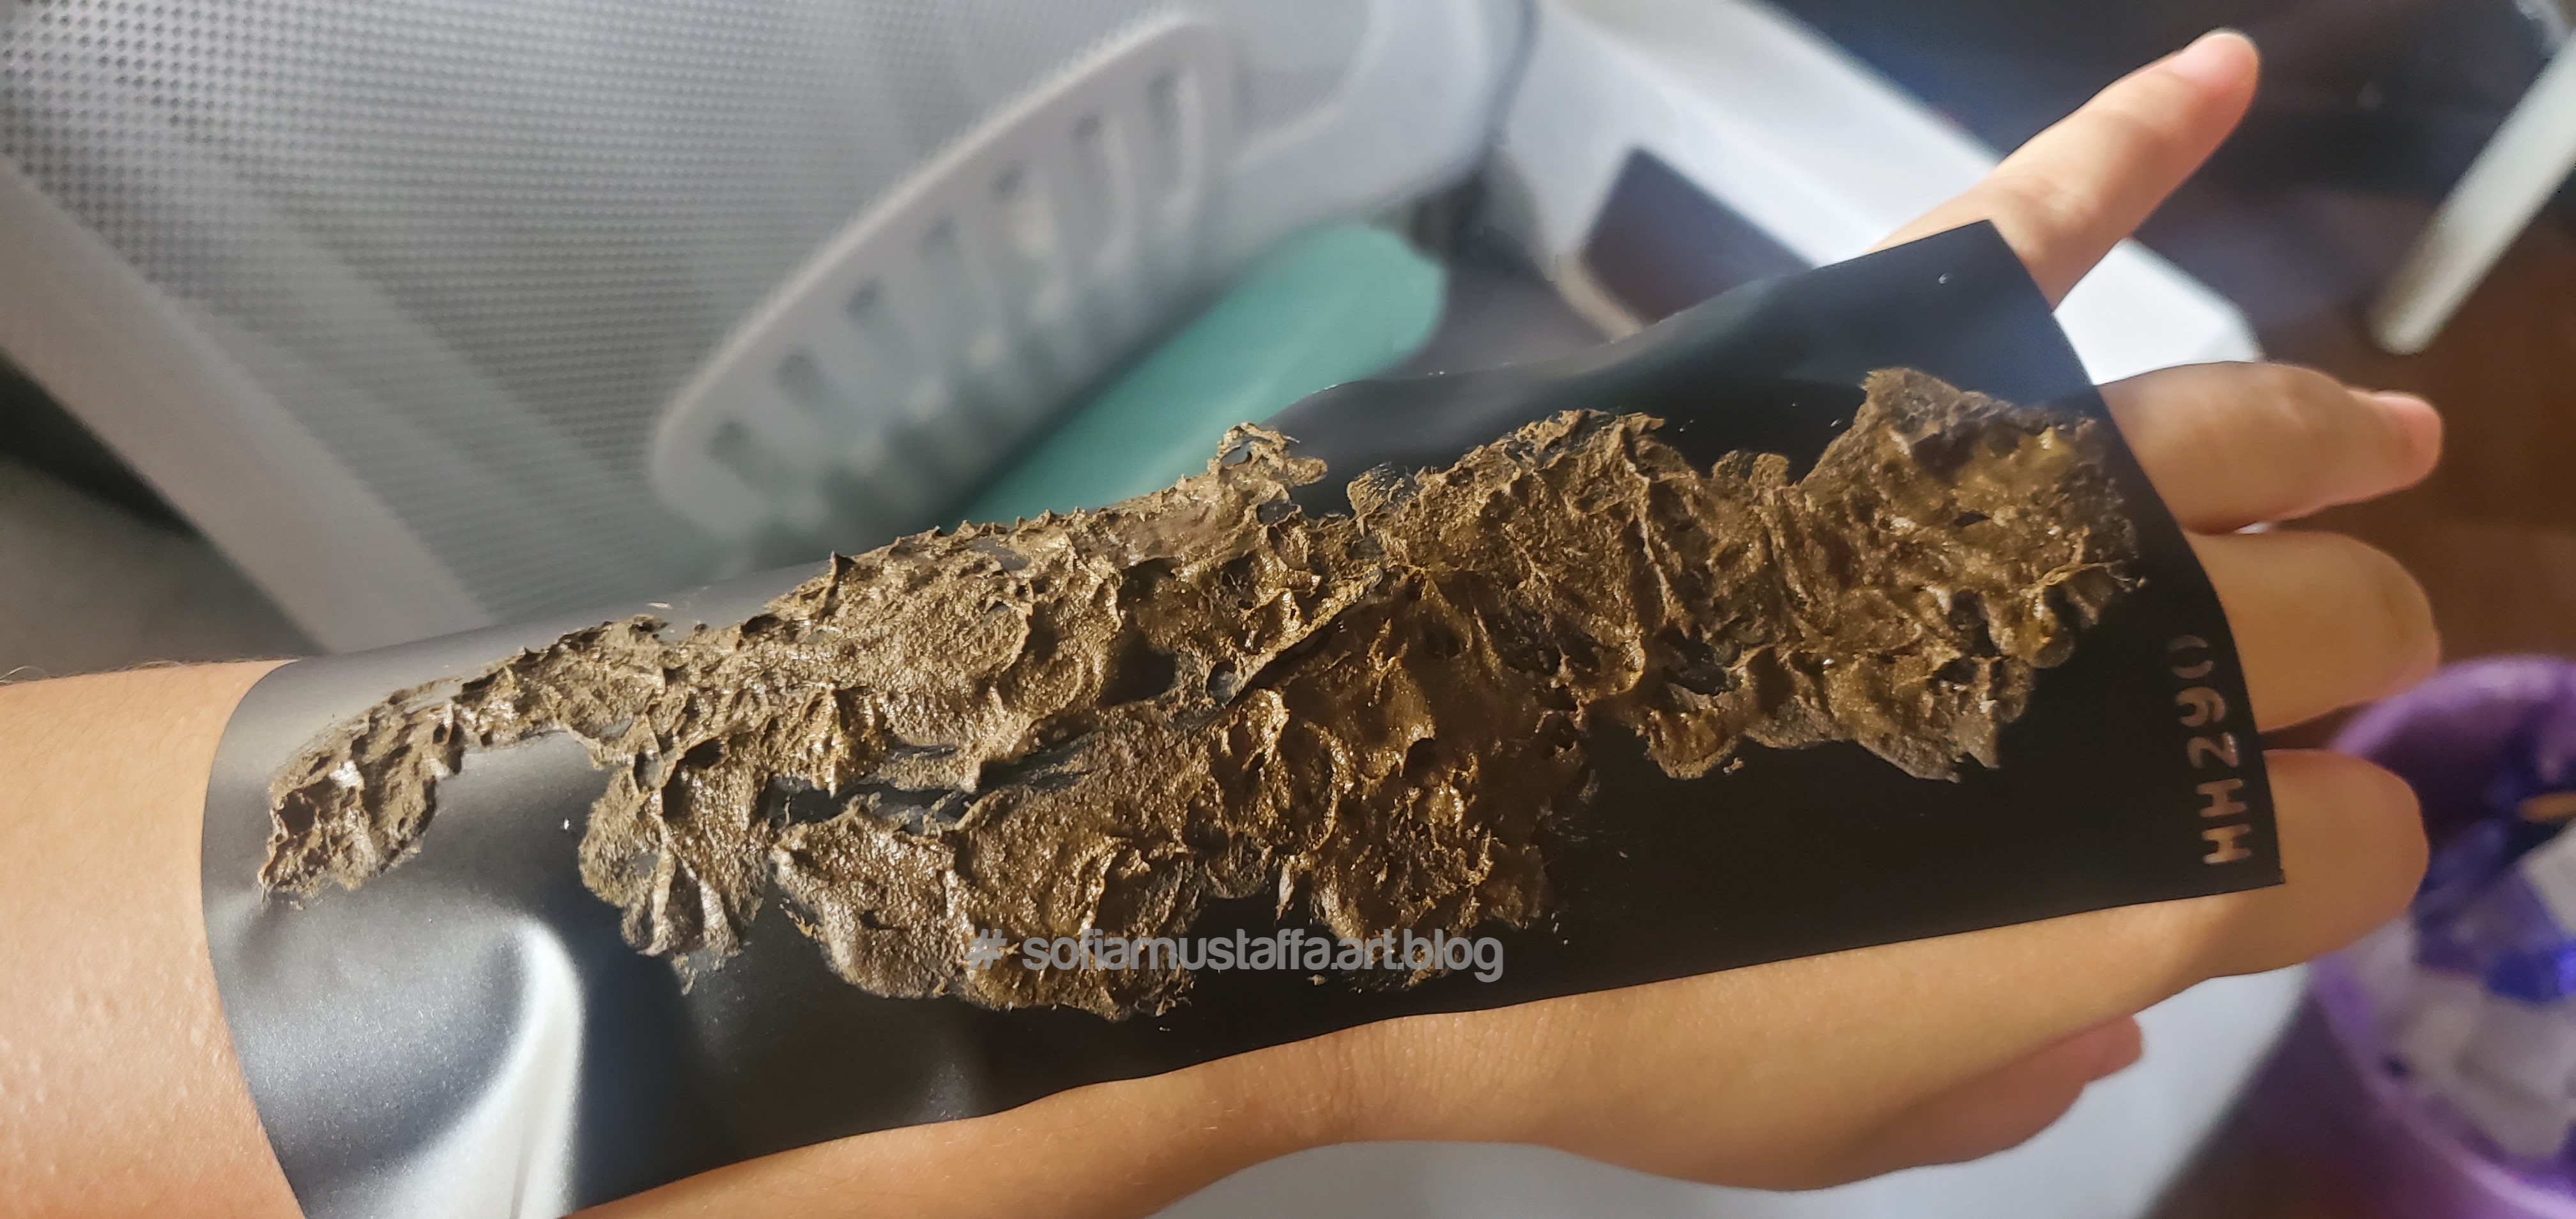
First thing first, you gotta choose which template you wanna try and where to put on your body 😅I prepare some tissue, and cotton bud to apply henna on it. As you can see here, the packet is the original henna, where you need to mix it with water. But I want things easier 😃, so I just bought readymade henna in the small cup. Of course it will be cheaper if you mix it yourself, i think the cup and packet, cup double price then the packet and a lot of quantity 😀Okay, then you put on the sticker template on your hand like this. Don’t put henna on those..HH290..its the sticker code ya 😁😅Alright, now we use the cotton bud to apply henna on top of the sticker…🥰Tadaa…make sure all template is well stick and apply on all sticker holes………..something like this….see..i dont put the HH290 henna, if not u gotta see it on your hand too..please ensure you alert on those 😅😅
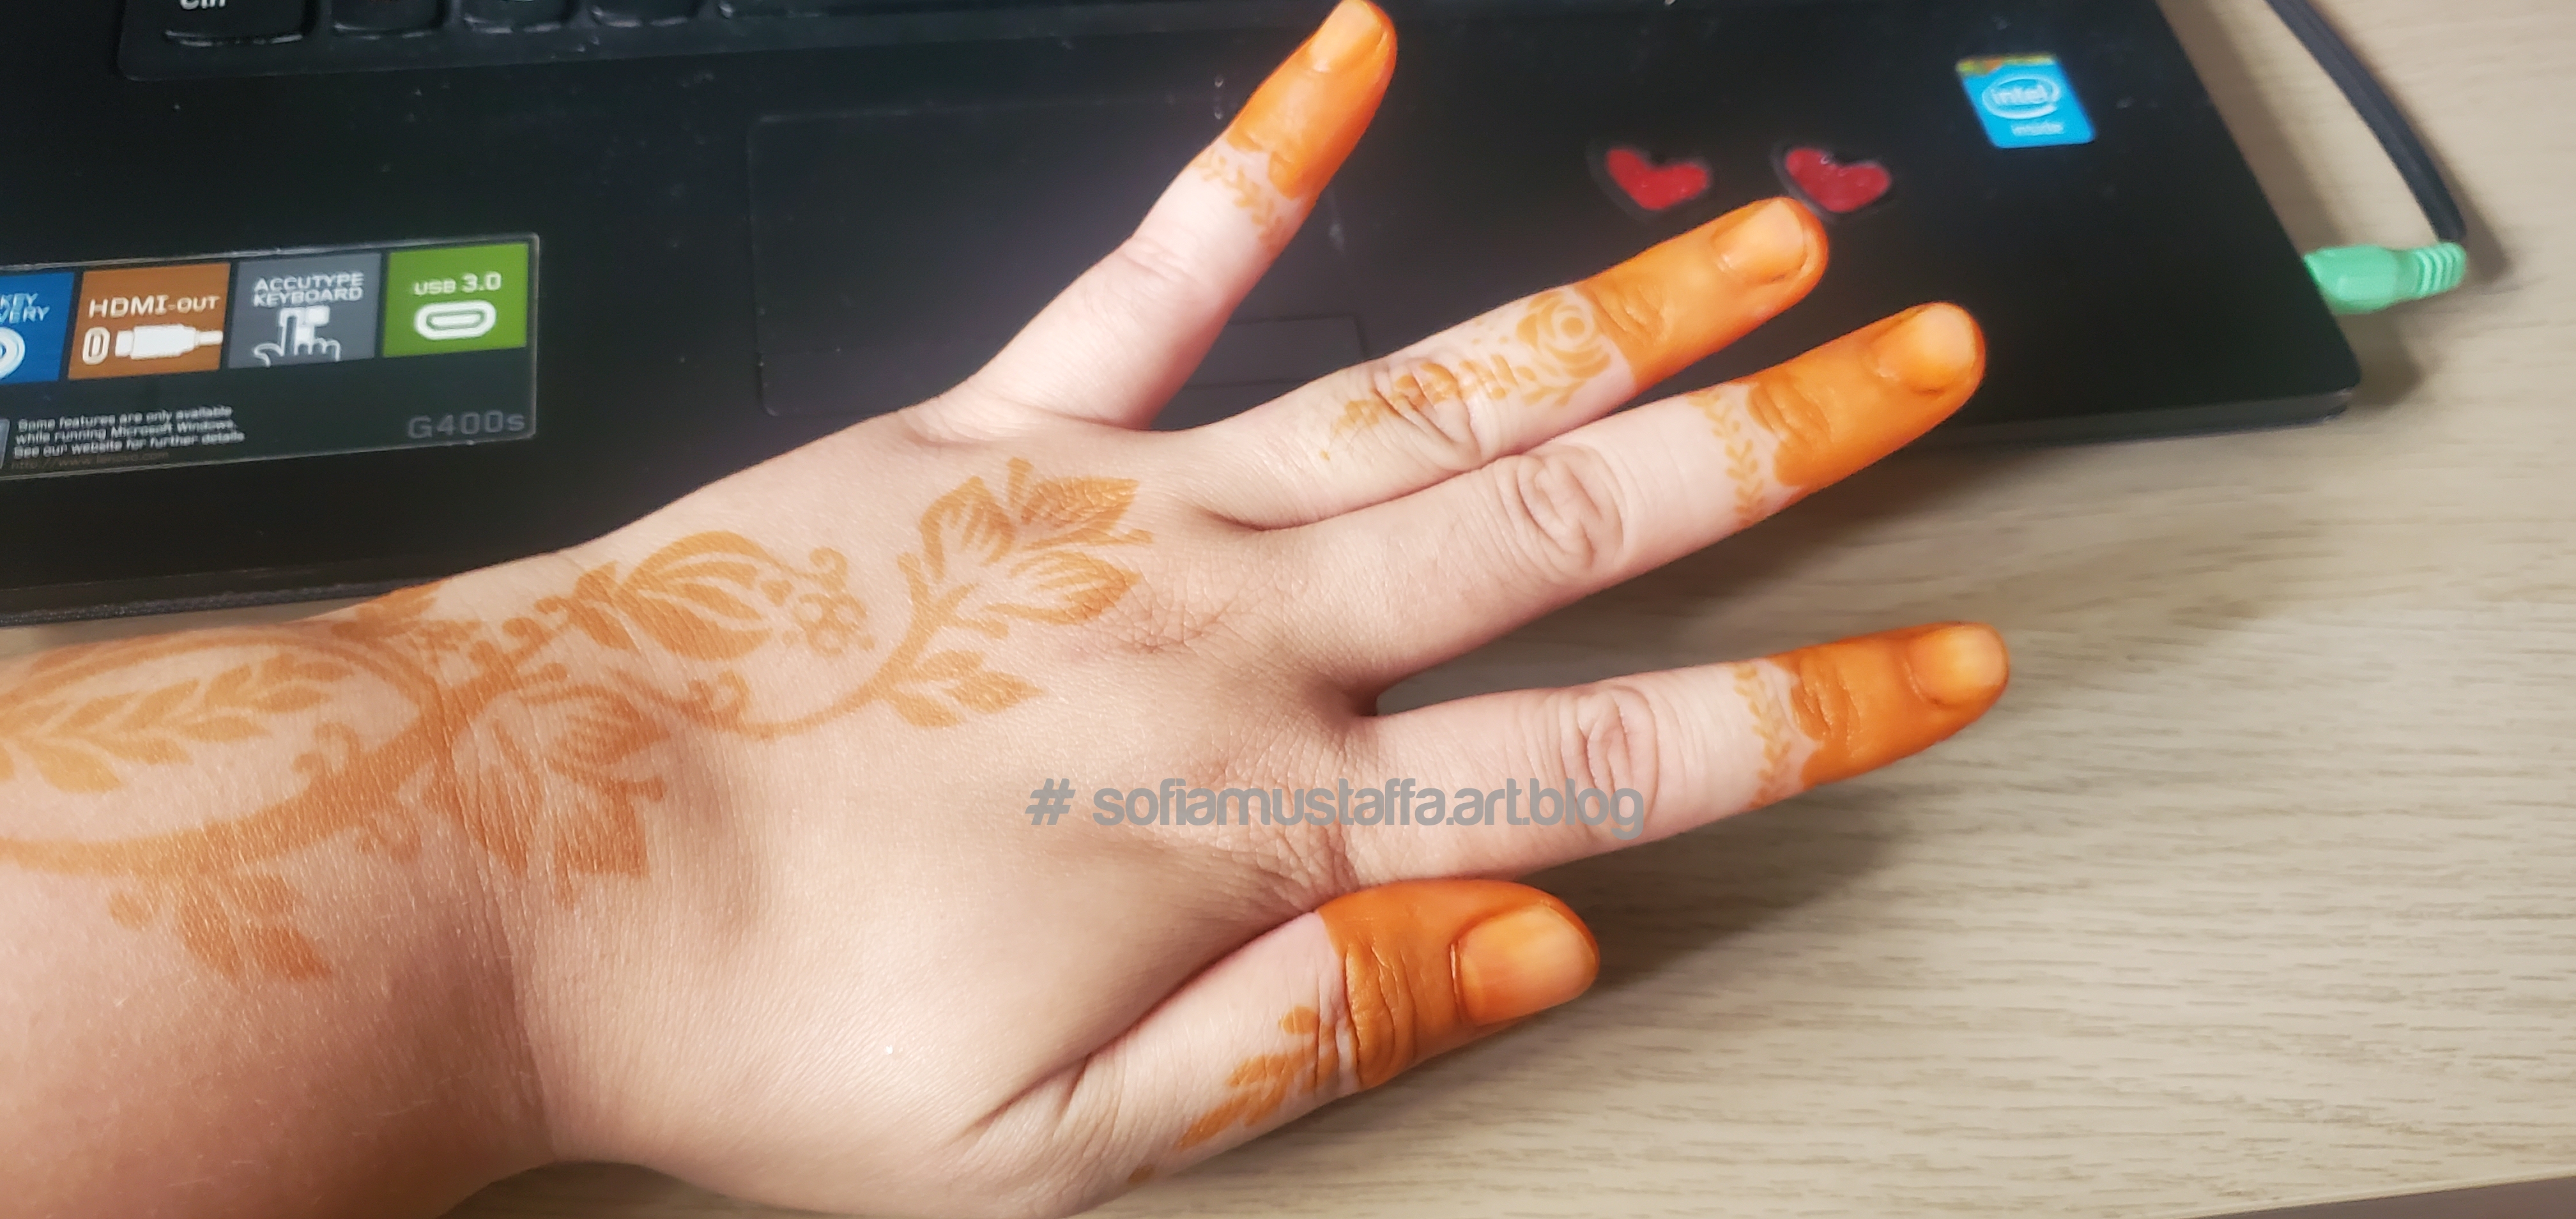
Okay, after you apply the henna, you gotta wait for few hours…or some people will leave it overnight. But hey, Im not gonna wait that long, I just leave it for 30min 😂. The more longer you wait, the more thick the color will be…☺
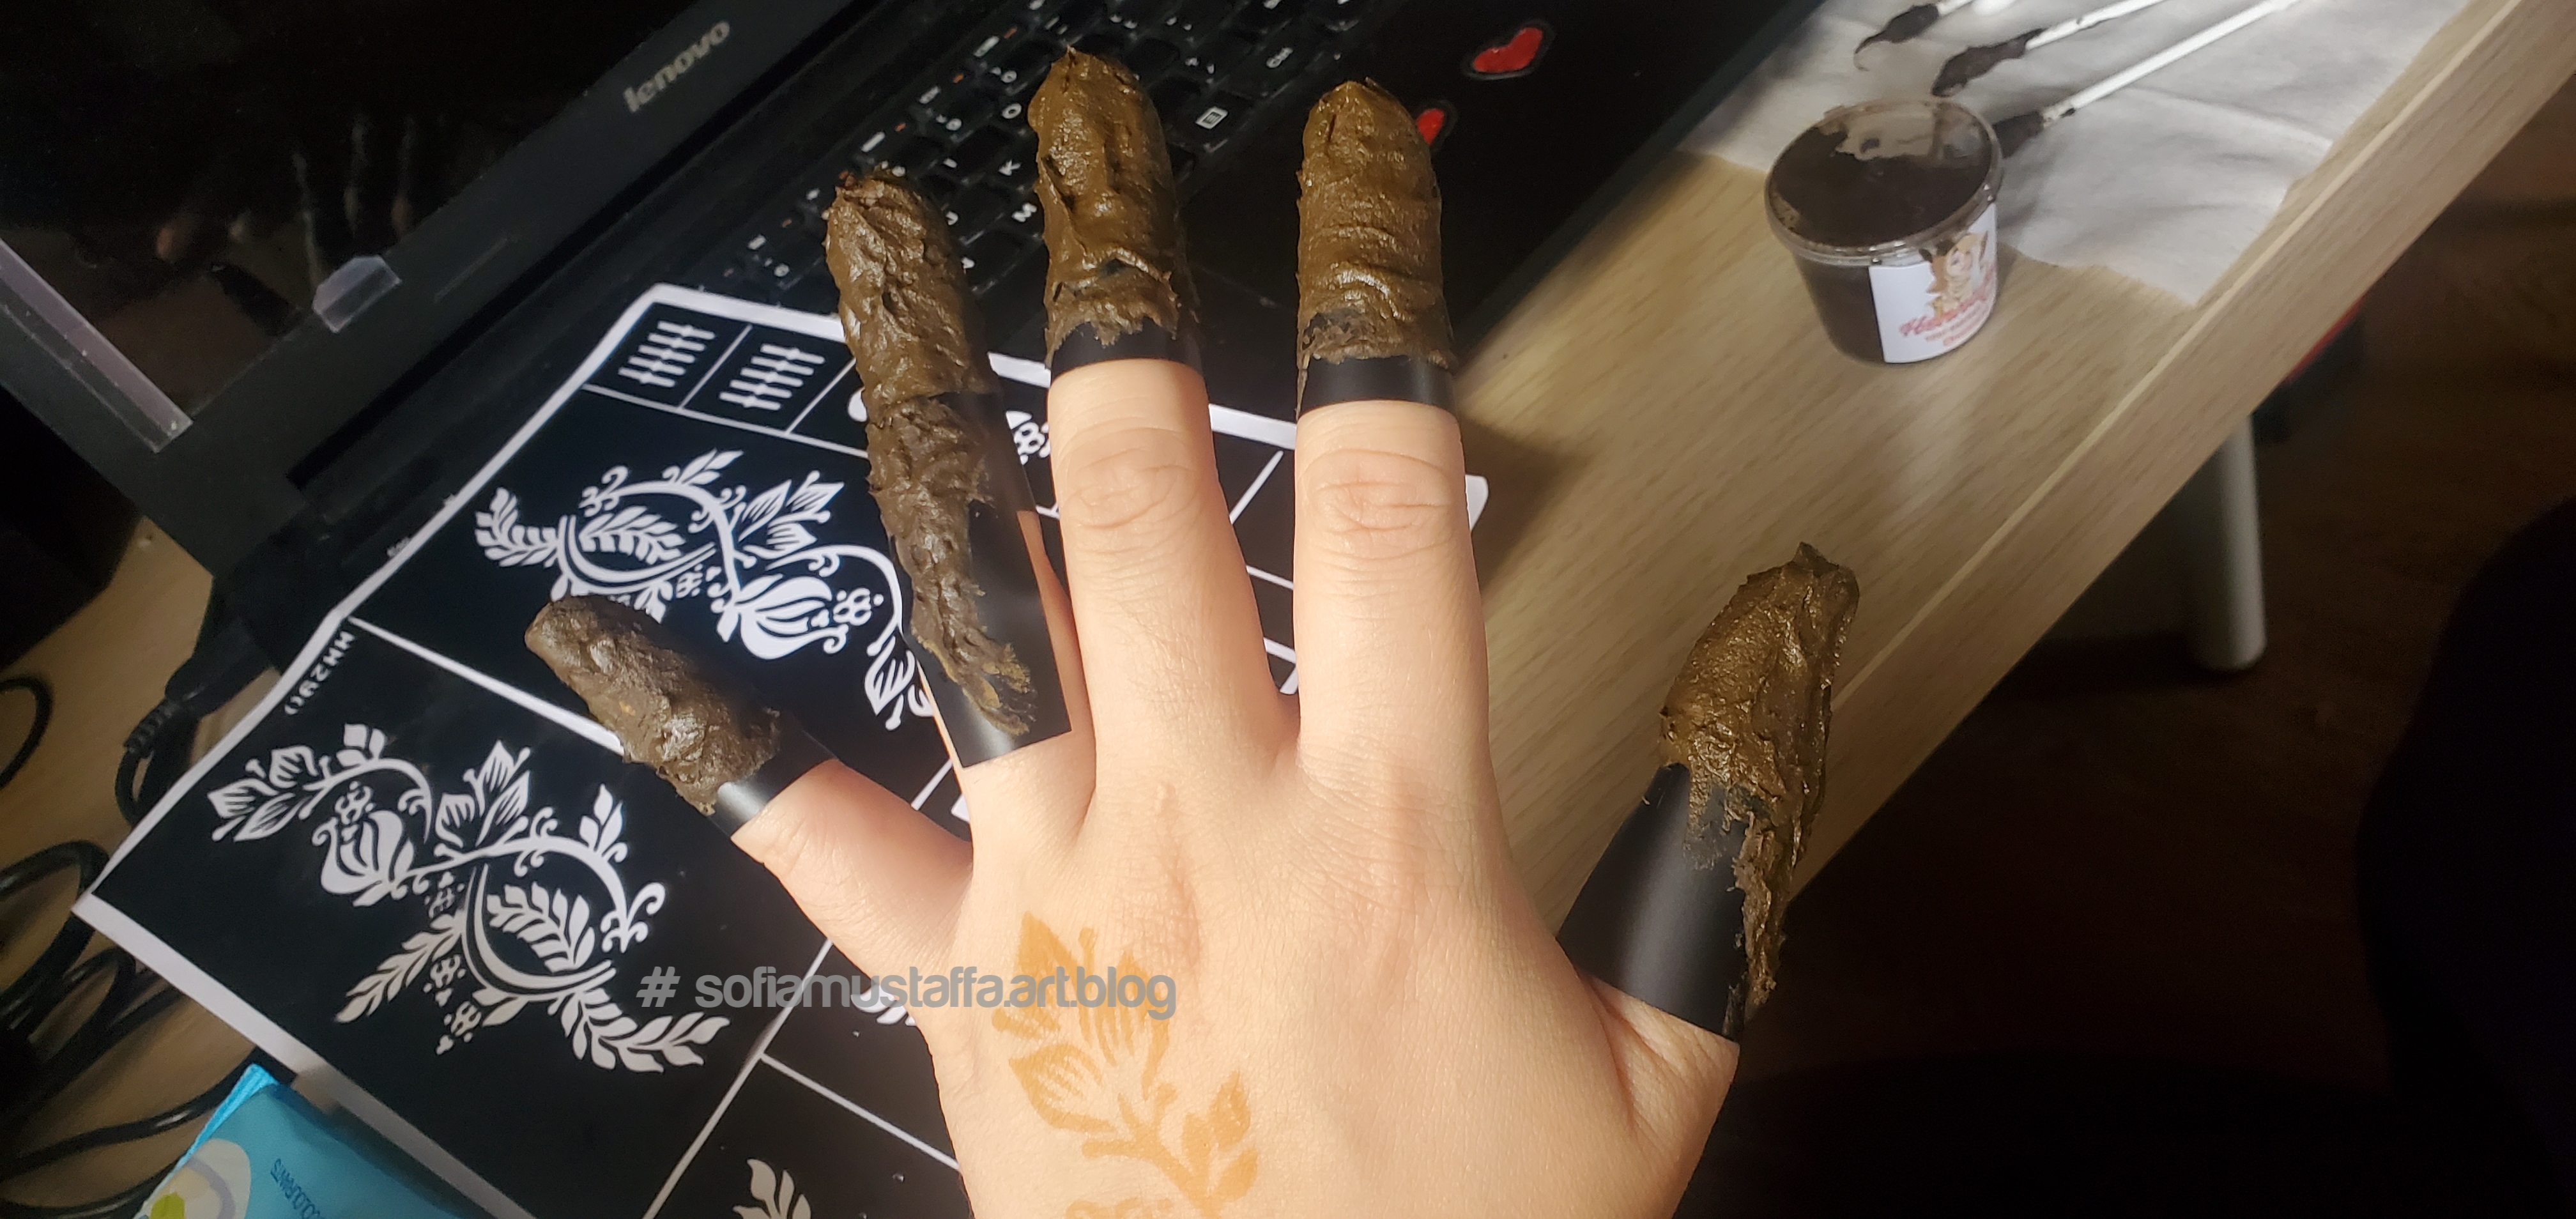
Okay, done for the hand part…let’s go to the finger part….
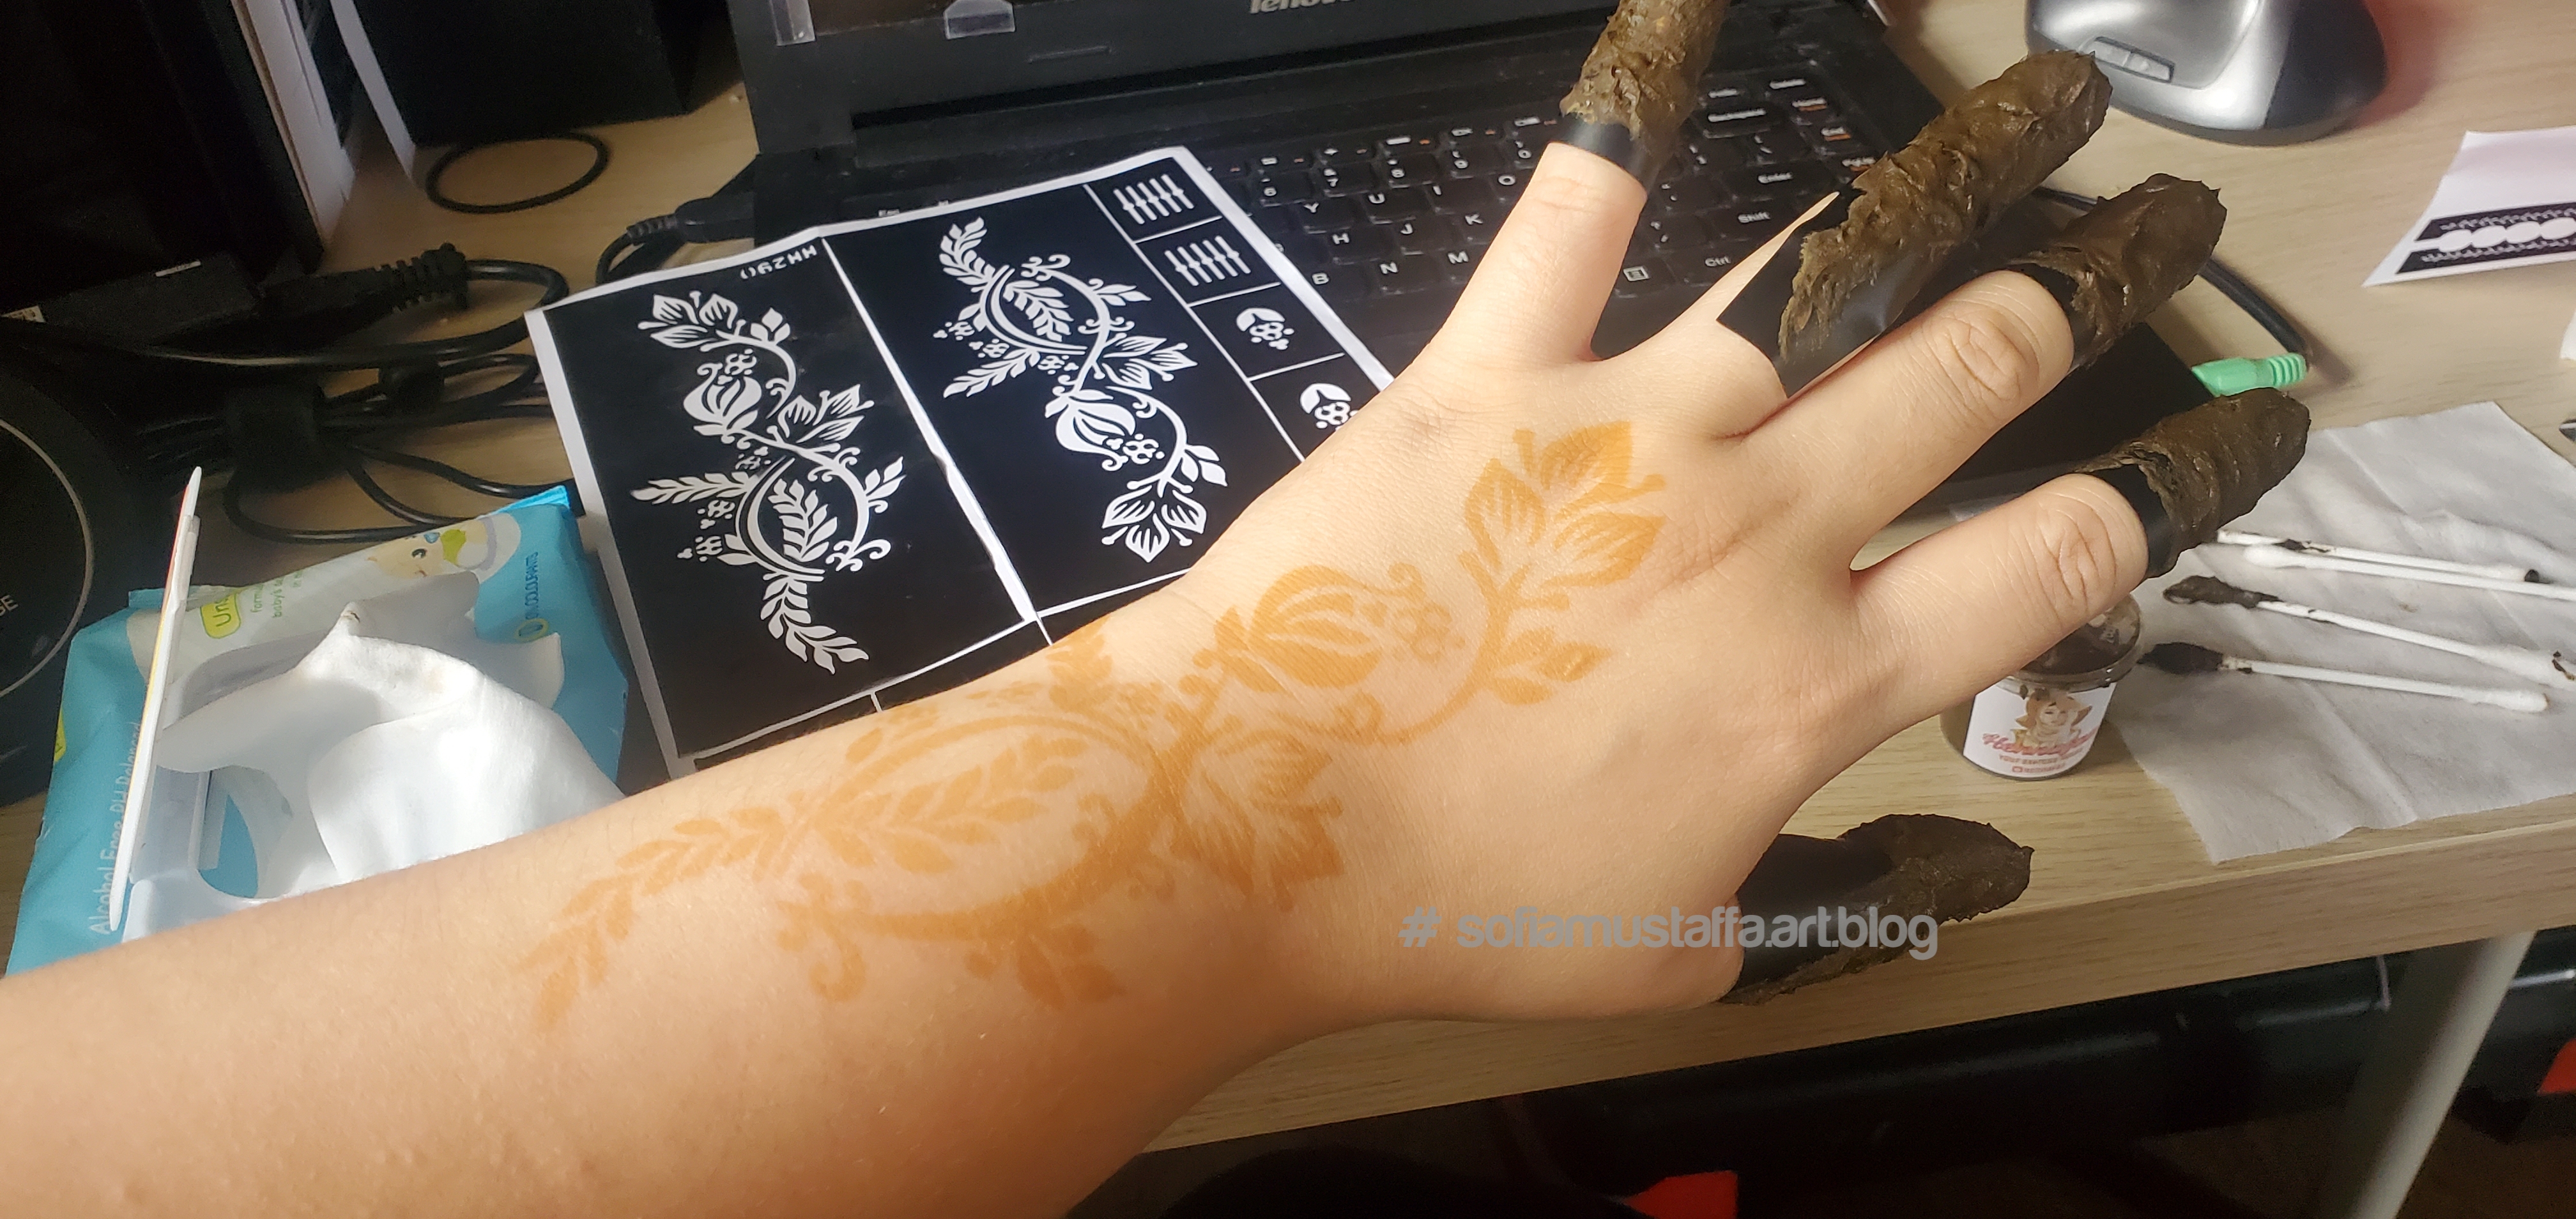
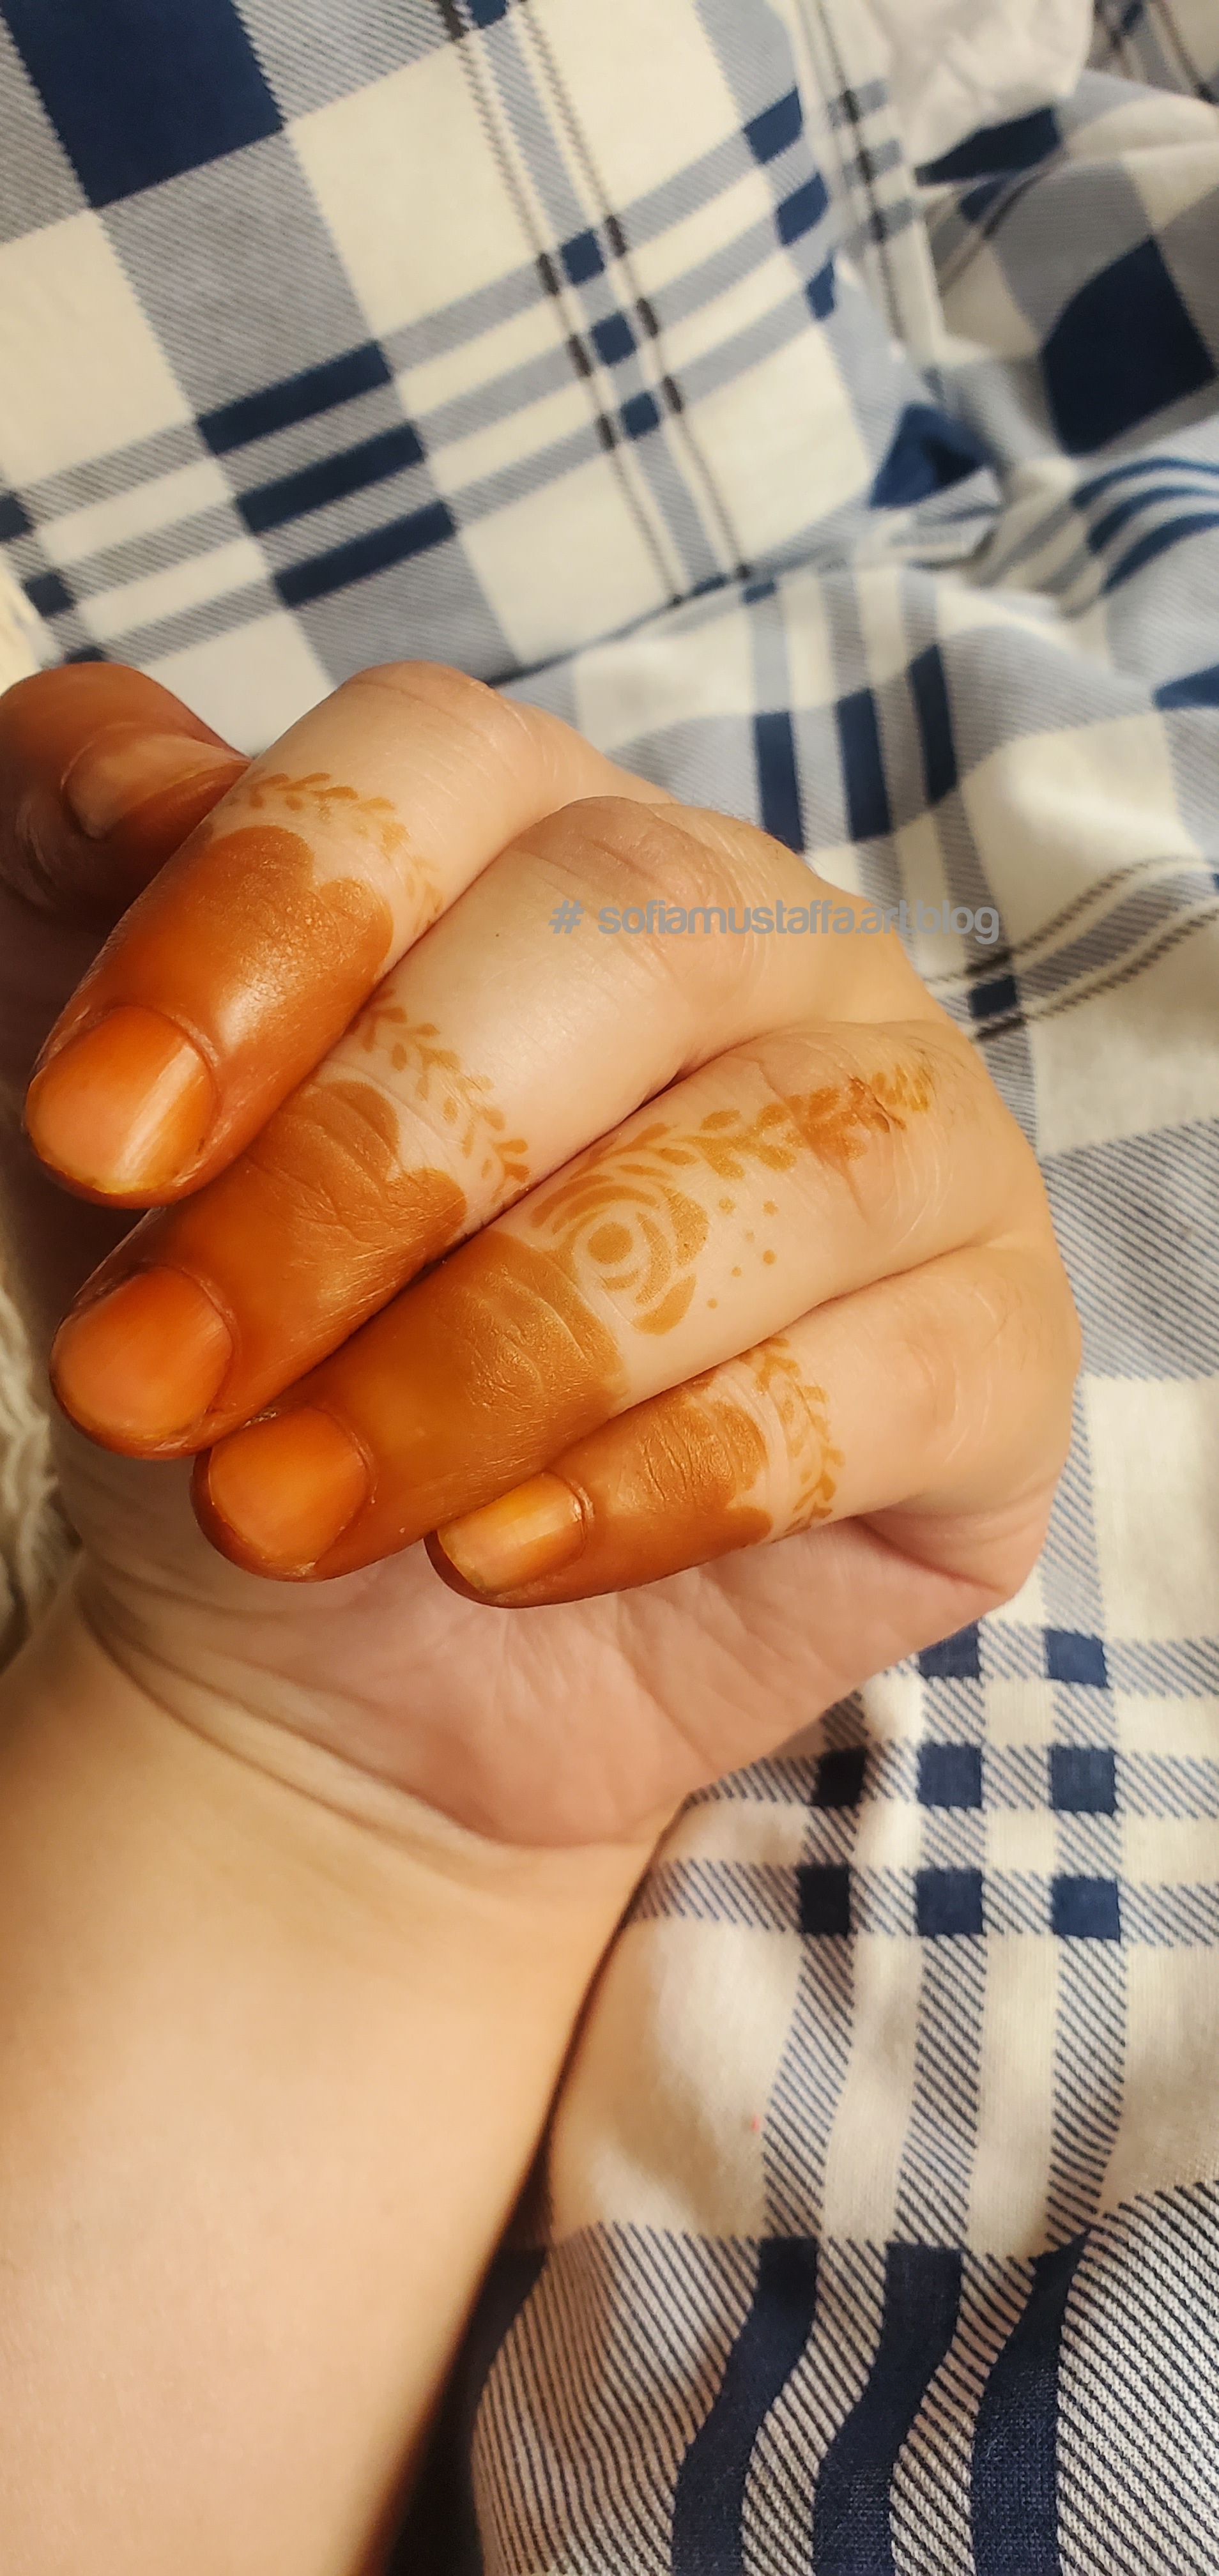
Hahaha…if you go to outside..most of them just lazy to design your hand. But me, I put on different design to my finger. You see, 3 different design on my fingers 😃. Okay, you gotta put it lower like this, so that 1/3 of your finger will cover by the henna..Apply the henna on top of the sticker template like this…Tadaaa..you see, the color is not that bright coz I just leave it for 30min 😂 okay, I waited another 30min. I don’t have much time to wait..LOLTadaaaaa….overall view..well..not bad…not bad at allIts orange color. Henna got available in white, dark green, black, red…but I love orange color the most. Suit with my skin 🥰Jeng jeng….i just love it…different kind of design….🥰🥰🥰
Okay guys, thats all Im sharing on how to make your own mahendi. Your own design, your own satisfaction. Till then guys…to be continue….
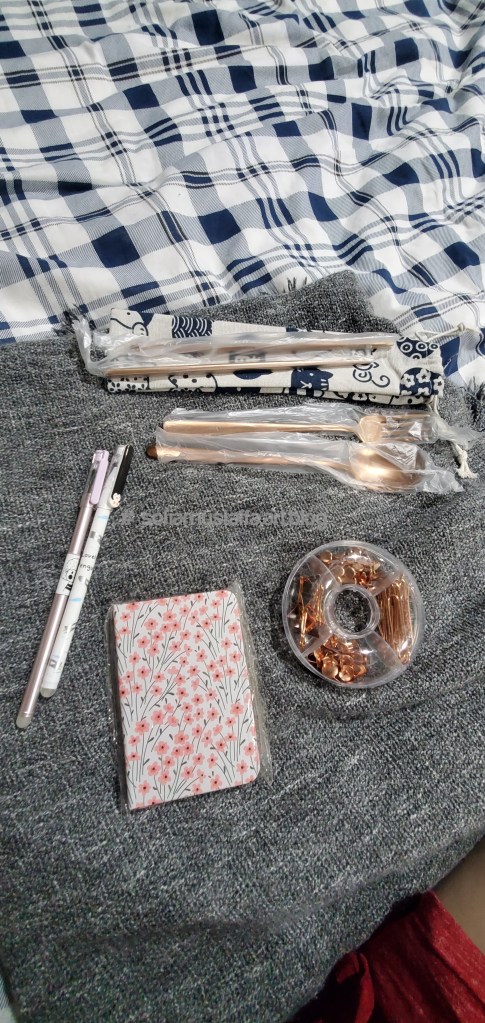
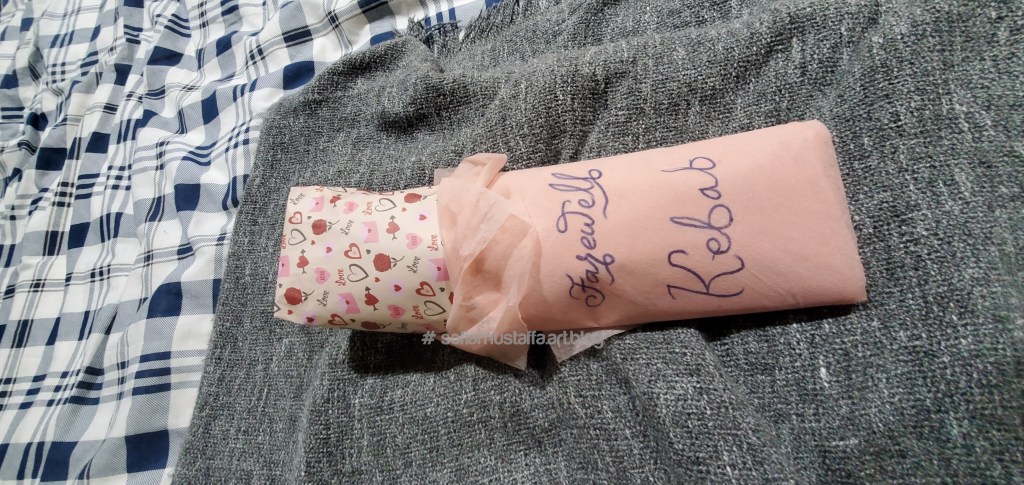
Hi everyone! Its midnight now and its public holiday in our country. I just finished wrapping my farewell gift to my supervisor. Its a habit for me to give away farewell gift to my supervisor or my colleagues as an appreciation for their leadership and sharing knowledges with me.
Okay, so what I bought is….a flatware set, small notebook, pen, and stationery pin set..
Well, i don’t have box to put all things together. So I decided to just wrap it. It turn out..holding it, felt like holding a kebab. So I wrap the gift to be look like a kebab 😂
Tada!!! A farewell kebab from me 😅
To be honest with you, it’s really tiring to wrap uneven present shape. I just follow my heart and it turn out it looks like a kebab. Haha..till then guys…to be continue…time to sleep…😴😴😴
Hello!!! HellOoooooOoo…hello!! Everybody! How are you? Today, I got a lil time for myself..so I made some diy items.
My room is super duper dusty lately. I’d bought dust mite vacuum, but unfortunately the parcel was lost during shipping. I bought it again, and hoping it won’t lost again.
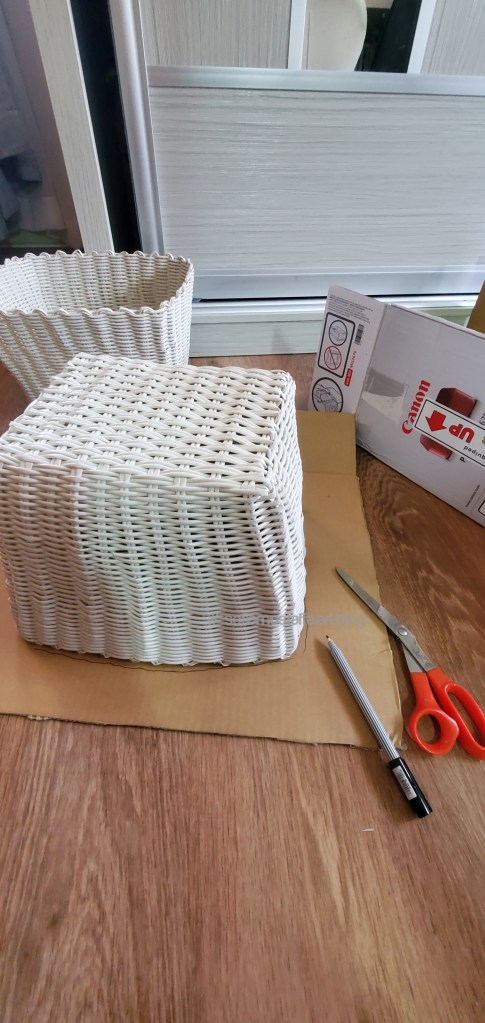
Because of my room sooo dusty, so I was thinking to cover up all my baskets. You really can’t see with your eyes the dust on fabric, but its there 🥲
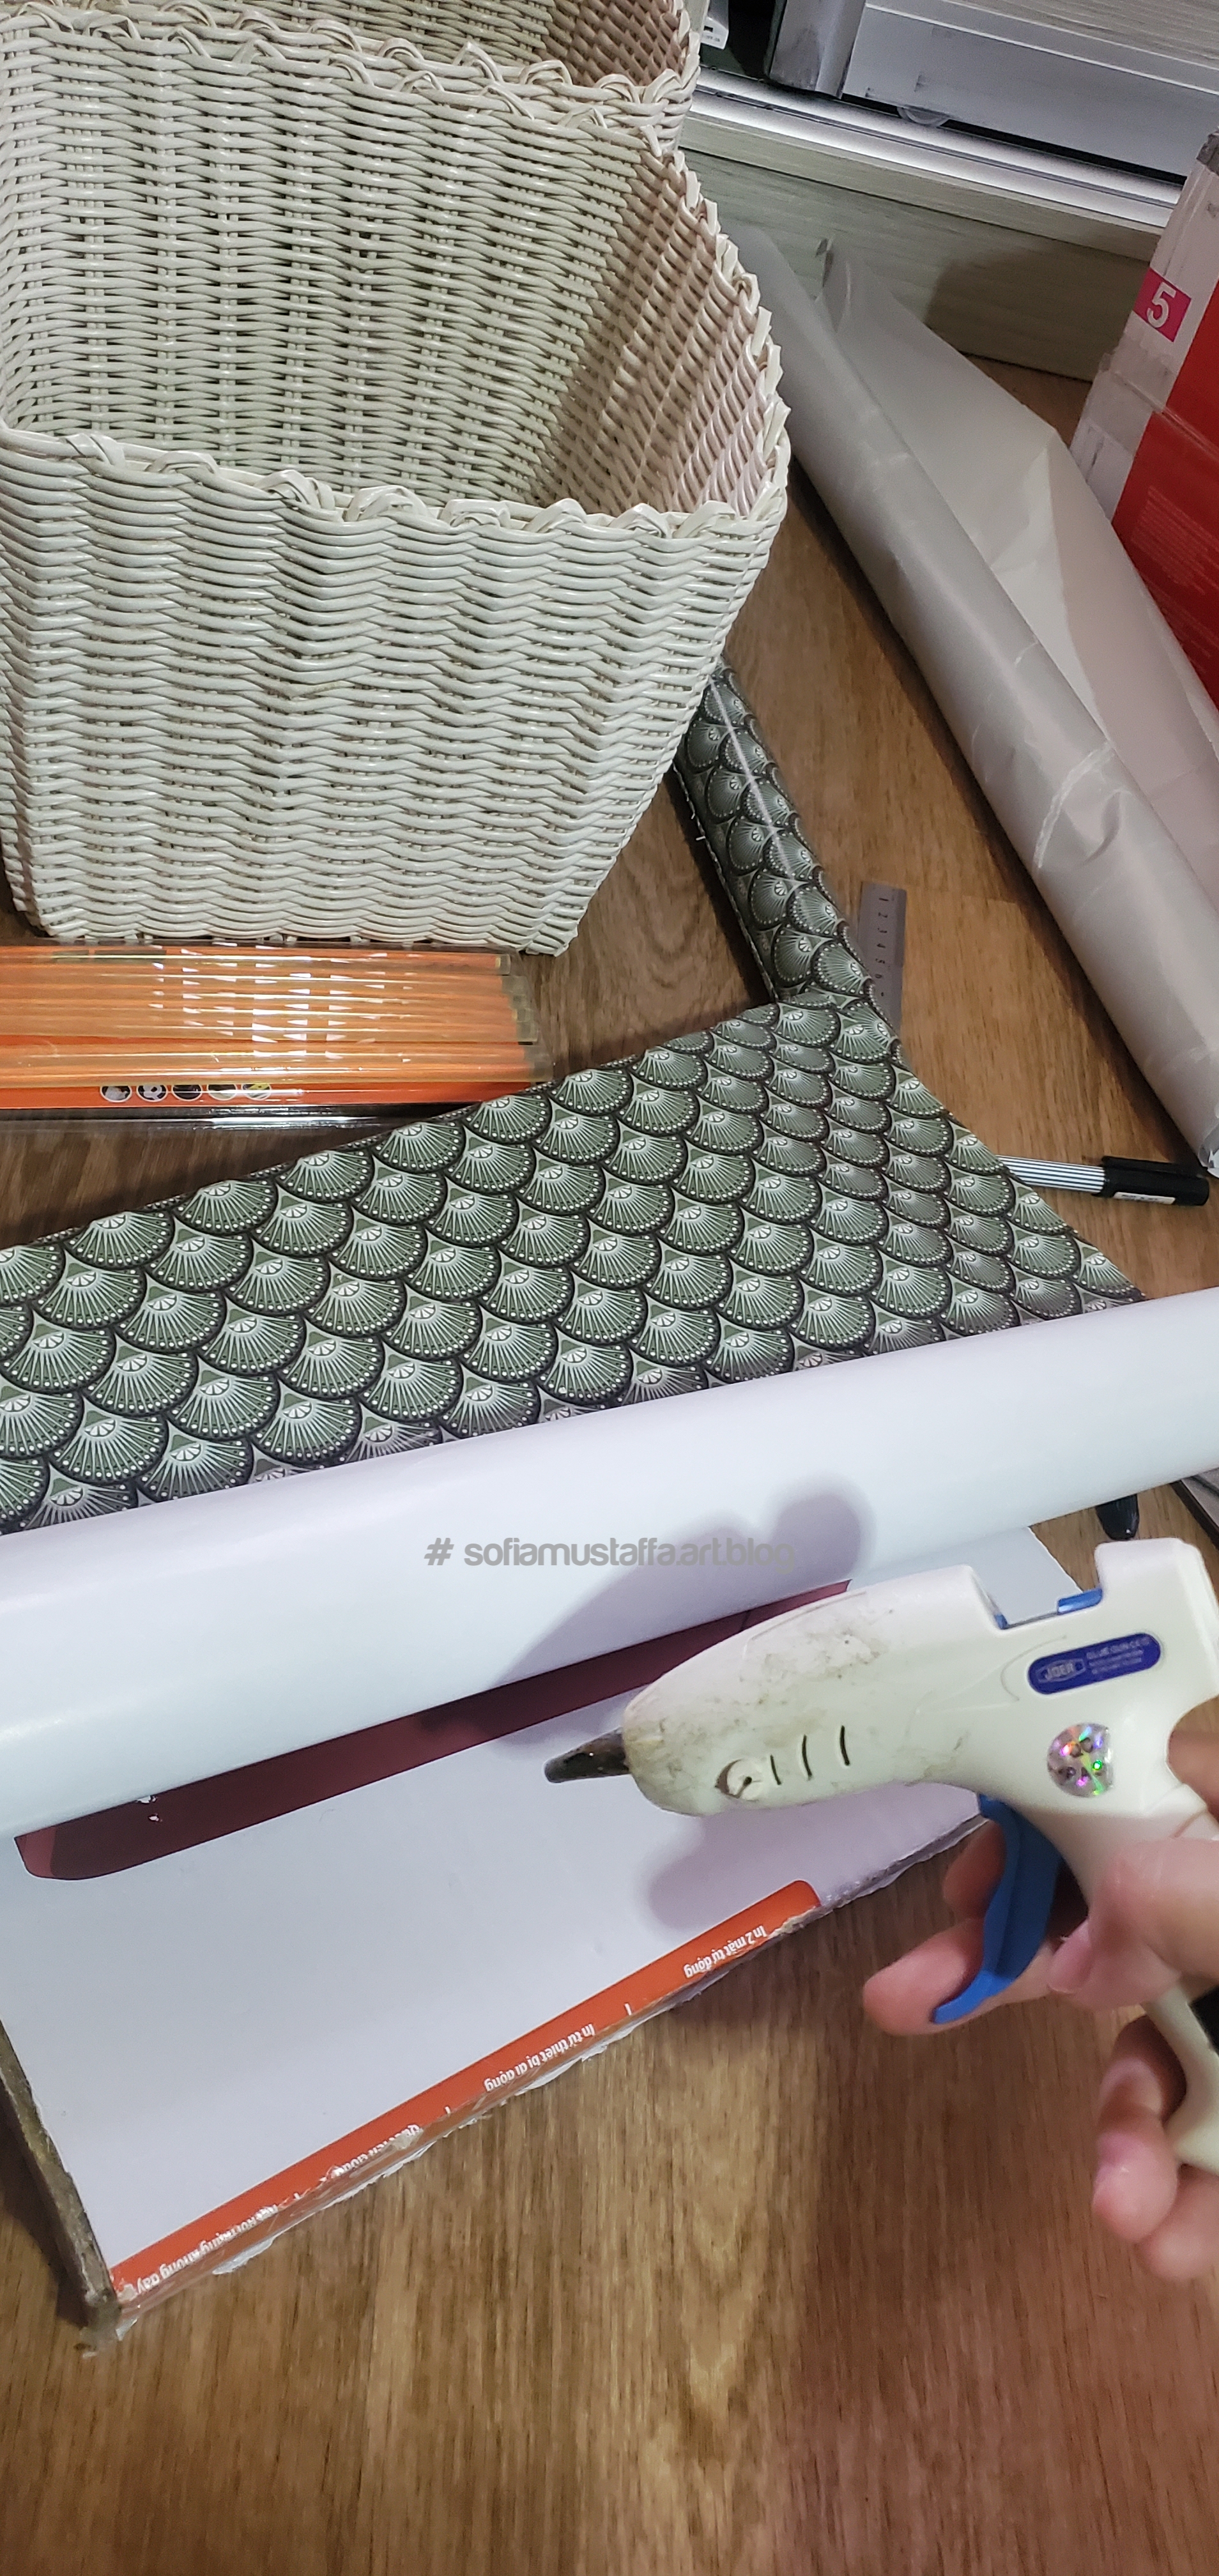
So I do some research on how to diy it by using recycle things I have now – boxes.
Things you need to make this lid are:
1. Scissor or cutter
2. Glue gun
3. Marker pen.
4. Ruler.
5. Big empty box.
6. Wrapper paper.
7. 10mm jute – optional
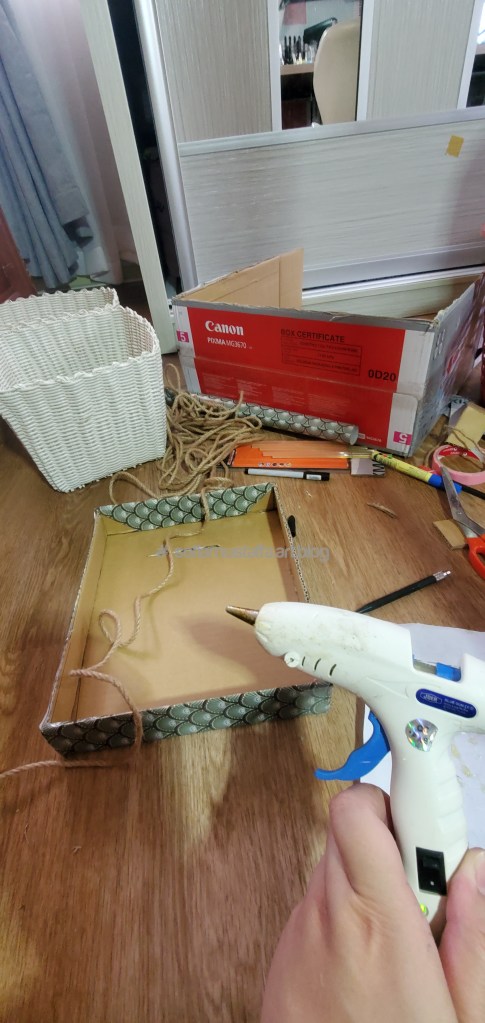
DIY basket’s lid 😃🥰
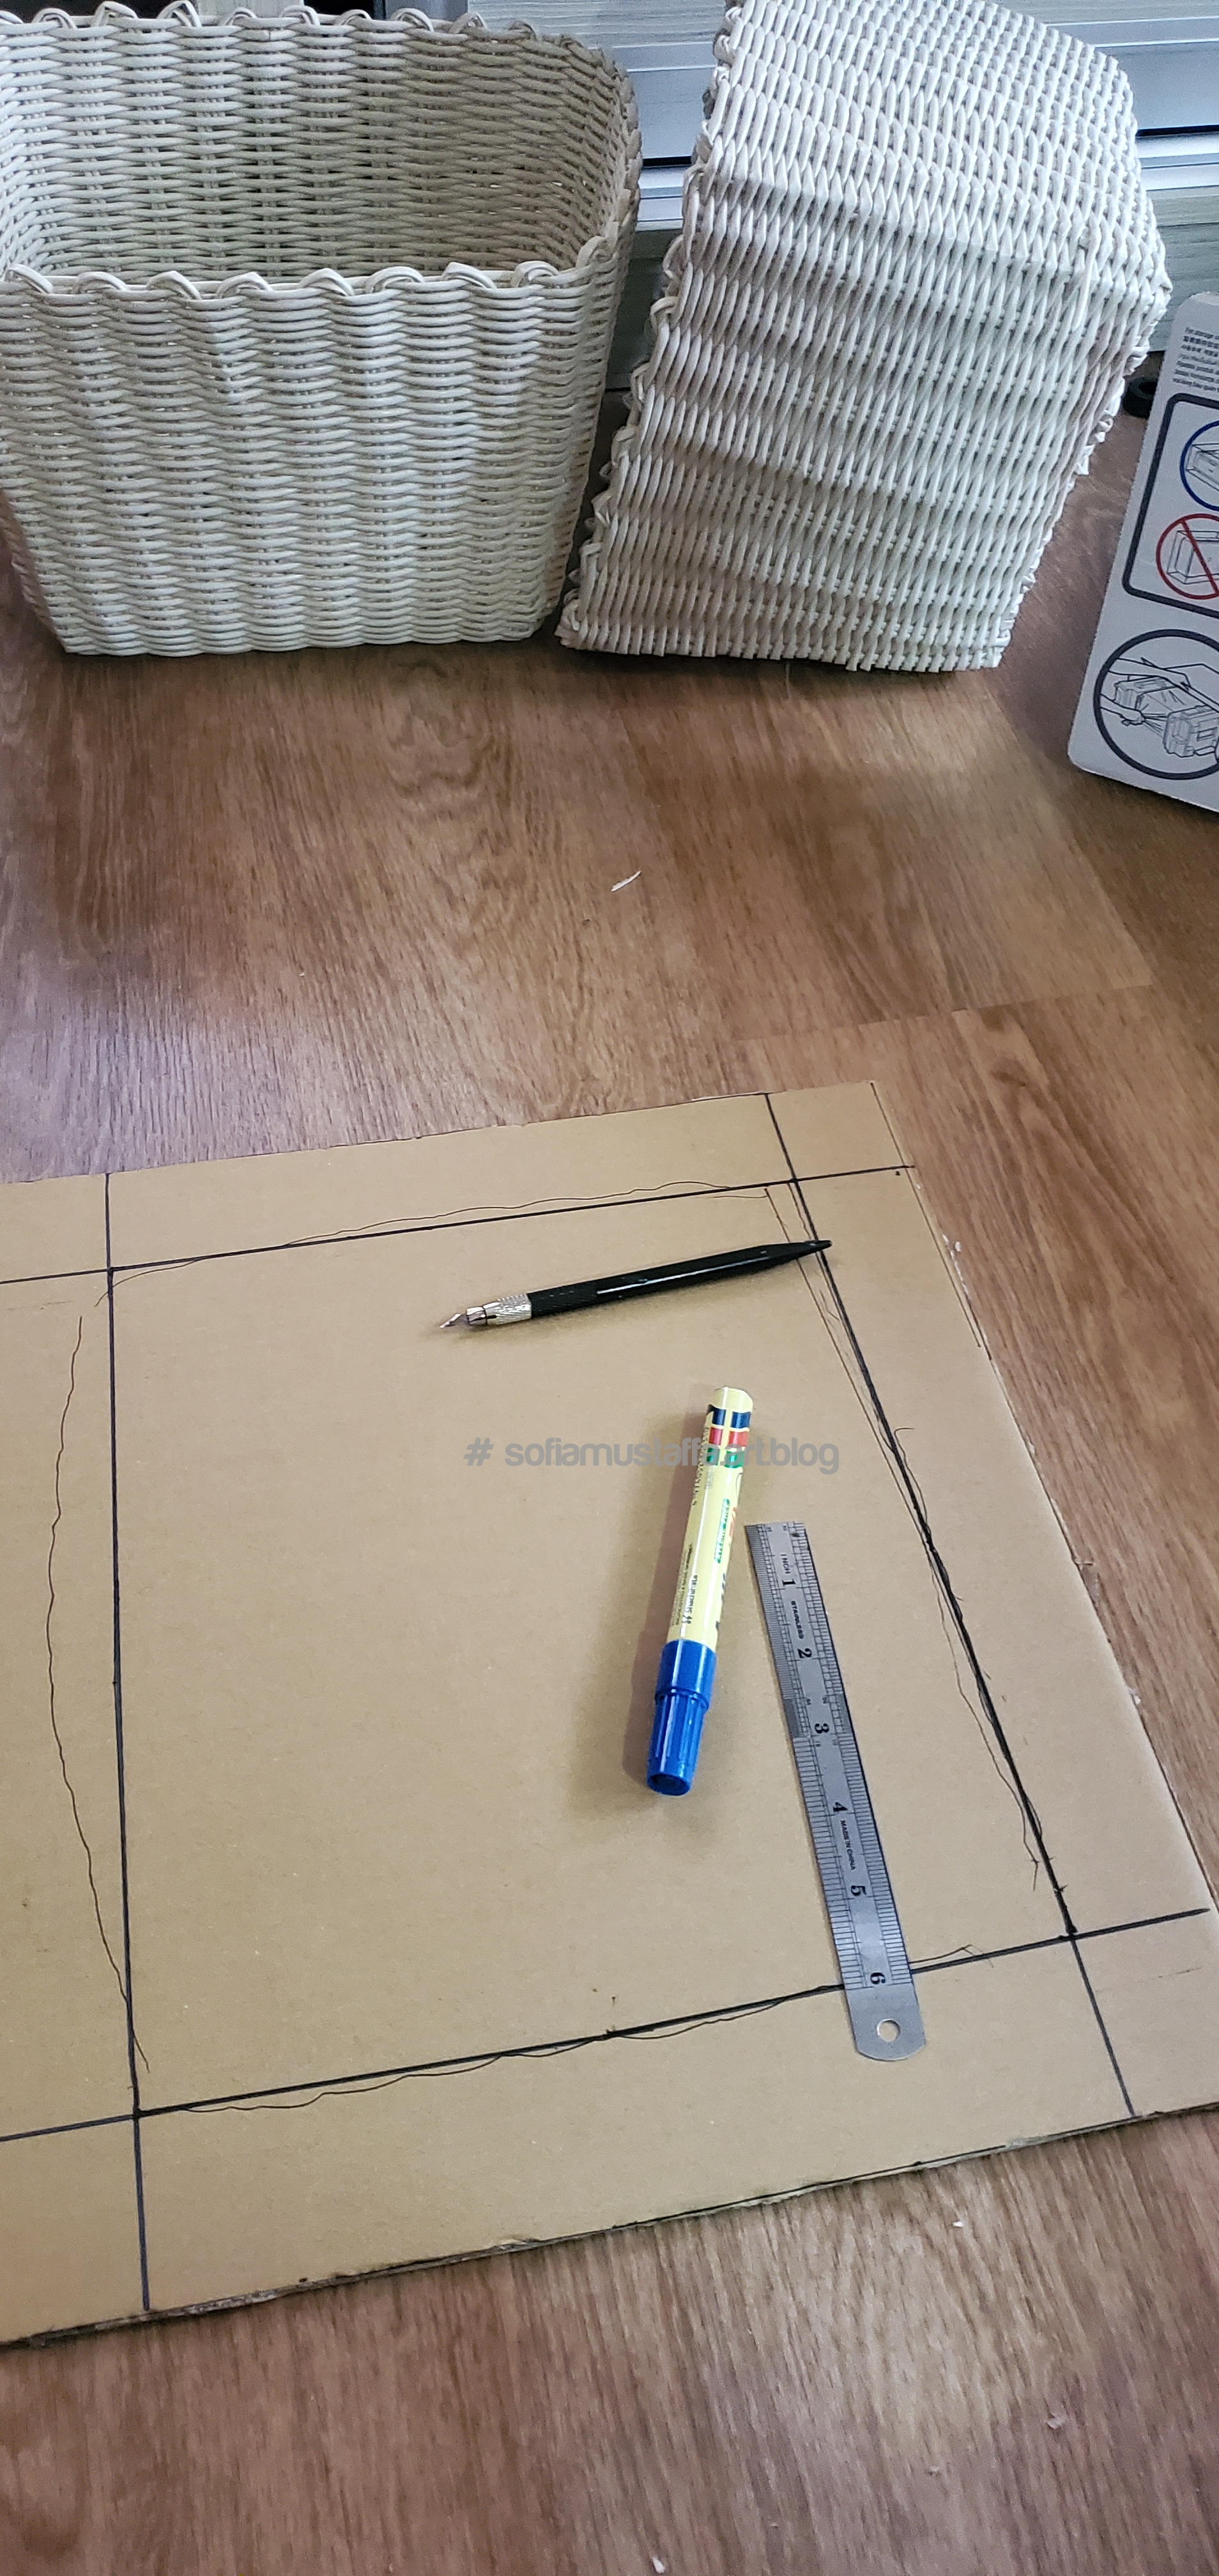
1. Make a measurement of the existing box. Well, u can measure using the ruler, but I prefer easier way. Just put the basket like this on the box, then line it 😂
Cut the box, line it with pen.
2. Then, u make a straigh line with all points with thicker marker pen.
I make few points on the box, then straight it with ruler and thick marker pen.
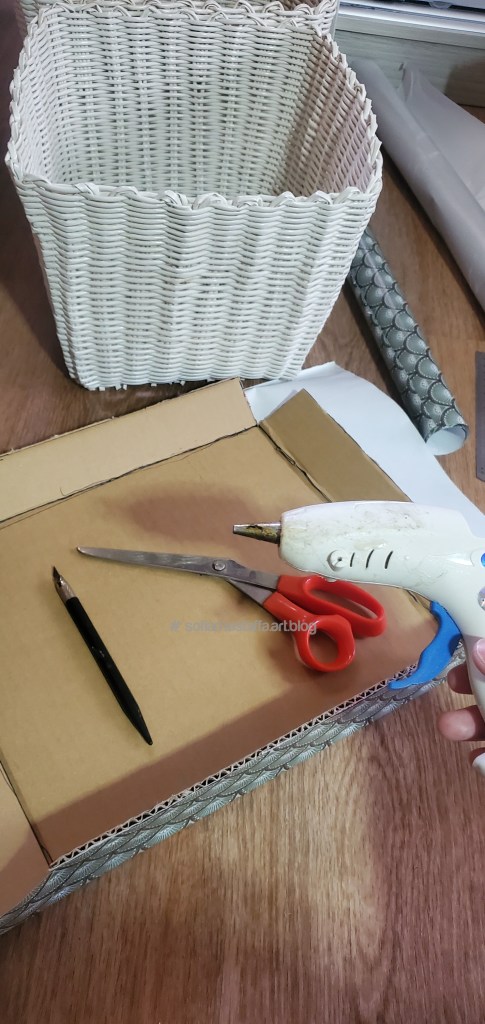
3. Cut all the lines!! I cut it with blade first, then cut it with scissor because the box is soo thick 😀
Straight cut
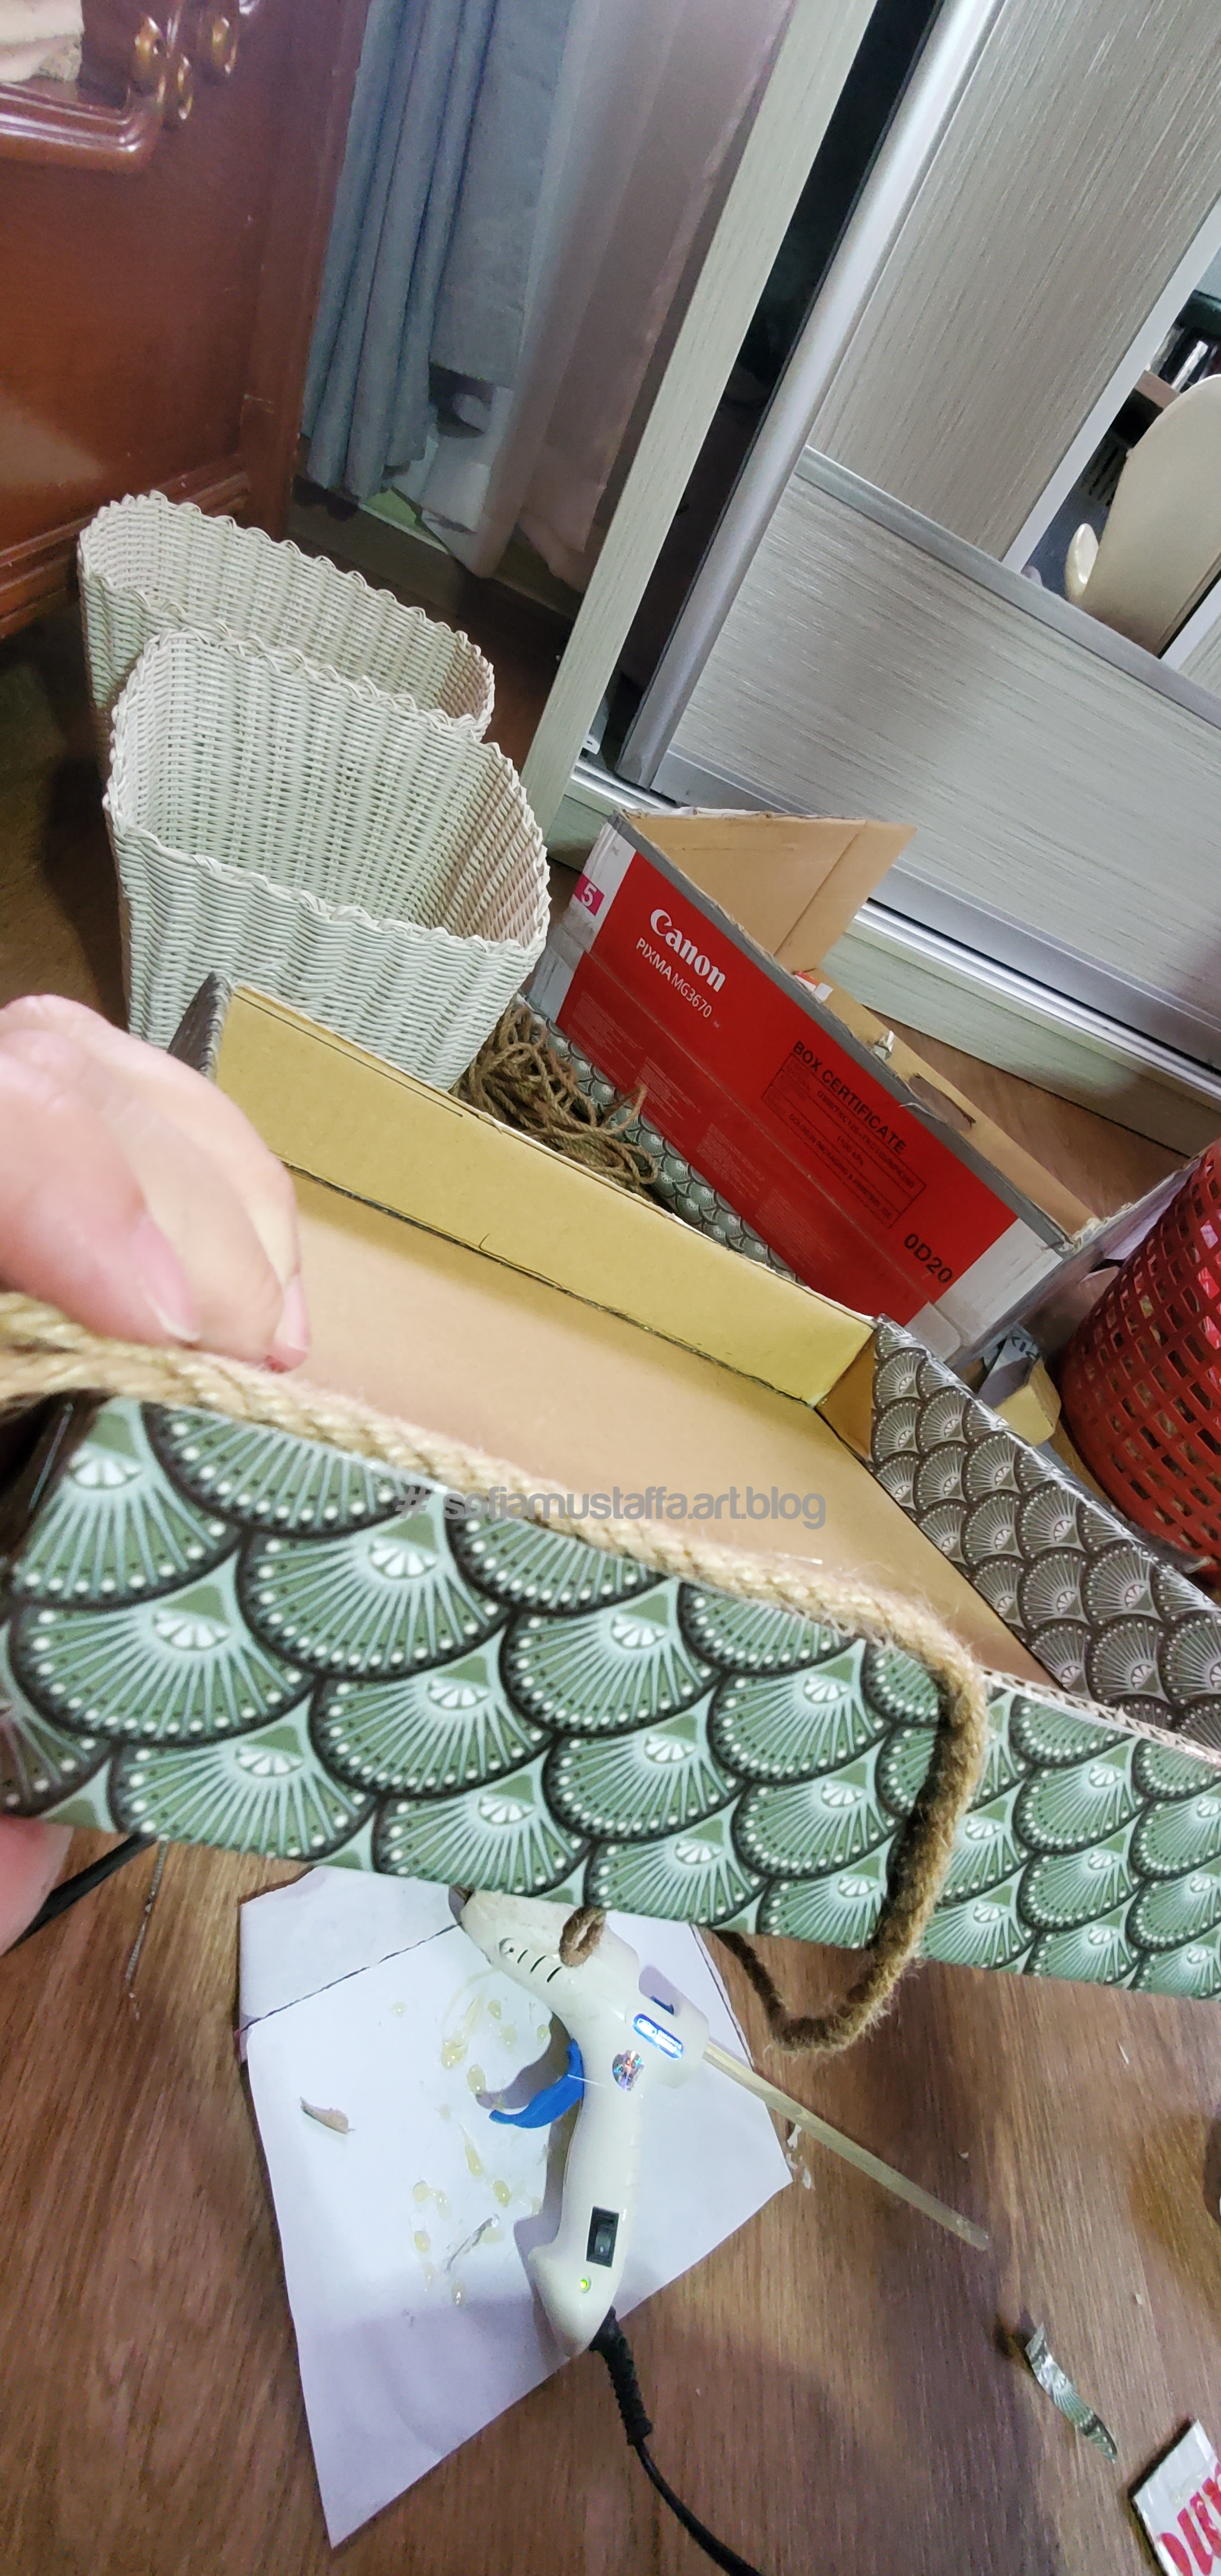
4. After cut all the lines, I glue the lid with glue gun. U need to wait for quite some times before applying the glue, to ensure the glue is smooth, coz we want a smooth surface for the glue. Until, its liquid state, then only u apply it on the box. Or else, it will easily tearoff and not glue properly 🙂
Cut the lines, and glue all the edges, make a rectangle lid.
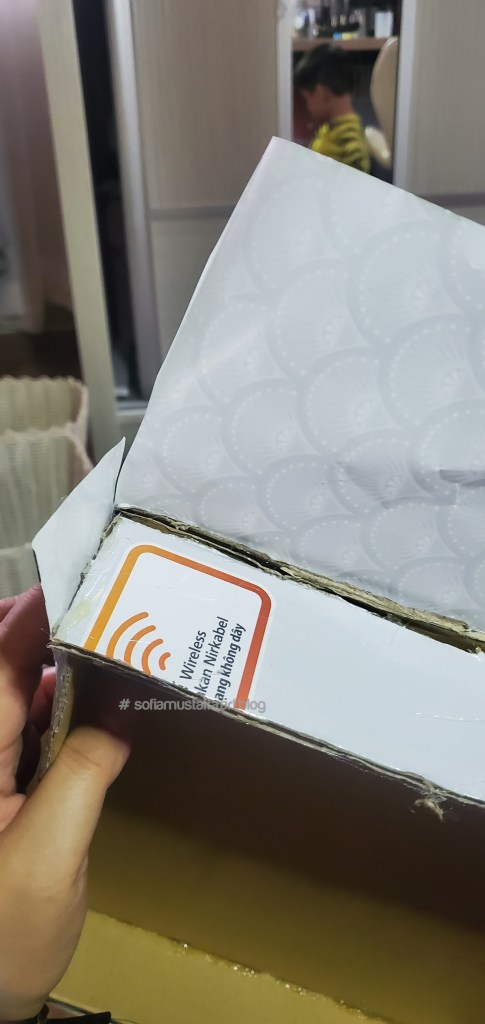
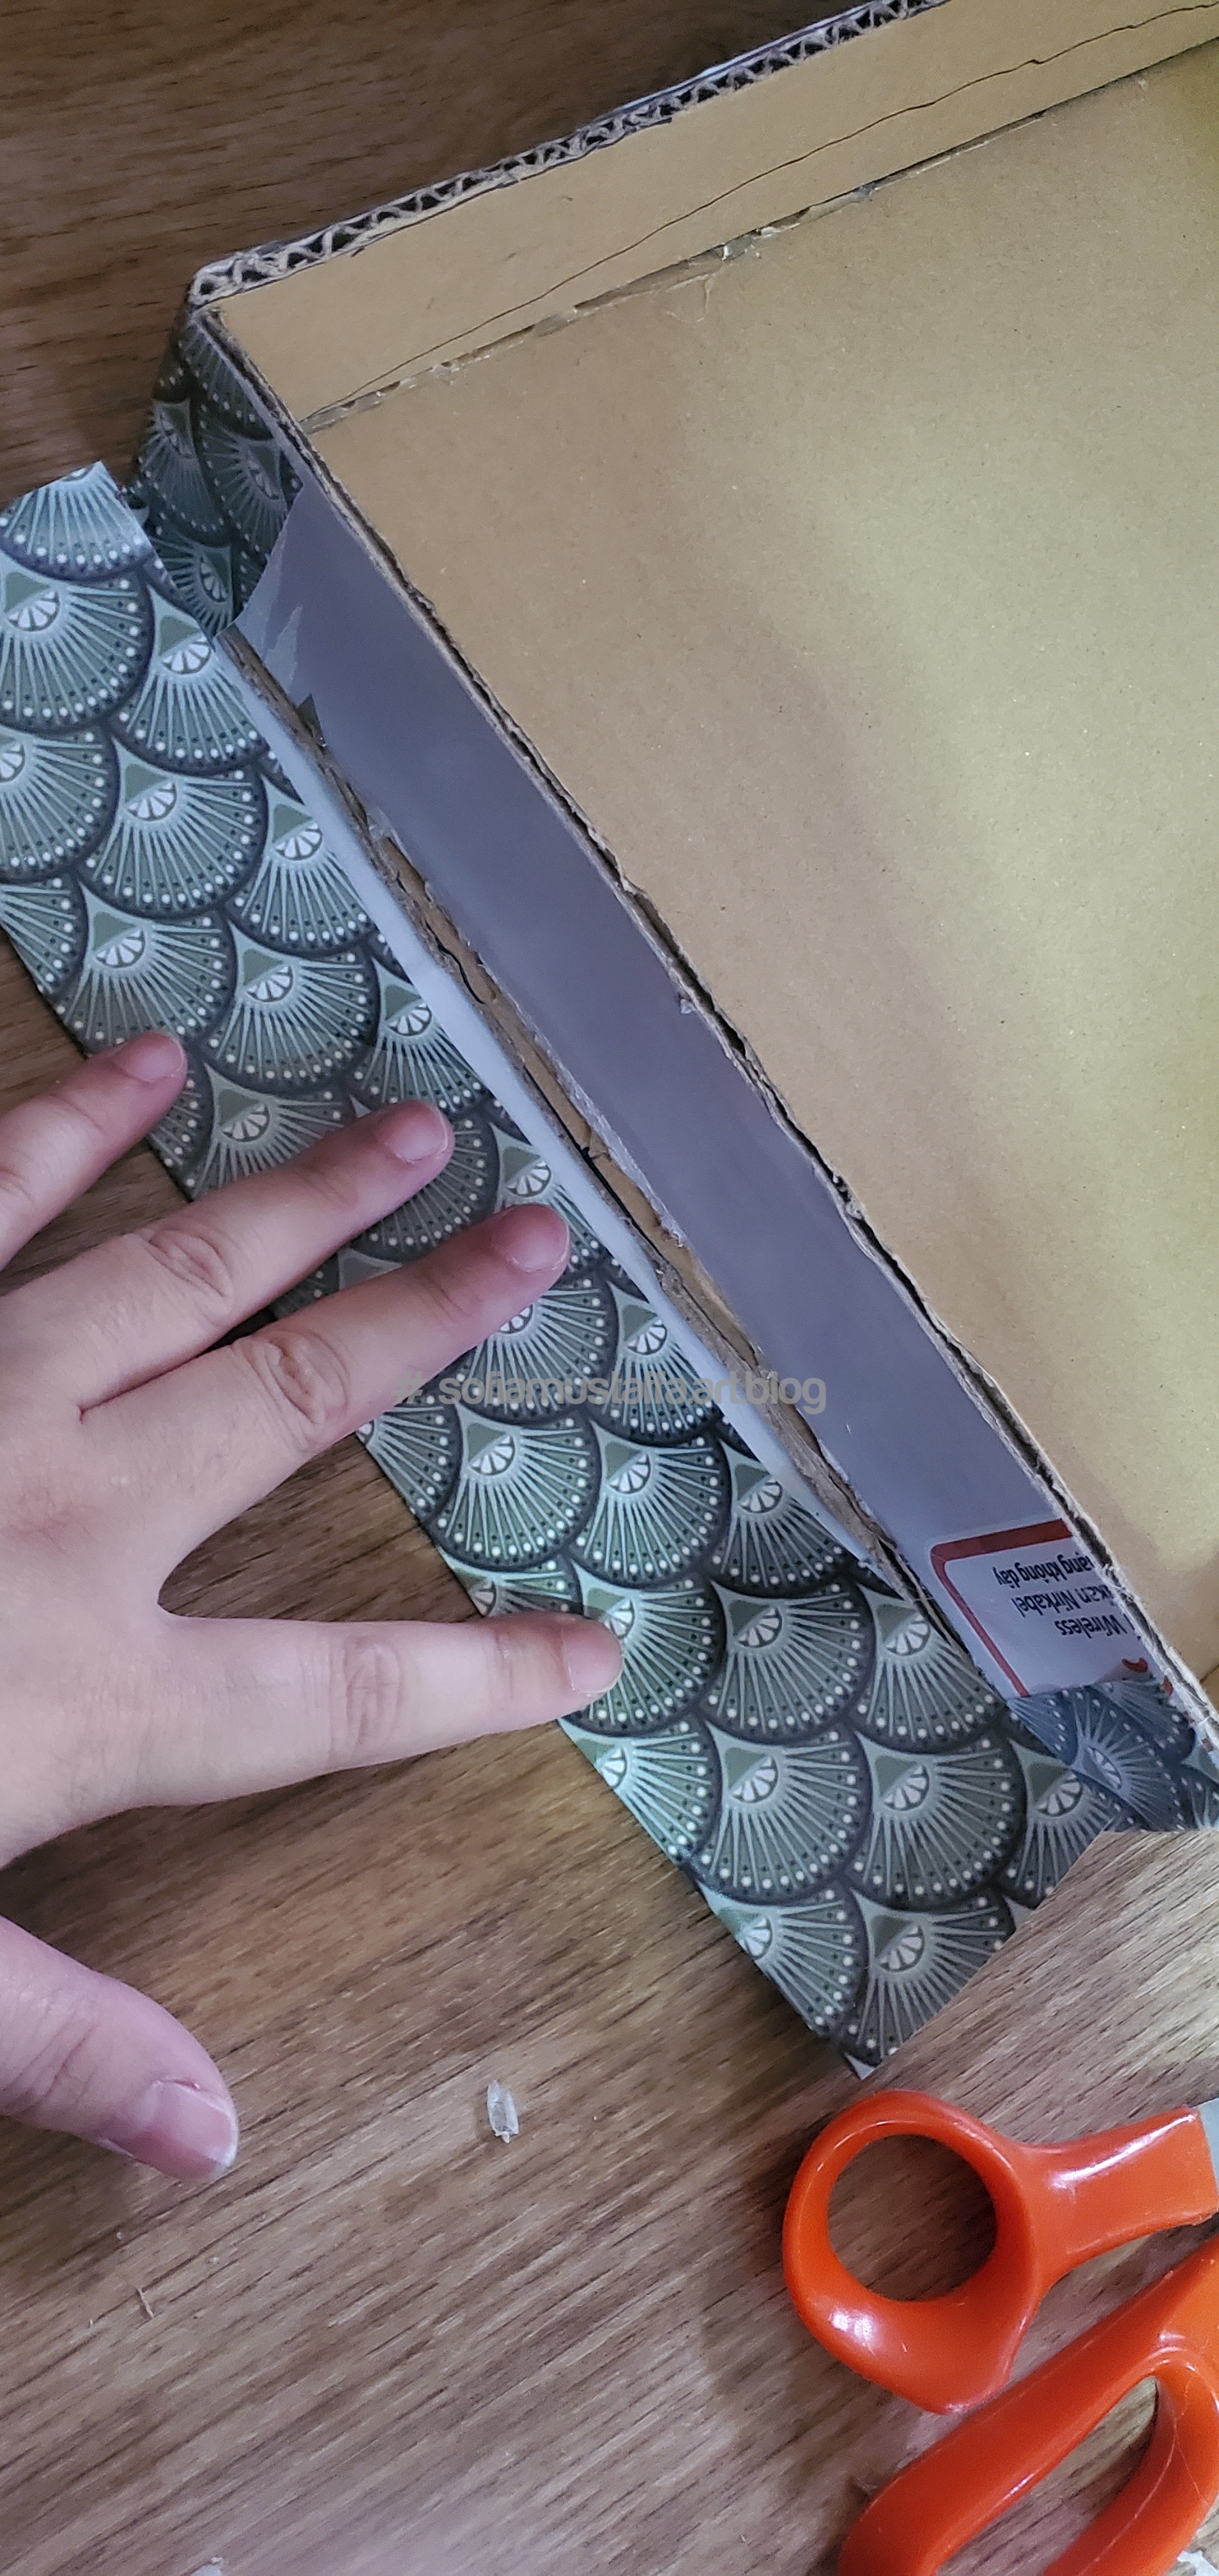
5. Once u can see the lid shape, wrap all way with wrapping paper. I prefer use whatever I have now. U can do ur own creativity to decor your box.
Glue all the wrapping paper using glue gun 😁
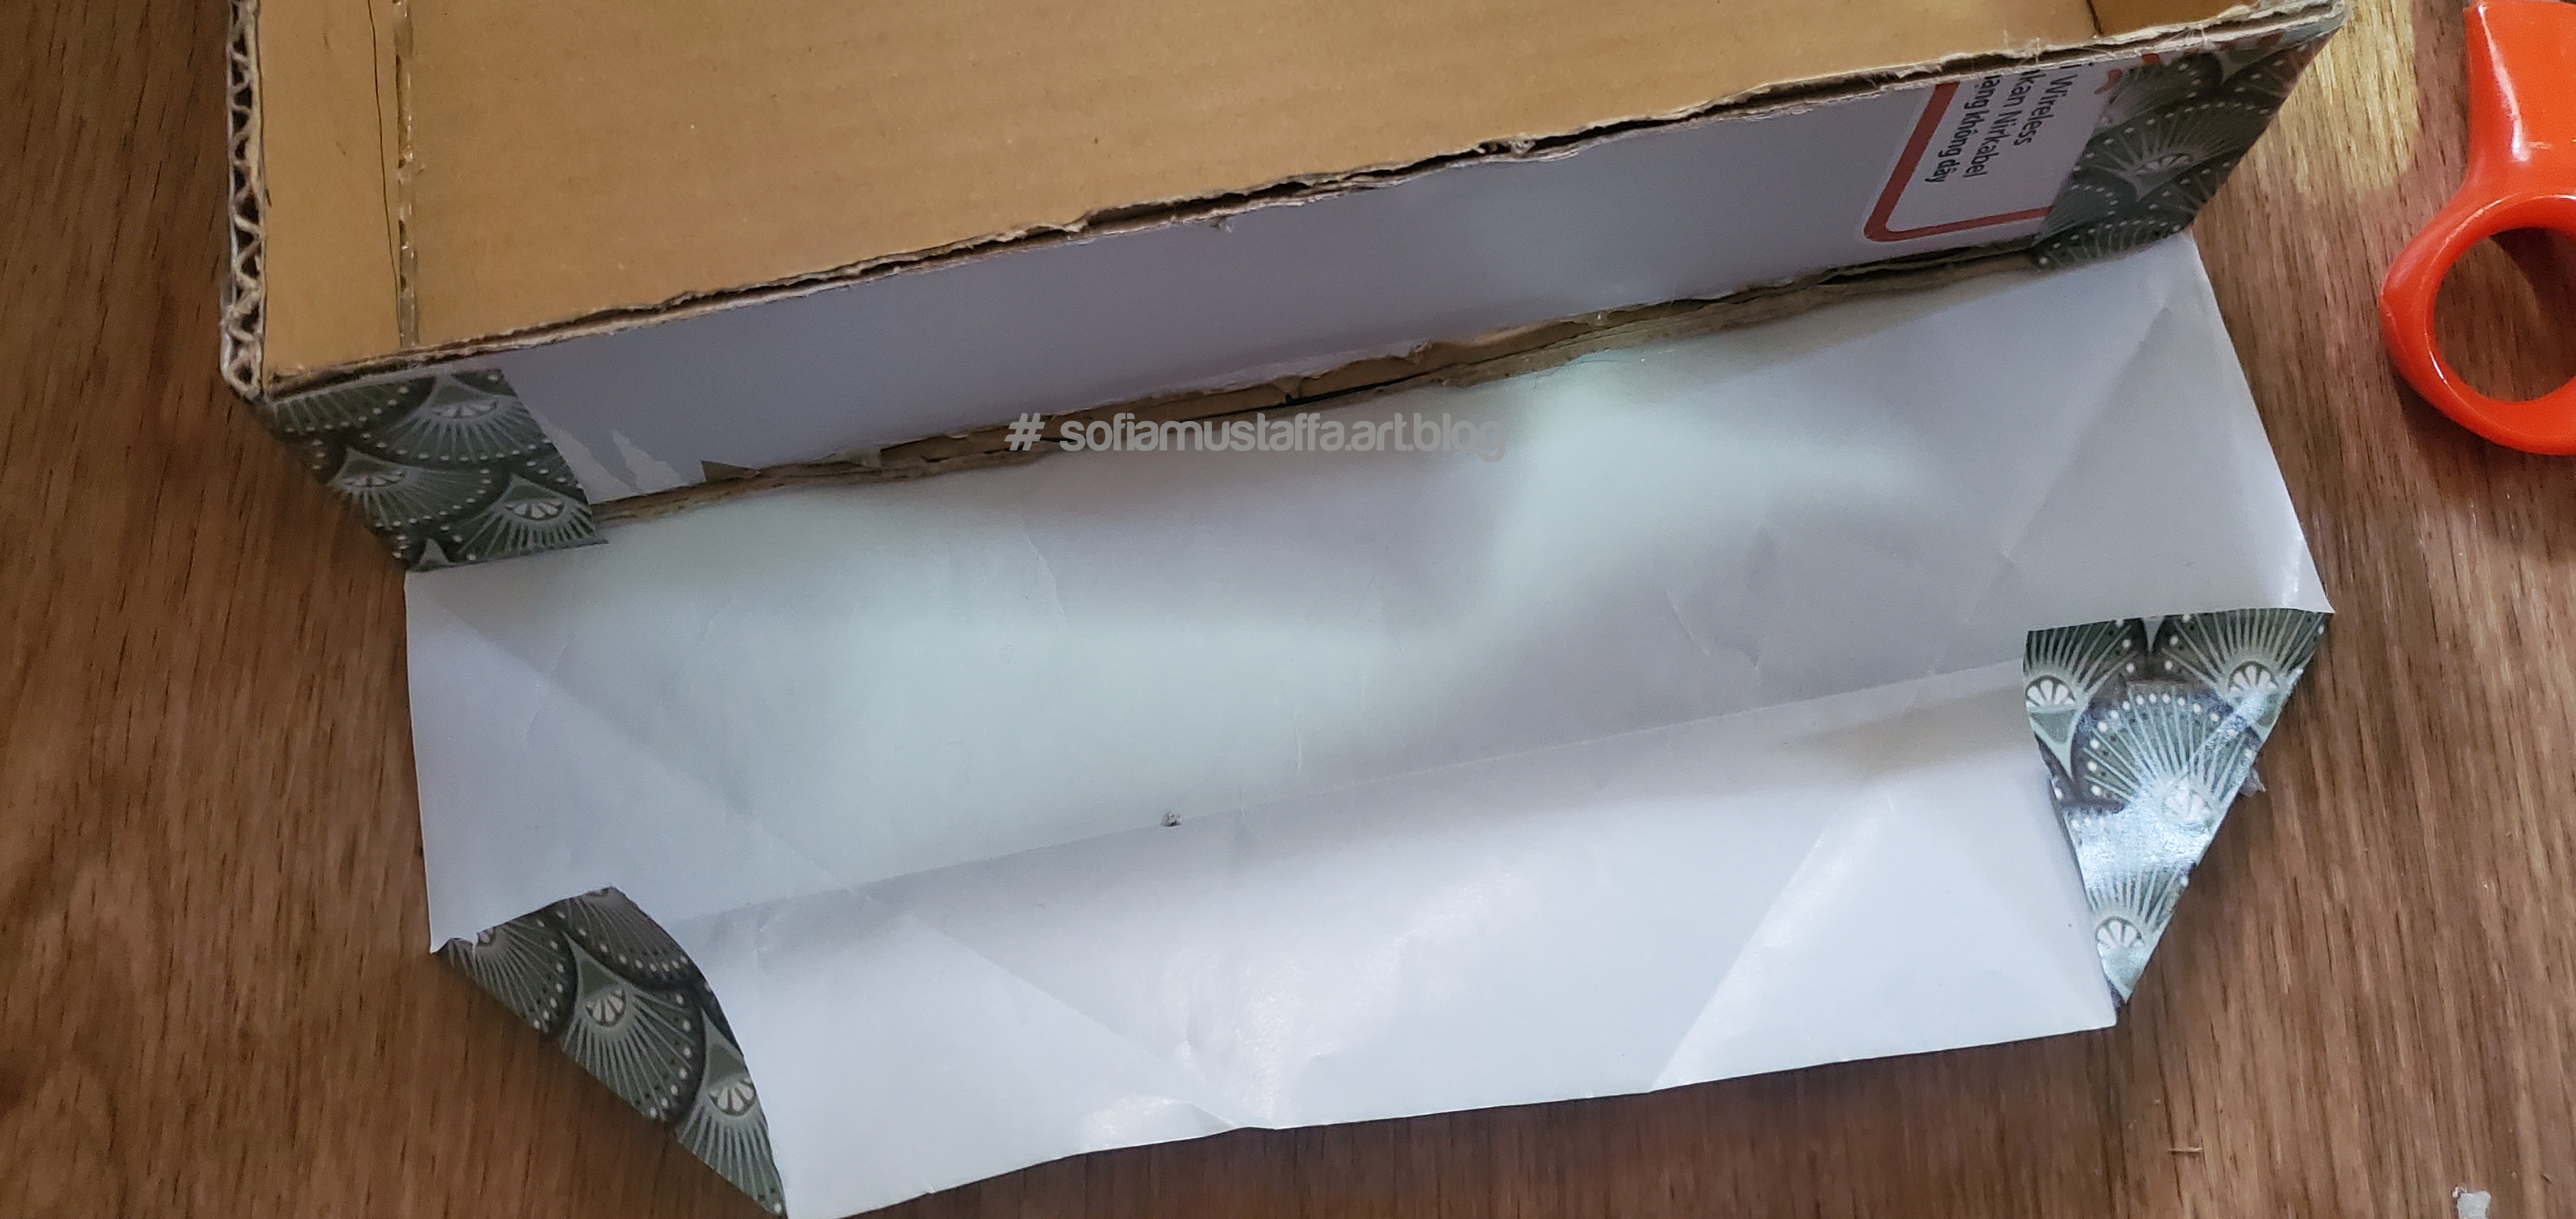
6. I glue it all the way. At the both ends of the box, there are some extra paper. So I fold it and glue nicely.
Cut it then glueMeasure first and make some fold. Then fold it into 2 like this..And…fold like this…i glue the end and glue it all the way…hahaha. Im glue here…glue there..glue here..glue there and glue all the way…haha..gluing while singing the song!! 😂
7. Tadaa!!! My box’s lid is DONE!!! Just a finish touch up to make it a smooth finished product, I glued jute rope at the edge of the box.
Glue gun all the wayyy…yeppie!!! 😆😆🥰Tadaaa!! Okay, u need a lot of patience when gluing this. U can’t do it fast, because it will smear or glue wont stick longer. U need to do it, slow and steady..then u will have a smooth nicely glued jute rope 🥰
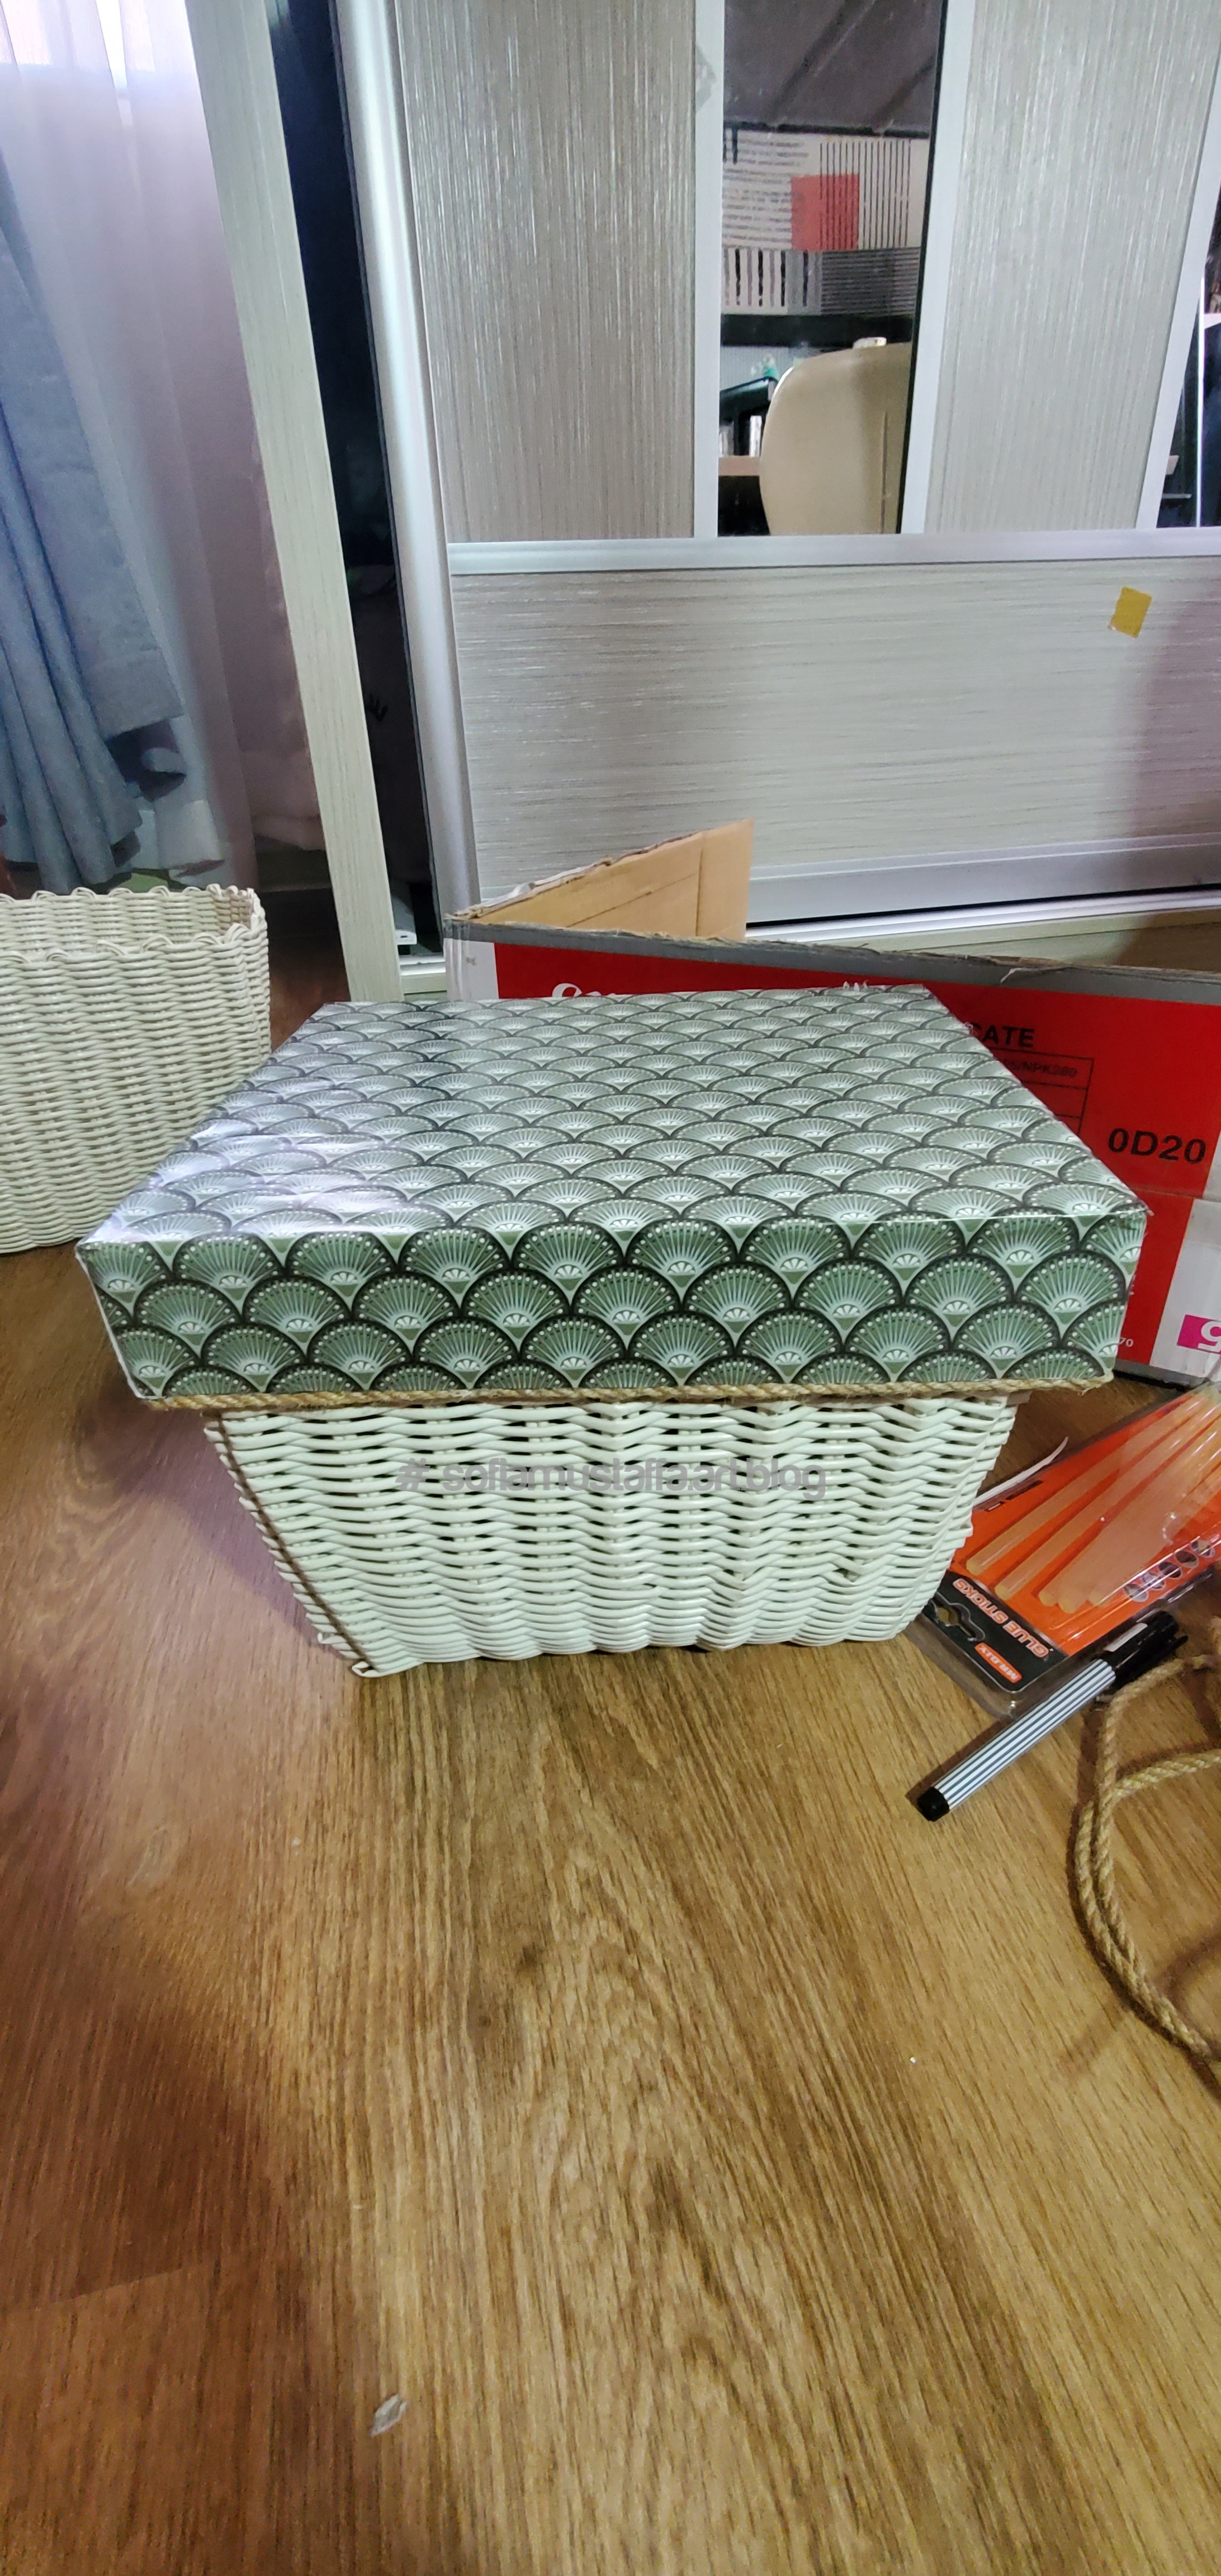
8. ALL DONE!!! 😍 My basket is a flexi material. I can bend it to fit the lid 😂😂 Doesn’t fit? Just make it fit right there by force 😆
Jeng jeng!!! The finished product is here. Now dust can’t easily go into my things in that basket..hahahaha. Problem solved 😆